


Gina
-
Posts
45,326 -
Joined
-
Last visited
-
Days Won
120
Content Type
Profiles
Forums
Gallery
Events
Blogs
Posts posted by Gina
-
-
With fan cooling the air is usually blown onto and through the fins.
I'm using an ASI178MC in my All Sky Camera which uses an exposure of 60s at night. It has Peltier TEC cooling with thermal insulation round the camera casing. The heat from the hot side is removed with water cooling rather than a fan as an ASC is outdoors. Fan cooling is used for the radiator that cools the water in the observatory, in relatively dry air. You may think water cooling is OTT but it has a few advantages. No vibration at the camera, very efficient and as I said, the fan that eventually provides the cooling is in a fairly dry environment.
For use in an observatory, damp is not a problem and as long as the fan is a low-noise version you should be alright. You won't get the sensor as cool as with a proper cooled astro camera with a double-stage Peltier TEC arrangement but your setup should definitely help.
-
 1
1
-
-
I'll have a think as to whether I want full independent remote control of the window, with all the complication that involves in the design, or whether I only want the window open when I'm in the observatory or it's no problem to pop back and forth from the house.
-
Because this happened and it jammed.

I made my own 3D printed block which cured the problem by made it less easy to uncouple. I guess I could add a hook and get over that problem. But there's still the silly shock cord method of pulling the window open which I don't really like.
-
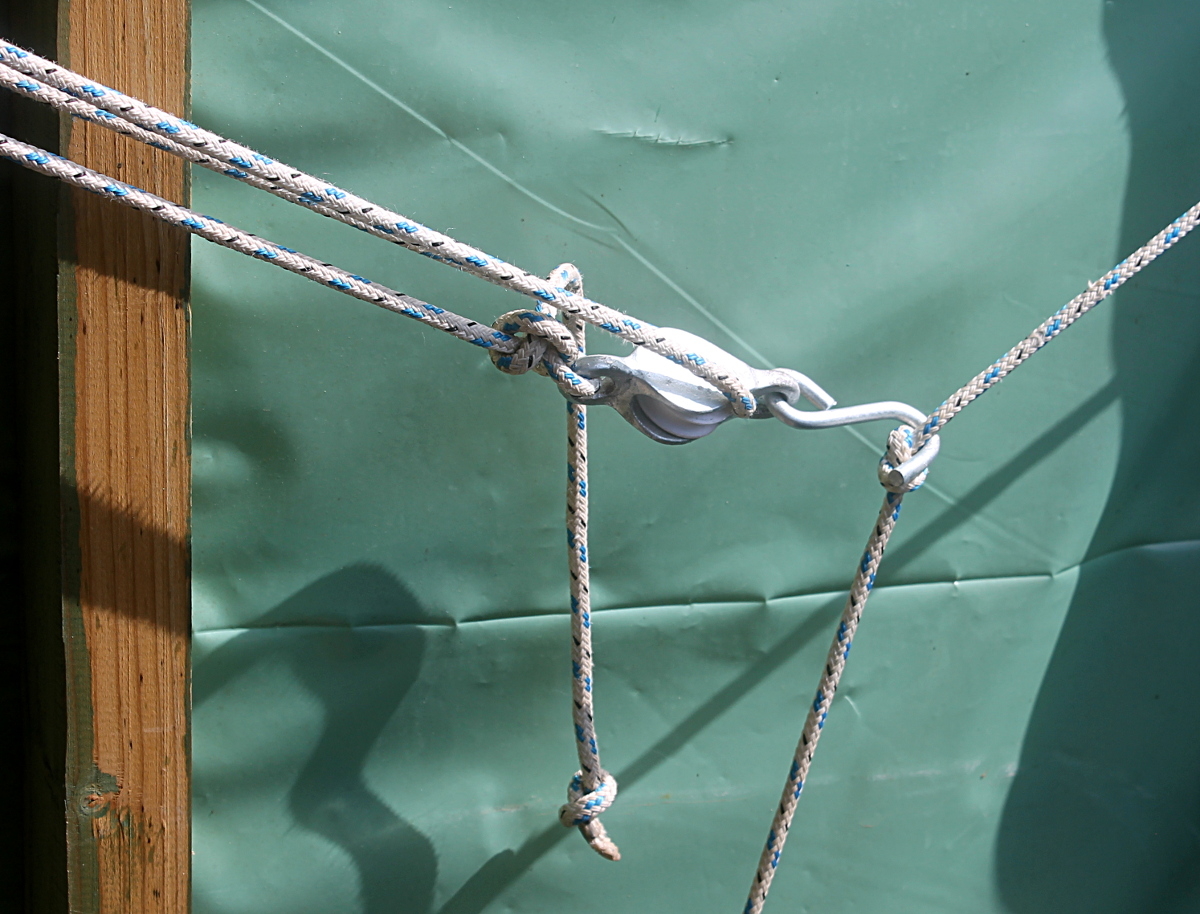
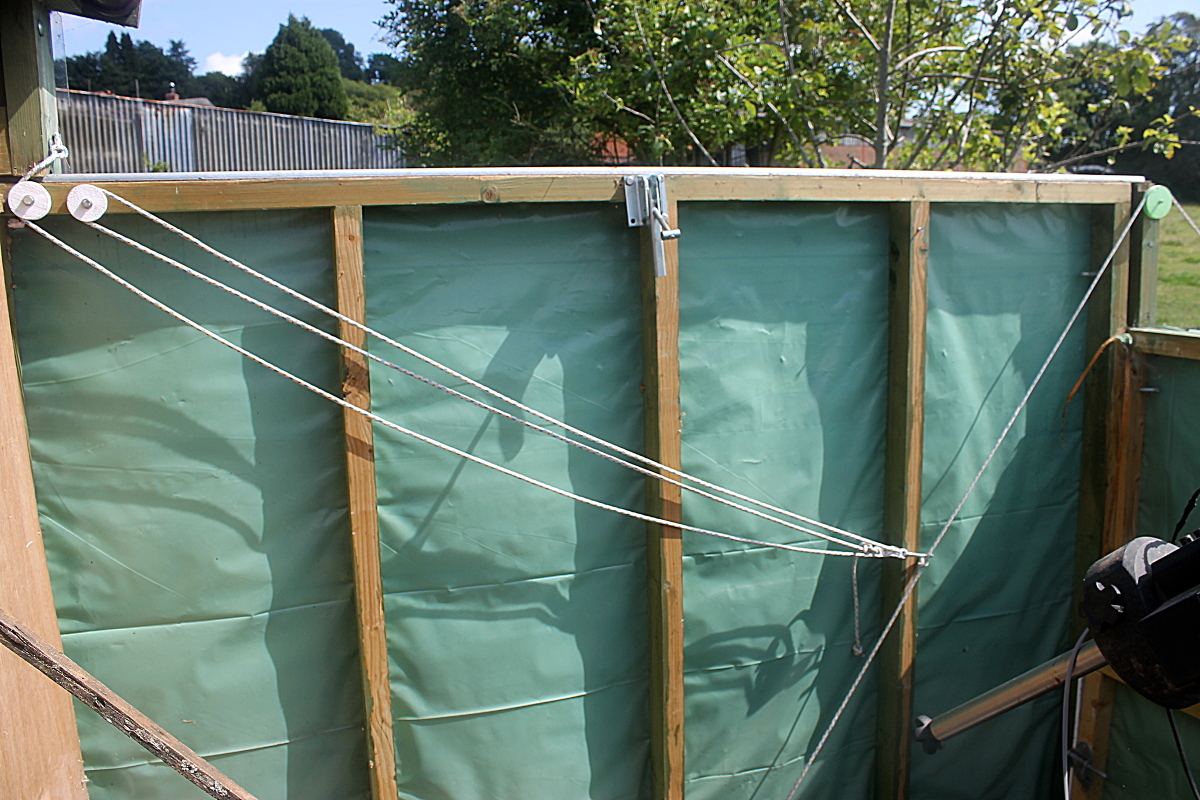
This is what I had controlling the window from the roof. But I can only separate window from roof by unhooking the pulley block.
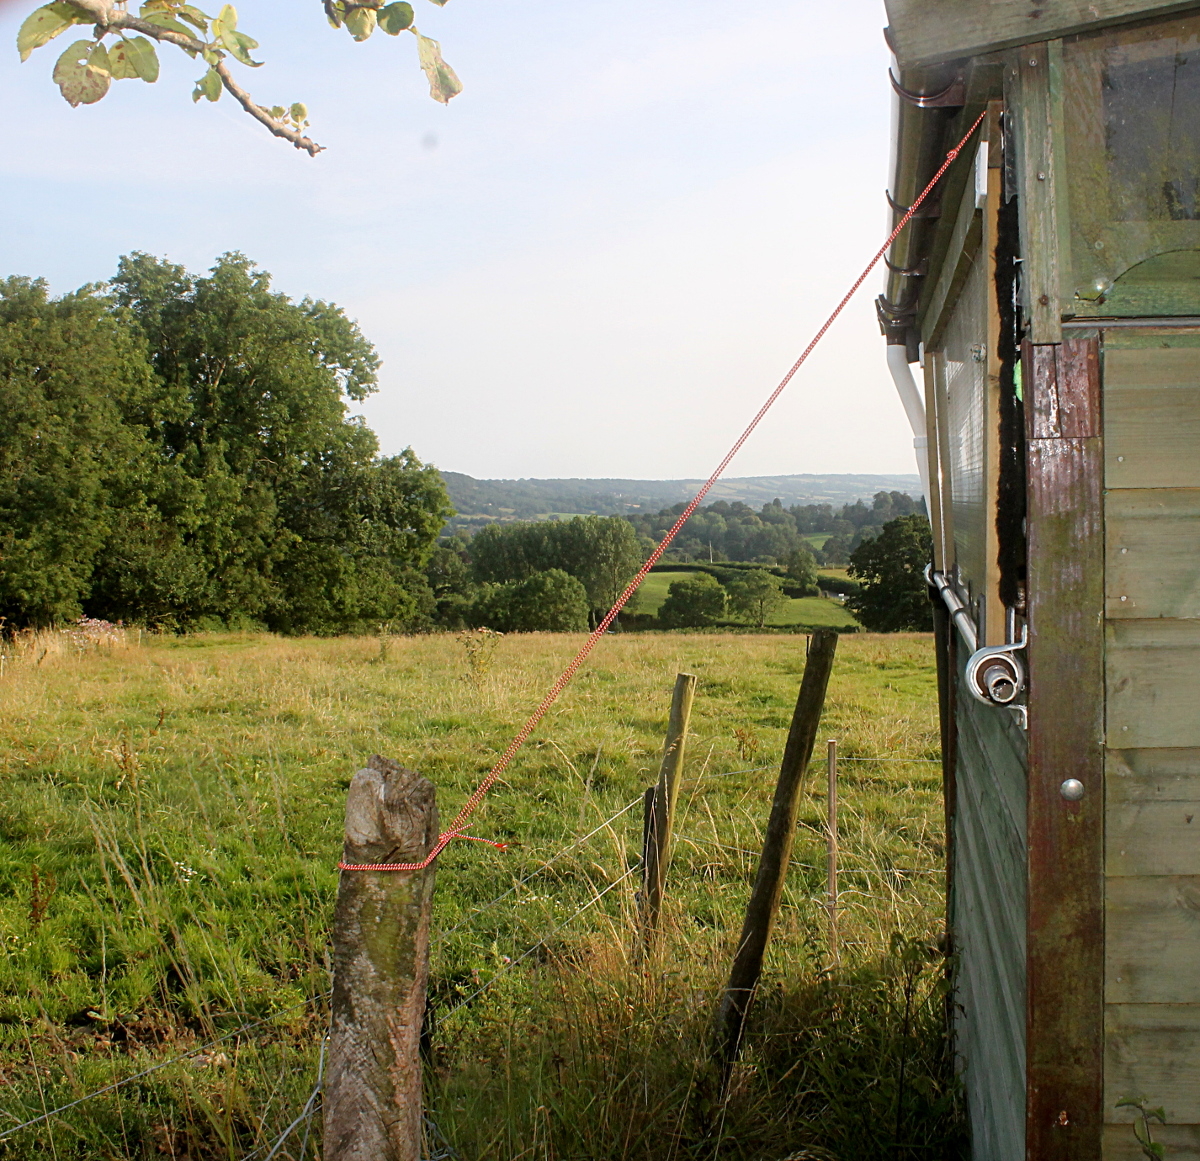
And because the window has no force on it tending to open it I had to produce some as shock cord to a fence post outside - not a very "engineering" solution 😁
I'm thinking a counterbalance weight may be better and a push-pull or rotary window opening/closing arrangement.
-
1
-
-
I've pretty much decided on the design of the remote control of the ROR and now I'm looking into controlling the fold-down window which I find I need to control separately as there are times when I want the window open and the roof closed.
-
3
-
-
Thank you, I'm gradually getting over it. Trying hard to pick myself up after quite a trauma.
-
5
-
-
I've fastened the NEMA17 into the box but not been up to doing anything else recently due to ill health.
-
 2
2
-
-
Interior of box with cover drive motor and cover parts. New pinion to match the shaft of the NEMA17 motor.
-
2
-
-
Been printing the parts and assembling with the box.
-
3
-
-
I think I could fit a NEMA17 in the box and still have room for everything else.
-
Yes, that is still an option. I think I would prefer a NEMA type motor as the cover will be opened and closed many times. The little 28BYJ-48 is fine for infrequent lightweight jobs like focussing but I have reservations about using them for anything much more.
-
I have the cover system assembled and attached to the box but the torque required to open and close the cover seems more than I expected and I shall need either a more powerful motor or a lighter cover. The current one covers the dome clamp ring as well as the dome itself and I think that may be unnecessary. A smaller cover will be both lighter and have less windage.
I have designed a smaller cover and other parts to match.
-
-
New design.
-
1
-
-
Yes, a motor each side of the box near the top and attached to the lid.
-
1
-
-
With 3D printed gears.
Closed.
Open.
And the internals.
-
1
-
-
Haven't decided yet whether to use timing pulleys and belt or 3D printed spur gears. ATM I think I favour timing belt.
-
-
-
-
I've come to the conclusion that dual linkages are too complicated and difficult to arrange and with the change of enclosure to a rectangular box the situation has changed. It now favours a single pair of levers to open/close the dome cover. The box is narrower than the printed casing was and the cover levers can go outside the box.
-
1
-
-
Misty tonight so still no imaging.
-
Same here - possibly tomorrow and Monday nights and the moon is out of the way so some OIII is on the cards. ATM it's full steam ahead on my ASC and there's a possibility that it might be ready for tomorrow night. That's if there aren't too many gremlins sitting on the parts and my tools!!
-
To test my theory that the two axles for the cover motion want to be coupled and keep the same relative angle, as the cover opens, I applied a constraint to the difference angle. Then the cover wouldn't move so I removed the constraint and instead measured the angle difference as the cover was moved and found a tiny variation of <0.1° so the theory is right but the modelling is not perfectly accurate.


I want to make a Nasmyth Cassegrain. Maybe later maybe never :)
in DIY Astronomer
Posted · Edited by Gina
Goodness me, you telescope builders are very clever!! I would have liked to build my own but never got further than looking at it and joining the M-O-M group and learning a bit about grinding mirrors. I realised though that it's a very long-winded job and wondered if I'd have the patience let alone the skill. I very much admire you all.