


sloz1664
-
Posts
4,385 -
Joined
-
Last visited
Content Type
Profiles
Forums
Gallery
Events
Blogs
Posts posted by sloz1664
-
-
9 hours ago, Martin Farmer said:
Hello Steve,
Please go ahead and post it. I’m glad it’s of use to others.
It would be good if Velleman had produced a board with more relays on.
Best Regards
Martin
Thanks Martin, I'll go ahead and post. Totally agree with you, they should bring out an additional board which allws you to daisy chain the K8056 boards. I also have a couple of ADAM 6050 18 channel digital I/O modules which I'm playing around with at the moment, whether they will work I don't know?
Steve
-
1 hour ago, Martin Farmer said:
All,
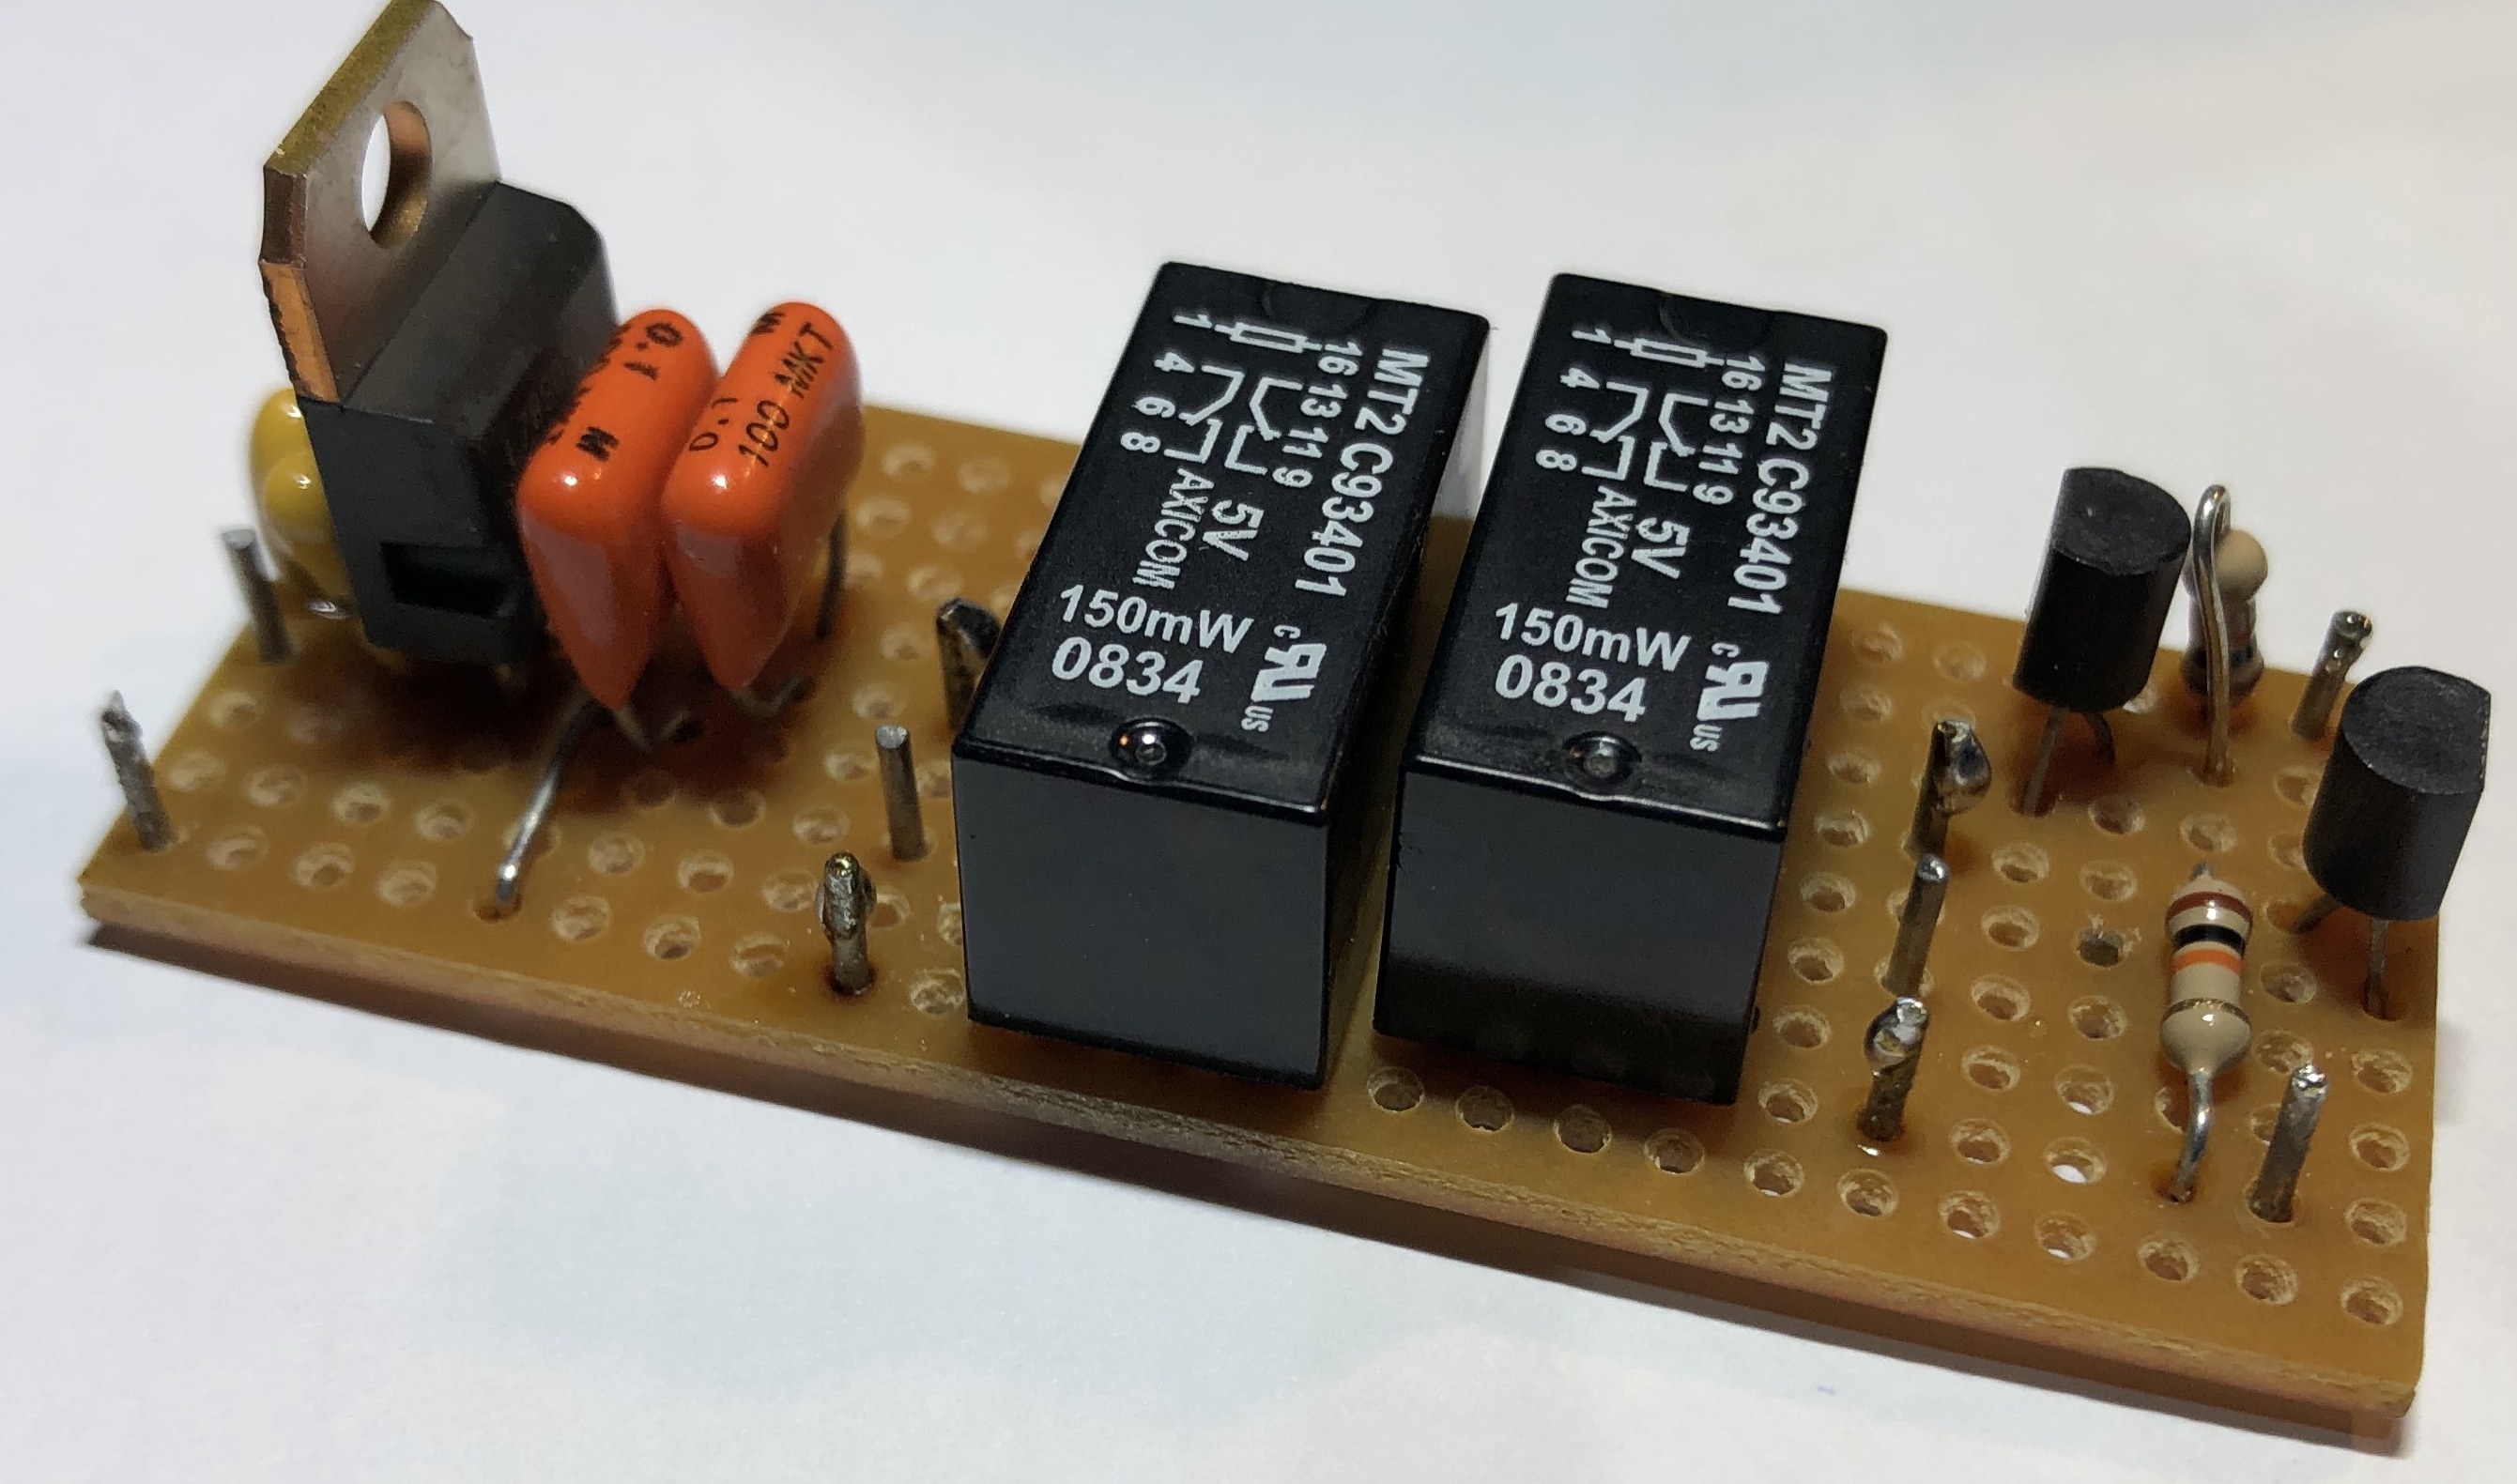
Further to my post here is how I added two extra relays that Voyager/Viking control.
Users of the Velleman K8055N (VM110N) I/O card coupled with the K8056 (VM129) will know there are only 8 relay outputs but by adding this circuit you can make use of the DAC1 & DAC 2 to give you two more relay outputs driven by the analog outputs. Connection of the relays directly to the Velleman I/O card did not work so I used a transistor that’s switched by the I/O DAC output and let this operate the relay.
The photograph of the little circuit board I have put together has a 5 Volt regulator also to drop it down to 5V as I am using a 5V relay.Operation of these two extra relays are done through the Viking program.
My unit operated on a DAC output of 3 Volts (you could alter the value of the 10K resistor but it worked)
I am putting this out there as one solution to adding more output to your Velleman I/O unit - please be careful with the soldering iron and make sure you are happy with what you have built before connecting it all together. Don’t shoot the messenger.
Regards
MartinHi Martin,
That will be a great benefit to all who use the Velleman board for Obsy control, of which I am one. Could you please post this on the Levesdome.io forum. If you are not affiliated with this group, would you mind if I posted on your behalf.
Btw I have downloaded the trial version of Voyager and getting to grips with the format.
Steve
-
Hi Al, and a very warm welcome to the Lounge
")
Steve
-
 1
1
-
-
Hi Paul, and a very warm welcome to the Lounge
Steve
-
Hi Grzegorz, and a very warm welcome to the Lounge
Steve
-
Hi and a very warm welcome to the Lounge
Steve
-
Hi Tom and a very warm welcome to the Lounge
Steve
-
-
Hi and a very warm welcome to the Lounge
Steve
-
Hi and a very warm welcome to the Lounge
Steve
-
 1
1
-
-
Hi Mike and a very warm welcome to the Lounge
The addition of a good and stable equatorial mount will greatly improve your astrophotography.
Steve
-
Hi Richard and a very warm welcome to the Lounge
Steve
-
Hi Rob and a very warm welcome to the Lounge. Great image of the Moon
Steve
-
1
-
-
Hi and a very warm welcome to the Lounge. Unfortunately we are hampered by cloud and in this Country of ours we have lots of it

Steve
-
1
-
-
3 hours ago, alacant said:
 Hi
Hi
When you reassembled, are you sure that you had the curve of the worm centralised on the curve of the brass gear teeth? I needed quite a bit more than the original teflon washers offered. See the material used to obtain the correct distance. And no laughing;)
This shows the south washer. The North -on the other side of the brass gear- is however the crucial one. On my mount, it was the same thickness of material that was used.
HTH
All the calculations for centralising the worm gear to the brave drive ring are in Astrobaby's EQ6 stripdown & rebuild posts. Regarding the "over tightening" technique on tapered bearings. This is a tried and tested method to ensure all the components are fully" bedded in" to enable the assemble to work effectively. If you have ever adjusted the wheel bearings on your car you would use the same technique. As for damaging the components, they are hardened steel and the force required to damage them would far exceed what is necessary to "bed them in"
Steve
-
That's a really good image of M106 especially in the bright Moon conditions you experienced. Your processing has to be admired.
Steve
-
Very nice sequence and well processed.
Steve
-
6 hours ago, Skipper Billy said:
When you get the Geoptik counterweights its worth giving them a couple of coats of clear varnish - they soon rust if you don't 😞 They shouldn't at that price - but they do or at least mine did and that's in a dehumidified obsy!
The price of counterweights on higher grade mounts are astronomical (sorry for the pun). I required some extra weights and a shorted counterweight bar for my Avalon. I decided to have them made at a local toolmakers. They were manufactured from stainless steel, of high quality, at a much lower cost and will not rust.
Steve
-
3
-
-
Hi Paul and a very warm welcome to the Lounge. There is an absolute mine of information here
Steve
-
Hi, and a very warm welcome to the Lounge
Steve
-
Hi Richy and a very warm welcome to the Lounge
Steve
-
Hi Phil and a very warm welcome to the Lounge
Steve
-
1
-
-
Superb images. Splendid colours and sharp detail. Processing is top notch. Love em.
Steve
-
1
-
-
Really great images of one of my favourite subjects. Well imaged and finely processed.
Steve
-
1
-


Voyager Questions
in Discussions - Software
Posted
Ok, hit my first hurdle regarding the Viking software and the Velleman boards. I have two Velleman K8055 boards, one drives the Dome automation as board address (0) and the second board as address (3) and switches the Velleman VM129 8 channel relay module. Viking cannot find the second K8055 board on address (3) always defaults to the first board on address (0). Any pointers?
Steve