


kbrown
-
Posts
478 -
Joined
-
Last visited
Content Type
Profiles
Forums
Gallery
Events
Blogs
Posts posted by kbrown
-
-
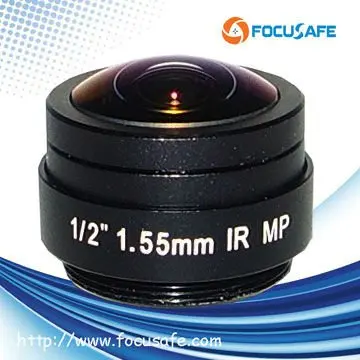
The 1.55mm lens arrived today. Only took 9 days from china including a weekend.

Seems to be just as good match for the RPi HQ camera module as I was anticipating. The full circle just about fits in the frame vertically so in indi-allsky I just have to crop out equal amount from left and right of the frame. So far I've been just testing inside the house but I am very happy with what I'm seeing. Just need to get my 3D printer back in action so I can make an enclosure for this. Photos to follow when I get them.
-
Old thread and slightly unrelated answer but I just wanted to point out there's two variants of the SW finder. One with a diagonal and one without. The one with the diagonal has a shorter tube so probably would require and extension to be used as a guide scope.
-
1 hour ago, Graeme said:
The Pi Hut do Raspberry Pi is compatible CS-mount lenses. Don't know if one of those would be compatible with your arducam camera module.
I've got a ZWO ASI 224MC camera that came with a 150° wide angle lens, I'm hoping to use with my Raspberry Pi.
After thinking about it a bit more I actually decided to get the RPi HQ camera from the Hut and a 1.55mm CS fisheye lens from Ali. Module is already here. Be a couple of weeks until I get the lens. In theory it should be a good match. I'll let you know how it goes.
-
 1
1
-
-
I've been meaning to do some experiments with one of these I have in my random electronic components box: https://www.onsemi.com/pdf/datasheet/qrd1114-d.pdf
They don't cost much but would require supporting electronics and a well designed enclosure. One of these days I'll get to it
")
-
11 hours ago, Tomatobro said:
Yes with the lens Tomato has and using meteotux software. Works ok.
Looking good. What bortle skies are you under? Do you feel a mono camera with or without IR/UV block filter would be better?
-
Hmm... having second thoughts about my camera module now as well. The IMX219 is a rather small sensor (1/4") with small pixels (1.12 um). The Raspberry Pi HQ Camera Module (IMX477) would have larger sensor with 1.55um pixels. With a 1.55mm lens it would capture the whole sky. Has anyone tried the HQ cam module as an all sky camera?
-
I'm in a process of making an all sky camera using a RPi 3B and an IMX219 based arducam camera module with motorised IR/UV cut filter and CS mount. A long time ago I bought this Fujinon zoom lens cheap off fleabay. By specs it should be okay but I feel it draws a bit soft especially at full aperture. It's a bit better if I close the iris a bit but I'm not sure I want to do that... That said, can anyone recommend a good quality CS mount prime lens for all sky purposes?
-
Pretty happy with it now. I put the kapton tape in as three vertical strips this time as suggested by @Chriske. Two layers of it per strip. One layer is on the draw tube and the other one is on the inside of the focuser body so that the smooth and slippy tape surfaces are touching. The bigger knob also makes it a lot less fiddly to operate.
-
2
-
-
Ah. Turns out I just had to edit the original post.
-
10 minutes ago, Chriske said:
Only now that I come to think of it, why do you call this a Helical focuser..? imo it is not a Helical at all. Helical focuser all rotate the eyepiece barrel with a eyepiece in it. There is one exception, and that is the one @Vlad made. It is a helical focuser indeed but Vlad's eyepieces do not rotate.
But the good news is that you just made a completely new type of focuser...😃 ...for which you need to find a new name...😉You're right. Helical was my original plan but as I said earlier in the thread I came up with this idea instead after I found the little bearings in one of my surplus parts box. Don't think I can change the subject of this thread any more?
Btw, I just put the new version together yesterday and it works perfect. I omitted the end stop ring so I can actually push the camera right against the T2 thread so nothing is lost in terms of optical path length.
-
Attaching the CAD files (FreeCAD + step) here in case anyone else wants to play with them. Enjoy
-
Now printing this:
Idea is still the same. Modifications include:
- Only adds 0.7mm to the optical path (vs 4.2mm before)
- Actuator screw further away from the body
- 2x Bigger knob for easier operation
- Overall height reduced by about 6mm
I played around with @Chriske's idea of beveled gears to turn the knob 90 degrees to the side but simply just run out of patience to get it done
") Don't get me wrong, I still like the idea but the bigger knob will do for me. I'm hoping that once I get this in focus I can just lock it in place and forget about it...
Don't get me wrong, I still like the idea but the bigger knob will do for me. I'm hoping that once I get this in focus I can just lock it in place and forget about it...
-
Thanks Michael. I did try to get it low profile but obviously not quite low enough. However all is not lost. I just realised I can slide the T2 thread down a bit along the OAG prism assembly thanks to the TS Optics TSOAG9 genius design. That probably already gives me the millimeters I need but I'm still going to re-design the focuser to make it as low profile I can. Gives me a chance to change a couple of other minor things too.
-
A little update. I removed the front glass along with its retaining ring/adapter in front of the QHY5L-II mono in order to get it 5mm closer to the prism. That seems to do the trick. I can focus now. Not sure whether that glass is just AR coated or whether it's also UV/IR block?
Anyhoo... Back to the drawing board with the focuser then...
-
Argh... Looks like I'm having to change my design as I'm not able to achieve focus with my OAG camera (QHY5L-II mono). But before I do so I want to make sure my setup is correct as I've never had and OAG before...
Currently the OAG prism is right after my Baader MPCC Mk3 Coma Corrector. Behind the prism is my fitlerwheel and then the imaging CCD at the correct distance (55mm + 1/3 * 2mm filters) from the MPCC. Does this sound right?
I supposed my OAG sensor needs to be at the same distance away from the centre of the OAG prism? It's practically impossible to measure this the way things are connected mechanically but it feels like I'm not able to get close enough to the prism. My focuser adds about 4.2mm to the distance the way it is at the moment. There might be some room to shorten this distance with a bit of re-design but I just wanted to confirm my setup and assumptions are correct first?
-
Some time ago I upgraded the secondary of my SW250P to a bigger one and at the same time I made a backing plate out of aluminum for it. On the plate I engraved sort of a spiral channel for some nichrome wire to act as the heater. All good until I started imaging without a dew heater controller. Turned out that my heater was heating the plate/mirror too much causing it to warp enough to cause all the optical woes.
I now have a DIY dew controller that also measures the temperature of the heater along with ambient temperature and humidity. The idea is to keep the mirror just a bit warmer than the current calculated dew point. Technically I have all this sorted out now but haven't had the chance to do proper testing yet.
Anyway. The lesson I learned was not too heat the secondary mirror too much...
-
1
-
-
3 hours ago, Dr_Ju_ju said:
Hmm my bad
 grovelling....
Now I want to wear a Bahtinov mask in front of my mouth

-
3 hours ago, Chriske said:
One more possibility to consider.
Why not redesign the focuser just a little bit adding two bevel gears so the focuser knob is at a more 'natural' position. iow at a 90° angle to the optical axis.Do not misunderstand me, I think it's a genius concept, but some users are not prone to use a vertical focusing knob.
That's a great idea. The way it is now is a bit fiddly to operate. Could even print those gears I suppose...
-
1
-
-
2 minutes ago, Chriske said:
Nicely done.!
I was more thinking of vertical strips. That should do the job even better imo.Probably would have to glue the strips in place as the tape doesn't stick very well on the printed surface. Might try that at some point. Thanks.
-
1 minute ago, pipnina said:
A lot of camera lenses are distortion-free already thankfully. If anyone wanting to try this already has a DSLR and an 18-55mm kit lens, it is likely to be pretty distortion free wih no post processing.
Can't say the same for the typical 55-200 kit lens option however. (as I understand, most of these kit lenses are basically rebrands even if they have Nikon or Canon stickers on them)
I have some L-series (i.e. pro) Canon lenses and they still distort a bit. It's only noticeable when you toggle the undistort option on and off in the software though. So visually it doesn't usually really matter...
-
4 minutes ago, vlaiv said:
Idea is very simple - It won't be able to do large section of movement, but rather small one - say 3-4 minutes of tracking. That is plenty enough to get general sense of smoothness of the motion.
You can trade resolution for angular section by the way.
One places laser on the output shaft. Laser is placed horizontally and aimed at the white wall. In case white wall is not accessible, or is not smooth enough - a piece of white paper / cardboard can do the trick as well.
Camera and lens are used to record laser point position and covert that into pixels (centroid on laser point is performed at regular intervals and recorded).
With something like ASI1600 - I'll have about 3800px horizontal resolution - then it is only matter of doing some basic math - like distance of laser to paper and camera paper distance / focal length.
Say that we use 1 meter of white wall and place laser 30 meters away.
That will give us ~6875 arc seconds of working space (so at 15.041"/s - that is 457 seconds of tracking or ~7.6 minutes), and at 3800px - we have something like 2"/px of base resolution. With centroid being sub pixel accurate - we'll probably have tracking on less than 1" precision - which is more than enough for star tracker.
(in case of A4 piece of paper - everything is scaled to 1/3 - so 10 meters away vs 30cm of size of paper - and shorter FL lens should be used - or camera placed closer to cover the paper).
Suppose you should take into account lens distortion with this method. Software like Lightroom or Darktable can undistort the footage against known database of lenses. Failing that you should do that manually with a calibration grid.
-
30 minutes ago, vlaiv said:
Thing runs and provides that 179.2:1 reduction and makes funny noises
. On sidereal or close to sidereal rate - funny noises are down to stepper and at "slew speed" (2 degrees per second - although I don't think star tracker needs slew function) - gears start to be heard and it all sounds like concrete mixer . I still haven't applied any grease to it - must purchase white lithium + ptfe grease and try that.
In case you didn't already know, the stepper driver can make a massive difference on the noise the motor makes. I've been using the Trinamic TMC2209 since I learned about them (same as in my Prusa i3 Mk3). They are more expensive than basic drivers and also require more learning if you want to take advantage of the more advanced features of it but if smoothness is the goal, it's worth it.
-
3
-
-
Didn't have any teflon strips but I remembered I had a roll of kapton tape which has a smooth and fairly slippy surface. Two layers of it seems to get rid of all the play and it's still smooth to operate. I'm happy with this
-
3 hours ago, Chriske said:
Looking good..!
Around the inner perimeter you could add a few teflon strips to make the action smoother. To get rid of the wobbly action a few springs or even small bolts pushing against these teflon strips.That's a good idea. I will first have to test this to see whether I can achieve focus with this. I'm only just converting my system to an OAG. Haven't had the chance to try it out yet.


Diffraction Eliminator Mask?
in DIY Astronomer
Posted
Ran across this idea of a mask that you put on top of the spider vanes on a newt on facebook earlier today to "eliminate" the diffraction spikes on bright stars. The guy had 3D printed one and claimed it works great. Has anyone here tried one?
Here's a French article about them: http://serge.bertorello.free.fr/antiaigr/antiaigr.html
Google translate version: https://serge-bertorello-free-fr.translate.goog/antiaigr/antiaigr.html?_x_tr_sch=http&_x_tr_sl=auto&_x_tr_tl=en&_x_tr_hl=en&_x_tr_pto=wapp