


2STAR
-
Posts
1,099 -
Joined
-
Last visited
Content Type
Profiles
Forums
Gallery
Events
Blogs
Posts posted by 2STAR
-
-
A very good find that John (Jahmanson)!
Yes, it would be an idea to point ALL newcomers to this guide, as the most common question from them seems to be "which telescope should I buy?"
We have all been there haven't we! We can see that the night sky looks very interesting - even with the naked eye, so the very next thing we want to do is rush out and buy the biggest and most sophisticated scope we can afford, giving no consideration to any other aspect of the hobby (i.e. will the scope be easy to use, portable, or even suitable for me in particular!).
The final result can mean spending a huge amount of money on an instrumant which is hardly ever used, and ends up on e-bay!
So to repeat - the guide you found is excellent John.
Regards,
philsail1
philsail
Just a mention on 'goto' scopes, as stated there is divided opinion and I can only say from my own beginners experience that the system I developed really did help me locate and identify quite a few night skies wonders!, on a couple of sessions I would use 'goto' to find my planned objects for the evening viewing, on the next couple of sessions I dont use 'goto' I would use a Star Map and knowing approx where and at what time the objects I had viewed previously on 'goto' were located I began to find them by ' star hopping',so much so that I only use goto now to find something new to explore in the night sky and then making notes I repeat the process as mentioned, this way I get the best of both worlds not much frustration and the ability to locate via a star chart at the same time.
-
Really nice article and as a beginner there are really great pointers. Before I bought a scope I spoke to an experienced astronomer /colleague/member of SGL. I had limited budget and opted for a second hand skywatcher 150p and EQ2-3 mount. Nice piece of kit and really delighted.
I am a beginner and joined my local society (WADAS) last month, which is solid advice for any beginner, find and join your nearest society, reading up on astronomy is essential, but not as essential as choosing your kit to start observing, look around, listen to others, do some research(LOTS), look on SGL, and then decide what you want your telescope etc to do for you. I have found that the discussions for a starter in astronomy on what telescope and to a lesser extent what eyepieces to buy is very subjective and can be confusing, yes there are basics to consider, but at the end of the day its your enjoyment and interest that matters and what you feel comfortable with.
I eventually want to get into astrophotography, but not for a couple of years, so its out of my mind at the moment, the number of nights we actually get outside in this country makes it sensible to just start with observing and learning something each session by yourself or in the company of more experienced observers, its trial and error but fantastic!! when you have a bit of success and your confidence starts to develop.
-
Hi all Thanks for the thread.
Before the Internet got really going the two books that I used extensively for amateur astronomy was written by a Terence Dickinson: The backyard Astronomer’s guide ISBN 0-921820-11-9
And: Night Watch an Equinox Guide To Viewing The Universe ISBN0-920656-89-7
I found Night Watch in particular, an excellent companion during night outings with a small red night-light and my 4.5 Newtonian poking around the universe.
With its coil bound back I could open to numerous charts to focus on sections of the sky that presents itself. It is tailored to viewing with whatever you have for equipment. I'll have to check out Turn Left at Orion.
Cheers, and Clear Skies.
Thomas
I was given good advice regarding turn left at oriion, buy the copy with 'ring binders' pages stay open better when outdoor .
-
Just attached the RACI finder scope, waiting for reasonable weather to align it .
Eric
-
Hi again John, The Celestron RACI 9X50 Illuminated finder scope just arrived today,
Celestron must be the worst company in the world regarding lack of assembly instructions!! for their products!!
Eric
-
 1
1
-
-
Hi John, great night at winscar last night, I wasn't at all optimistic as I was driving down the M1 motorway in driving rain ,spray and gusty wind, however, what a pleasant view on arrival, to find Milky Way and all clear sky, even I could see m31 with naked eye !!. 2 hours of great viewing with 4 other members of WADAS. The evo 9.25 showed great potential for use when I am more familiar with it, great scope no doubt.
The saga of the handset holder finally sorted, I had received the wrong assembly piece that the handset sits in, no wonder we couldn't 'click' it into place lol.
FLO have sent me another and I have returned the 'wrong' bit showing obvious signs of wear and tear after numerous people had made numerous attempts to fit them together lol.
-
The plastic RDF has to go John, my old eyes just don't get on with it, I have just ordered the Celestron RACI 9X50 from FLO, that was a really good gesture they made to you when you got yours complimentary lol, mine has cost £102 with post !!, still FLO price was as cheap as anywhere else.
Being retired I have time on my hands, today I have set up, & taken down the OTA/MOUNT/TRIPOD no less than 8 times lol , I found marking some points on the mount with a bit of white ducting tape made it a lot easier for me, I am now practicing in the dark which is more realistic !!.
The advice you gave regarding lowering the OTA in from vertical was appreciated, I was a little nervy at first but confident now every time.
Holding the mount handle whilst releasing the manual alt clutch is a must also.
We are hoping (weather permitting) to travel down to our darkish site at winscar tomorrow 8/12/15 where the scope will get its first real outing, Cant wait to get observing, it seems like an eternity since we had any clear sky at all here.
Regards Eric
ps: FLO are sending me a new and assembled handset holder, its looking like its us old fools here are no good at jigsaws lol !!!!!!!!
-
Just been practicing and messing about with evo to familiarise myself, ,good advice John regarding sliding OTA in from vertical , lot easier cheers
Eric
Where are the clear skies !!!!!!!!!!!!!!!!!
-
Thanks again John, no luck, tried, hands are sore lol, thrown both bits on settee, it just will not click in, I will drop FLO a email for Monday
Positioned exactly as your pics , but no joy, anyway, the scope etc all look really good and looking forward to some clear skies for us to get down to our local dark site at Winscar Reservoir.
Will drop you a line when sorted, and again many thanks.
Eric
Member WADAS
Ps: No one else from our group has the scope lol, just my luck.
-
Eric, the part on the left slides into the tube retaining clip. I can't see mine until later but it does look the same from those pics. To help you visualise it place the HC into the retaining holder then slide the back of the holder onto the tube clip. I recall it goes in with a firm click. I will look when I get home later and take a pic but I reckon you or your daughter should have it all done by then ☺
Hi again John, I have had 4 people 'have a go' with no success, general opinion is about the same that the plastic mould pinpointed in the pics is obstructing the holder from clicking into place. I will wait until I hear from you before contacting FLO, just in case we may have it wrong !!
Eric
-
Hi John, have taken pic of the said piece, is yours the same please, there seems to me to be a piece of plastic mould out of place.


Eric
-
Hi John, the pics I have seen only show the retainer with the handset in so not really helpful, there must be something wrong with the 2 pieces of clip on that I have, my daughter can do the Rubik cube in around 2minutes so I am going to see if she can solve lol!!!!!
Eric
It could of course be me just being a bit thick also lol
-
Hi again John, just got my evo 9.25 and assembled this afternoon, bit fiddly with the mount but other wise looks sturdy and well made bit of kit.
Maybe a silly question but I have just spent 30 minutes on trying to figure out how the 2 piece retaining clip for the handset fits together !! , I can see how it attaches to the actual leg but cant seem to sort out how one bit fits the other, hope I explained properly.
Eric
Any clues please
-
Hi , Birthday & Xmas present on the way next week, will be buying the 9.25 EVO from FLO also.
Eric
Member WADAS
Thanks again John for your time and effort in giving this scope an objective and honest appraisal.
-
1
-
-
Thanks John, just sold my SW 200p DOB, so more money in the kitty toward the C9.25, thanks for the dew shield info.
Eric
-
Hello Eric,
I use a separate power source for the dew heater, one of those jump start car batteries, quite useful and portable. I don't think you can power dew tapes from the mount, someone though might correct me. You can definitely power and charge up your phone or tablet
Cheers John, by the way what did you make your dew heather 'cover shield' from, I like the idea of the one on the finderscope also.
Eric
-
Do you power your Dew heater from a separate source John, I shouldn't think the internal lithium battery would be up to the job or is it maybe?.
and also, thanks again for the report, I am filled with excitement now lol, if the wife up's my pocket money I may be able to afford it sooner than I thought lol,
Regards
Eric
-
Hello all,
I have now had my Celestron Evolution 9.25 nearly two weeks and now finally got some photos and information together for anyone considering this set up. It has been out as well but not really a first light report as mentioned later in this review.
The rationale behind choosing this set up was to provide a system that was easier to travel with to a dark site where I observe, as the HEQ5 Pro and GSO 200mm whilst a good combo are not the easiest things to transport, set up and tear down. I also conceded that AP is probably never going to materialize for me due to never having enough time plus the fact I do not think I am doing enough visual anyway! Like most people here I spent weeks thinking about what I need, what I don't need, what would be nice, how much cash can I raise, what shall I sell, will my daughter stop shooting chickens on that silly Nintendo game etc etc etc.....???
Anyway lets get started ......
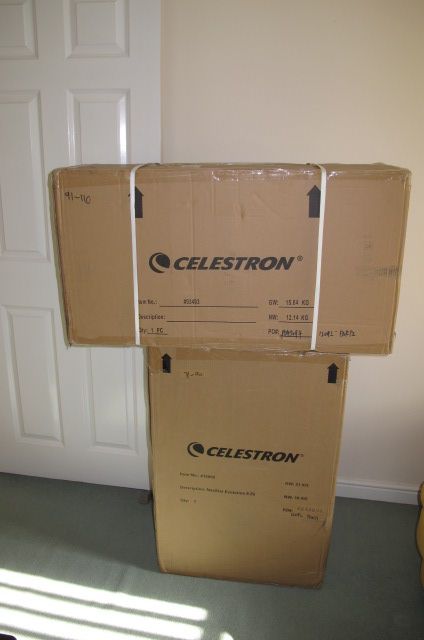
As always it begins with some big boxes, inside them are more big boxes, but this is not an un-boxing thread so that's the last you see of any boxes. I will say though that everything was very well packaged. Delivered from FLO by Fedex. All measurements and weights are approximate or as close as I could get them. For the rest of the images apologies for the shadows in some of them, you just cant get the light these days...
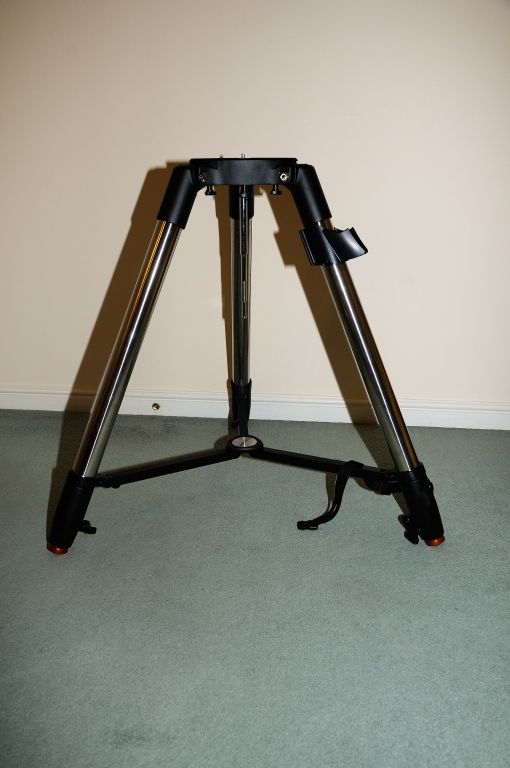
First we have the tripod. On the right side leg is the handset cradle that pushes on. The tubing is steel and feels very strong. In this image it is hard to see the central spindle but it is there. As pictured this tripod weighs 9.8 KG and is 780 mm high. Fully extended it goes to 1170mm high. At the bottom is a strap for securing the legs in transport, on my version of the tripod the legs are quite stiff so no real danger of them flaying about when carrying the tripod. Having said that the strap is genuinely a useful addition.
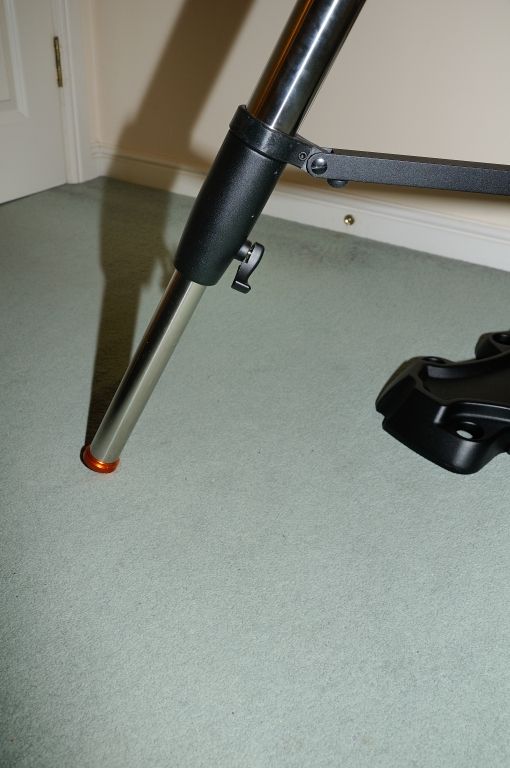
The above image shows the legs extended part way, note there are no index markers as mentioned in the manual, in fact the manual shows a different mount altogether which I believe is the lighter version of the tripod and mount for the smaller scopes. This is the beefed up version for the 9.25, and maybe the 8 comes with this mount as well but I am not entirely sure.
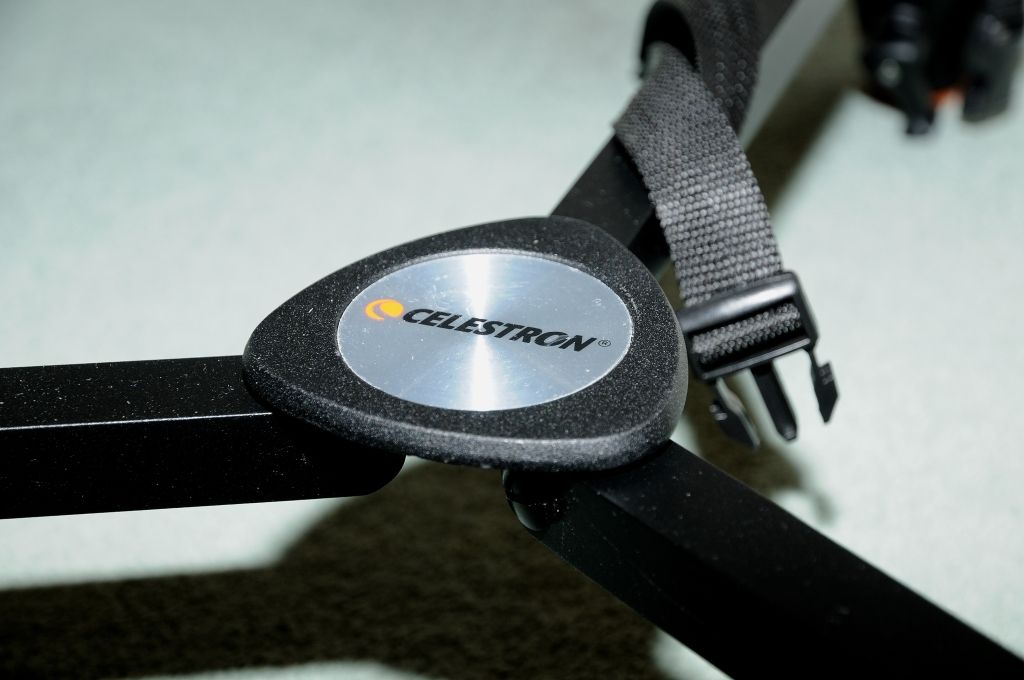
Close in shot of the central connector bearing the Celestron branding. All fixings are secure and rigid. Nothing loose and nothing rattles.
This image shows one of the leg extender release handles. It is wonderfully easy to lock and unlock the legs as the handle is large and easy to find and operate in the dark. It is also made of alloy as well and feels bullet proof. In comparison to the handles on my ex HEQ5 PRO the Celestron wins hands down. Well done Celestron, it seems someone has actually thought this through......
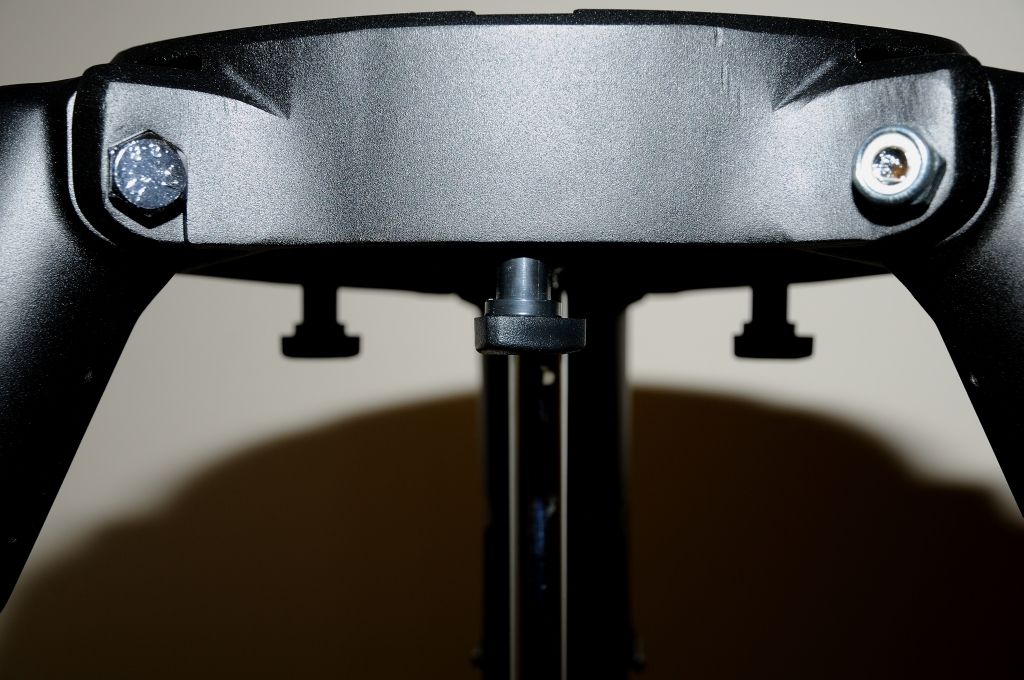
The top of the tripod from a side on perspective shows the 3 captured bolts hanging down. These bolts screw into the mount and are solid. They are easy enough to grip so undoing them with cold hands should be OK. The bolts when screwed into the mount for the first time felt a little stiff, so some synthetic Finish Line bike grease on the bolt threads solved the stiffness. I have found the best way to do these bolts up is in the same manner you would do a car wheel.
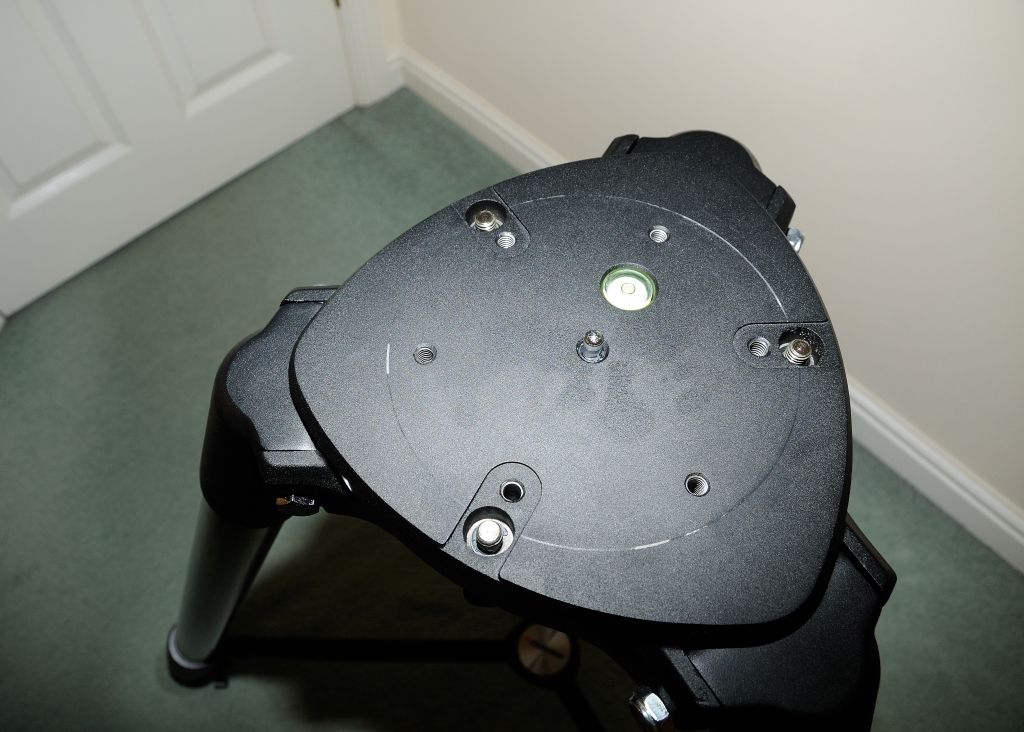
This image is the top of the tripod. The 3 captured bolts on the outside, and you can also see the 3 screw holes which I am led to believe are there for a forthcoming EQ wedge. There is a bubble level as well. In the centre there is the central fixed spindle which is what you align the mount onto. The mount is placed over the spindle and then the bolts aligned with the holes in the mount. Nothing needs to be clicked into place like it does on the Orange County video I saw of the 8 inch version of this.
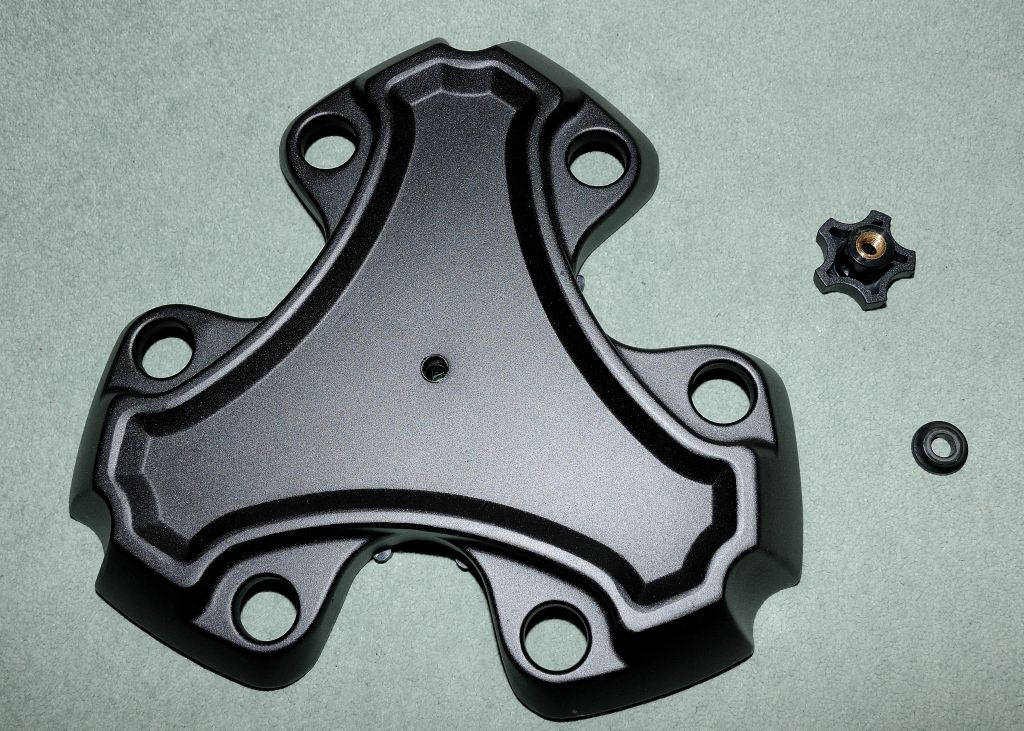
This is the tray. It is seriously heavy duty and weighs a staggering 2.4 KG. Metal not plastic and with 6 EP holders around the edges. Look closer at the deeper indentations and you can see 2 rubber pads in each. The tray is designed to stay on the mount when the legs are folded in and the rubber pads stop the tray from clanking or marking the steel tubes. It is a small attention to detail but a welcome one. At the side is the tightening nut and washer. The nut has large grip indentations making it a breeze to tighten up the tray. All in all a very well thought out design.
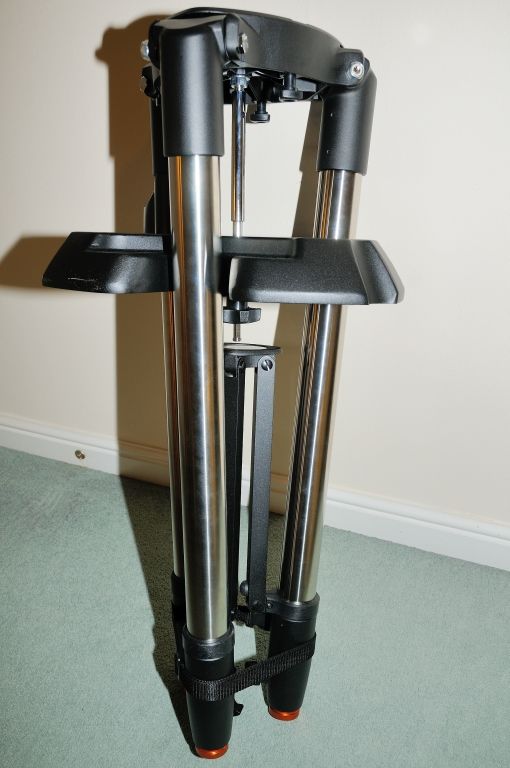
To prove the point here is the tripod and tray folded up and ready to transport. Neat tidy and although heavy not a difficult item to carry and store.
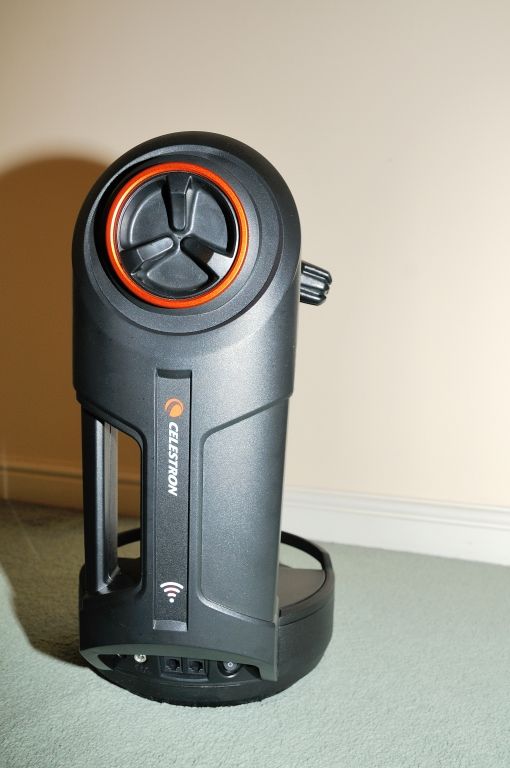
The above image is the actual mount. It weighs 7.2 kilos and houses a lithium phosphate battery which Celestron claims 10 hours of use. The mount is 47cm tall. The large carry handle makes it easy to grab and lift up onto the tripod. The Celestron icon pulses red when the mount is being charged and stays red when fully charged. The W-Fi icon pulses red until it meets a smartphone or a tablet then stays a permanent red until switched off. It can use direct access to your router as well, and both the icon and the W-Fi indicators can be dimmed from the Nexstar handset.
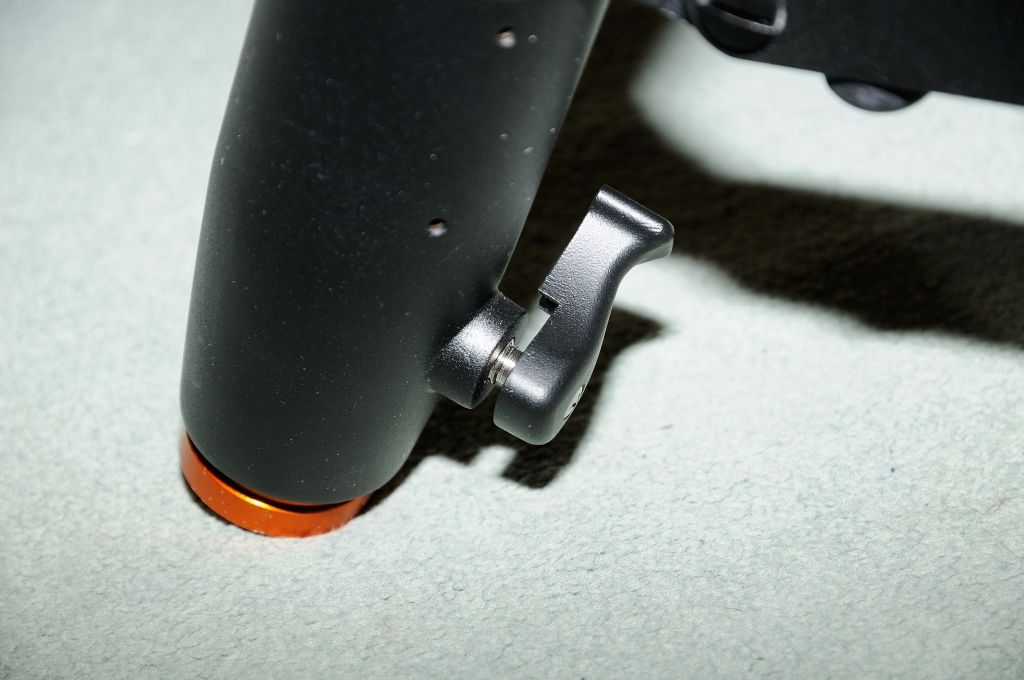
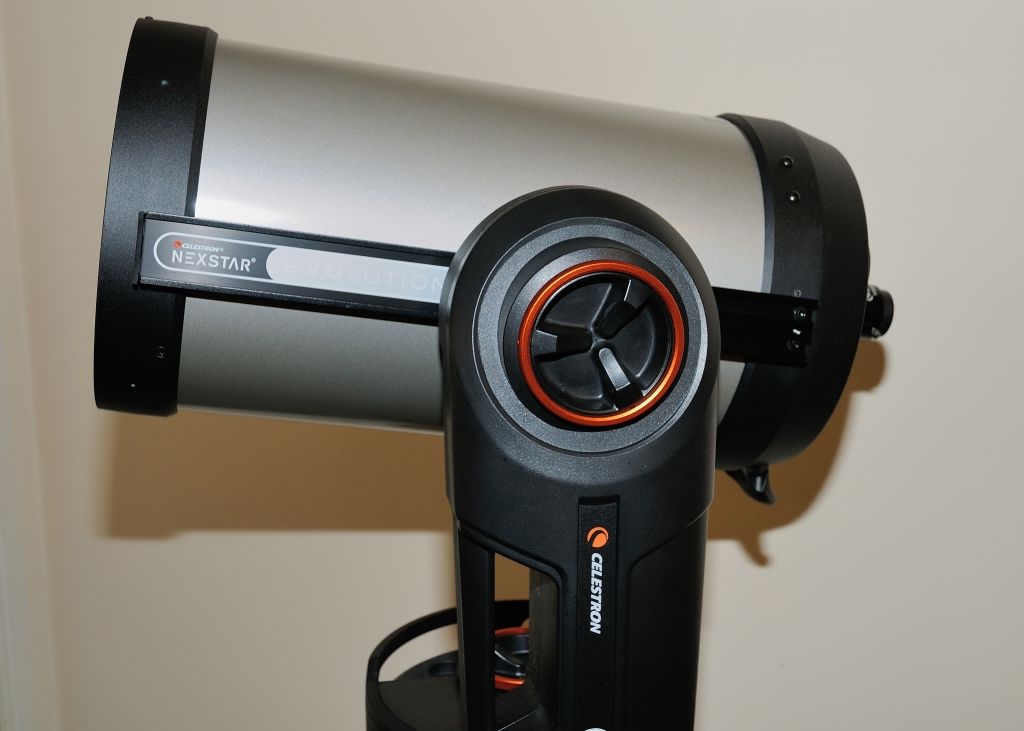
The metallic orange circle is a knurled disc that loosens or tightens the the up/down operation. If you have smaller hands or maybe your a kid then the three central stubs in the disc make tightening and loosening very easy to operate.
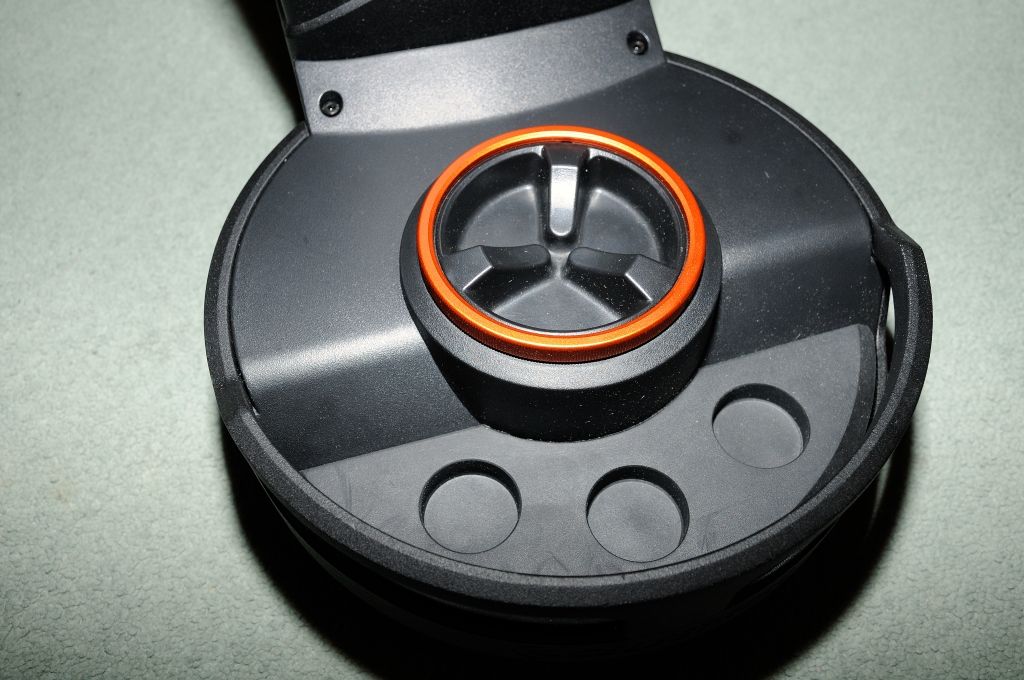
Looking down onto the top of the mounts base shows another one of those metallic orange discs, unsurprisingly this is for loosening and tightening the left/right operation. The difference here is that this disc actually glows red in the dark to help you see the 3 really expensive EPs you are going to keep in the top accessory tray! It also can be dimmed from the handset if things are getting a little too bright for you.
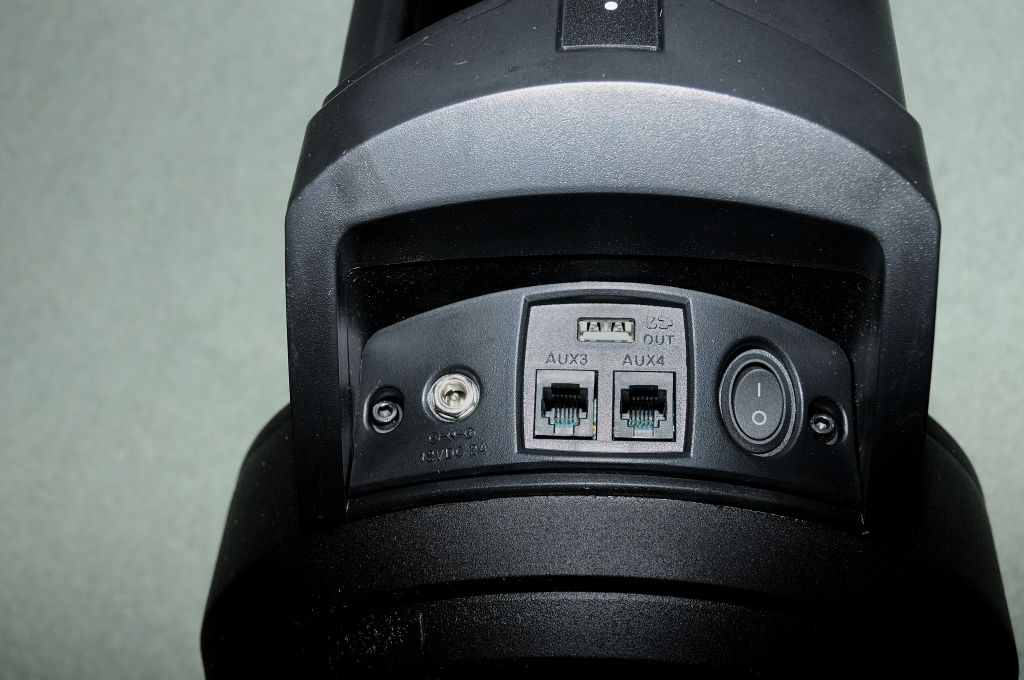
At the base of the mount from left to right: Socket for charger or 12v cable, Auxillary 3 and Auxillary 4 (The Nexstar handset can plug into either Aux socket. Aux sockets 1 and 2 are on the side of the mounts fork.) Above the Aux socket is the USB charging outlet which for example can charge your phone or tablet in the field, and on the right is the power switch. The electric panel is protected by its placement underneath the bottom of the fork.

The vixen style clamp is operated by a single heavy duty bolt. When mounting the OTA it helps to put this clamp into the vertical position and literally lower the tube in.
A small marker at the top central area helps you align the scope to a level lateral position. It feels solid and at no time do you feel your precious OTA will fall off!!
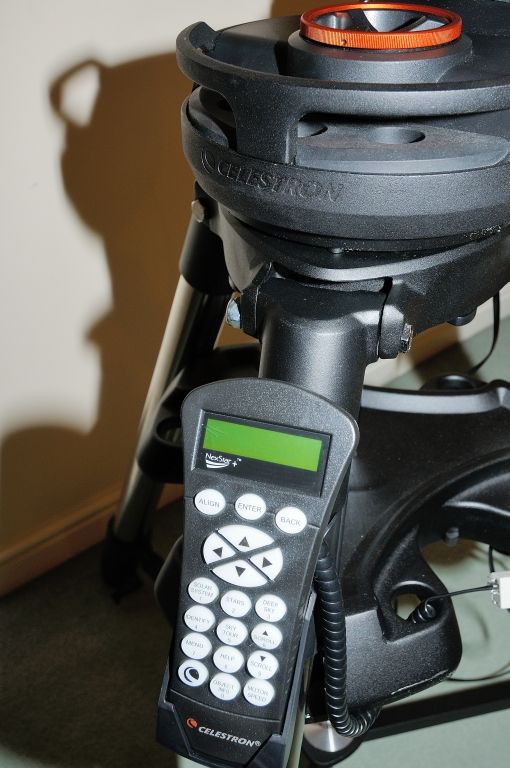
The mount on the tripod with the handset on the retaining clip. The handset is plugged into the Aux socket on the main electric panel and gets there by the use of an extension lead. The handset cable is one of the disappointments. It is the curly type that does not like to be stretched and it is very short. I found that in some situations the cable could get stressed and cause a disconnect. The extension cable from Astronomiser cures this issue, Andy from there made me a custom 2 metre cable. I noticed that the cable at the handset end is wired in to the handset as well unlike the Synscan handsets where the cables can be swapped out for CAT5 patch ethernet cables. I know that the handset has a software cord wrap option which was set to on but this did not stop the cable from being stressed whilst in use.
SOUND: In use the mounts noise level is about the same as the HEQ5, possibly a tad louder with both axis slewing but without the noise of coffee beans being grinded at start up. There is no beep to tell you it has finished slewing.
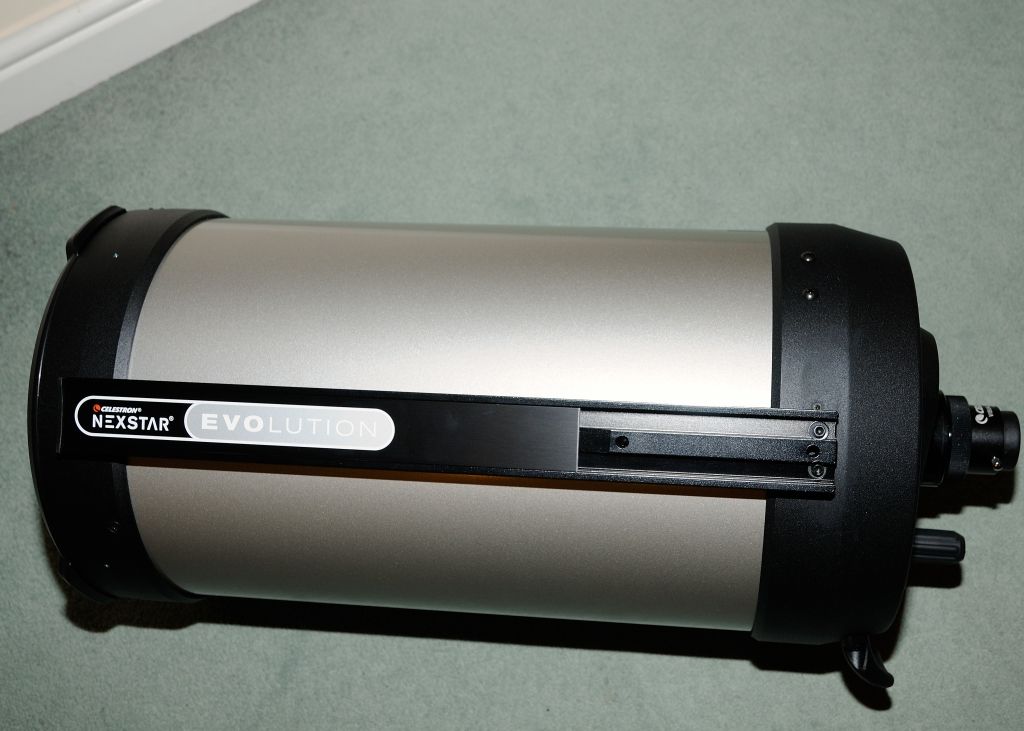
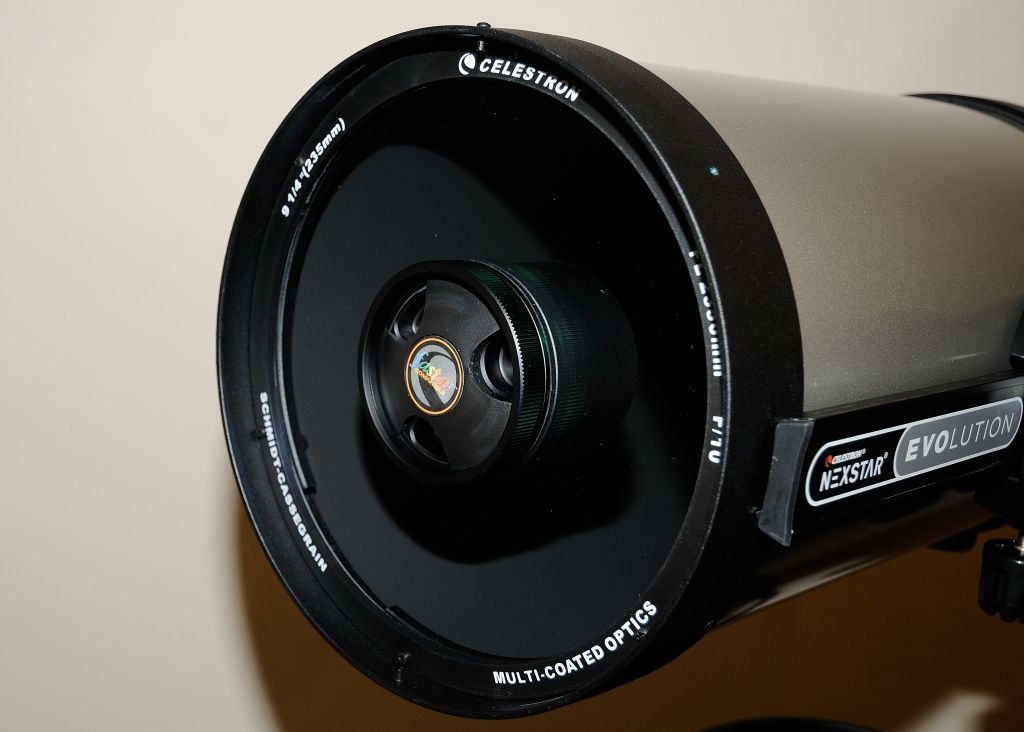
OK here it is....the OTA and needs little introduction. There is not a great deal to say about the C9.25 as this scope has a well proven track record and gets very good reviews from people that know more about them than me. The scope has an excellent carry handle and the protective cap scews on and clicks into place with a short turn. It weighs 8.4 KG with protective cap and visual back in place, and the length is 54 cm plus a further 6.5 cm with the visual back in place.

Top down view of the bottom of the scope showing the carry handle, focus knob and visual back. Bottom right 5 o clock position reveals something that does not come as standard with this telescope.....read on.....but first a few shots of the business end of this scope.
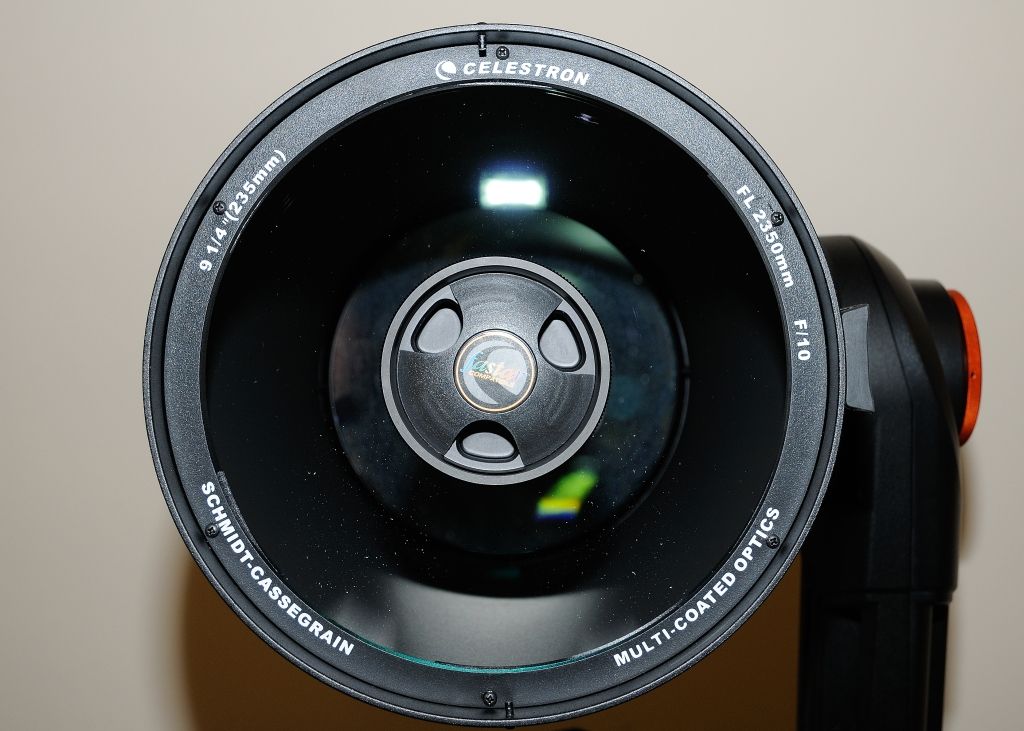
Amazing how these digital cameras can capture tiny specs of dust which my eyes cannot barely see.
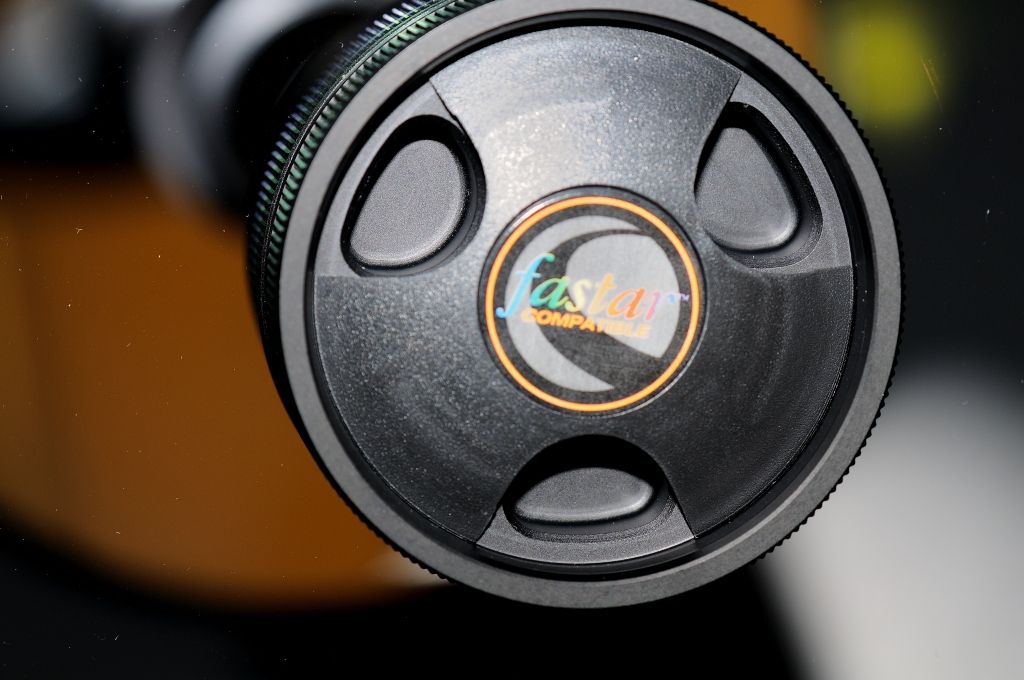
Close in on the central adaptor / secondary. turn the plate a short way and the collimation screws are revealed
A shot of the supplied star diagonal and the supplied Celestron 40mm EP
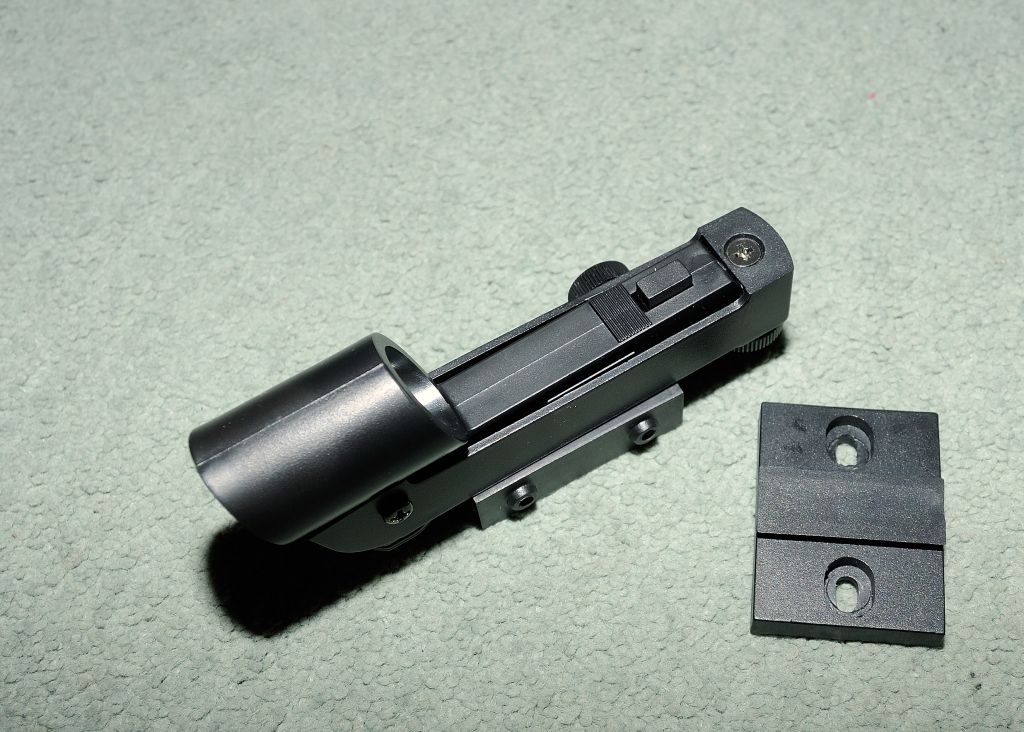
Ok so far things have been very positive with just the minor irritation of the handset cable, but there was a cloud in the silver lining and here it is. Now I know these scopes ship with an RDF ( red dot finder ) and those have never really aroused much admiration from me, I have one for my Mak but usually swap it out for the 9x50 that came with my frac.However the 9x50 SW finder is not compatible with the Celestron mount
Now I do not know if other Evolutions are the same even in the 9.25 variety, and quite possibly it might just be mine but take a closer look at the mounting plate. It looks like one piece but if you attach the RDF to it the small dovetail in the centre of the bracket and tighten the screws the dovetail comes away and the RDF drops to the floor. Effectively it is useless. If that is not enough to make you reach for a double Ricard with ice take a look at the RDF itself. It is completely misaligned on the lateral axis and when we tried it on the Mak and the Frac the red dot could not get anywhere near the alignment in the scope. No amount of tinkering with it could correct it either so like the cheap nasty mount it came with it was effectively useless. ( Well there is a battery in there to salvage ) Suffice to say the chap who conjured up the leg clamps will move up the organisation a lot quicker than the guy in the RDF department.
Anyway I pinged an email off to FLO later in the day including some pictures and Steve G replied within 2 hours and said he would look into this, but they did not have any more 9s in stock but would check one of the 8s. Later on they sent me another email saying they thought the 8s mount was different, so could not use this. They said they would sort this out.....Then the next day another email from FLO saying they had found a replacement finder and it would be with me in 2 days. As I was so busy at work I only skim read the email but was OK with the fact FLO responded so quick.
The Fedex man came and went and naturally I was out when this happened so elected to collect it from the local depot at the end of the week. On the way to Fedex at the end of the week my car broke down with a brake issue and I limped it into a garage where i waited 4 hours to for them to fix it. Hundred of pounds later and feeling rather depressed I finally got to Fedex and collected the box. Drove home in appalling weather, got drenched going from car to front door.
Then I opened the box. A note at the top said " Hope you enjoy your new finder scope " and this is what I found

Had I had time and read the email properly I would have seen FLO sent me a Celestron 9x50 illuminated RACI finderscope as a replacement.
I was stunned to say the least, and this is one of the most fantastic experiences of good customer service I have ever come across. I already knew FLO had a very good reputation around here and this just re-enforces it. Thank you FLO Steve G and Steve B, it was a marvelous and generous gesture and most appreciated.
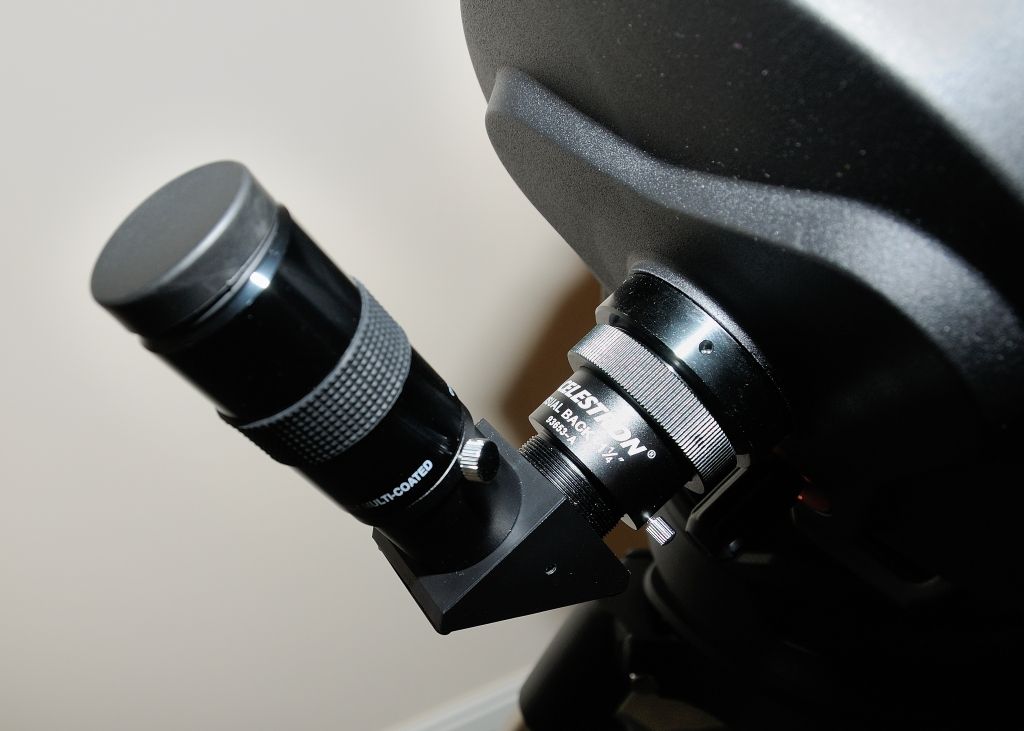
Now we need a picture of it on the scope while the RFD languishes in the things that are broken drawer.....
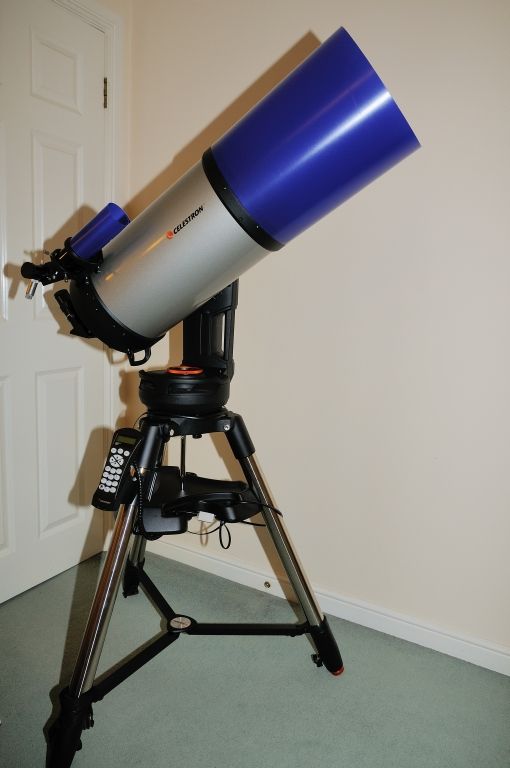
Set up complete with dew shields, just awaiting dew controller and dew tape.
Now a quick look at the software.
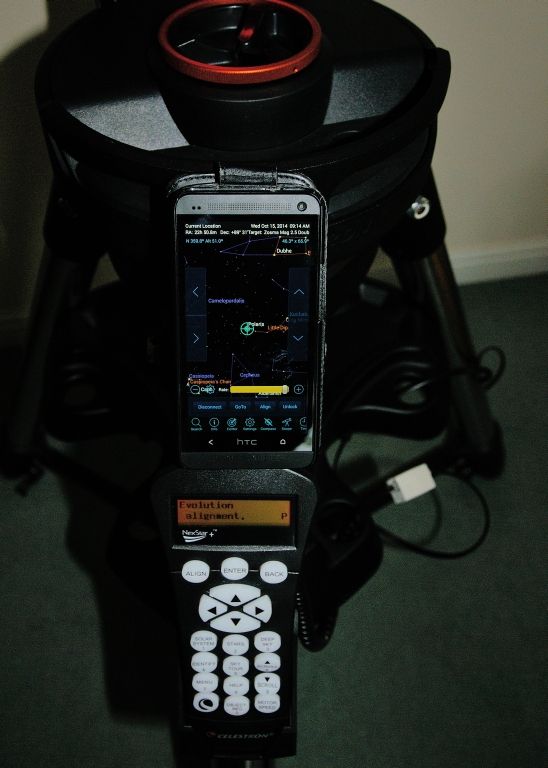
So with the first look nearly done it is worth mentioning what I have experienced so far with the software. Sorry the above is not a great photo, found it hard photographing a phone screen! First of all you download Celestron Sky Portal, mine is on my Android HTC ONE phone running KitKat 4.4 although later today I will have acquired a 8 inch Android tablet for this.
Turn the mount on and then switch your phones Wi-Fi on. Start up Sky portal and identify the SkyQlink network. Press connect to SkyQ and the phone then connects to the mount. It works....seriously it really works and if you look at the phone screen you may be able to see some of the night sky and the buttons at the side to operate the movement of the telescope. The idea is once aligned you just point to an object on the screen and the scope goes to it. Some might think this is a gimmick but I see it as a handset with graphics. One thing though, sometimes other networks can get in the way like your own router in the house. A small piece of paper was included with the manual explaining a bit more about the network and connection side of things.
It seems that from the phone / tablet or whatever device you use the default setting is a 3 star align, one other option is a manual align with a further option to plug in the RA and Dec co-ordinates. I do not know for example if you can do a 2 star align from the Nexstar handset and then use the phone to cruise around the sky. Tracking options are Sidereal, Solar, Lunar, and OFF. Backlash can also be dialled in from the phone along with slew rates as well. Lots of stuff still to learn and find out.
The software ( based on Sky Safari ) has a multitude of settings for the front end you can tinker with, far too much to explain here but can be read in the downloadable PDF from Celestrons web site. I haven't found much wrong so far but time will tell and in any case software updates to the app should take care of things. In practice for example I found the icon and wi-fi dimmers on the phone do not have the desired effect on the mount, but that is no deal breaker so to speak.
In summary:
PROS:
Solid well built and well thought out tripod and mount.
Internal battery and USB external charger socket
Excellent leg clamps
Tray design remains when legs folded in for transport
Useful lashing strap for securing the legs
Fast set up and tear down times
Individual components easy to carry
Easy to see and use fixings in the dark
Well place OTA carry handle
Screw in protective cover on OTA front plate
Reasonable 40mm Celestron Plossl EP supplied
Can use other scopes on mount
CONS
Finder scope and mount broken on my supplied version
Poor instruction manual, refers to different mount.
No 12v power lead (Think long sessions when internal power is exhausted)
No Serial cable supplied (firmware updates)
Handset cable is very short at 40cm
HALF LIGHT REPORT:
I called it half light because the reality was I used this scope without a working finder as the clear sky happened before the RACI arrived. It was also a full moon with a drenched out sky and I was completely unaware of the requirements for Skyalign to work.
As mentioned I travel a short distance to a dark site to do my observing so the first test was getting the gear down the stairs and into the car. The OTA is comfy strapped into the front seat and uses up far less room than a 200mm Newtonian. The carrying handles made life easier and no heavy counterweights to haul outside.
I was also missing the 18 kilos of weight from the leisure battery, one less thing to worry about. So the scope and mount were all in the car with plenty of room left over.
At the dark site, unloading to set up was about 12 minutes. The phone connected to the mount but the alignment was impossible without a finder scope as a guide. All attempts at a 3 star align failed, but that is not down to software or faults it was because it was taking forever to centre bright stars and by my own admission not knowing how bright they have to be and where in the sky they have to be located. So a few goes on the handset and the same issue, and then to find out that this handset likes co-ordinates in degrees and not decimals. What fun......
Never mind, with the threat of clouds It was a case of undoing the clutches and manually slewing to some objects, no DSO though as the sky was so washed out. I checked out a few stars including Mizar, Polaris, Vega and all looked pretty clear and good. It just took some time to find them using a 40mm EP! Anyway that done I turned it onto the moon and using BSTs 18 / 12 got outstanding views of the moon. Very crisp, contrasty and punchy views plus a burnt out eye! So not much viewed on that evening out but never the less it was enough to get excited about for the future.
One thing people might wonder about is the stability of the whole set up, and in all honesty it is difficult to say for certain until I use it more. The was no movement viewing the moon at 12 or 18 but a small amount when using the 8mm during focusing. It remained a bit jumpy from what I recall at 8mm but this needs more testing. Surface winds were about 3-4 knots. Viewing the few stars was also jumpy at the higher powers but initially my thoughts are that it is not so different to a 200mm on a HEQ5 for stability.
Eventually the clouds rolled in and it was time to pack up. Tear down was quick and the kit was in the back of the car before I had time to lose something.
So that concludes this first look and half light report, I hope it helps others who may be considering this scope. Overall I am pleased with the purchase and especially impressed with the FLO response.
I know I have probably left some things out, but hopefully most of what people might want to know is covered. Any questions on the set up and I will try and answer!
Cheers and clear skies
John
Thanks John, first proper review I have seen on the C9.25, I am hoping to get the scope etc soon. Eric
-
- Look forward to seeing next lot of pics.
eric-
1
-
I can only say absolutely superb Damien, will love to see it when finished. Progress reports are excellent (even if I haven't got a clue what you are talking about on the technical side lol) still great read to follow.
Eric
-
1
-


Celestron Evolution C9.25 First Look & Half Light Report
in Discussions - Scopes / Whole setups
Posted
Not sure if I mentioned that the handset holder was not compatable with tripod legs , flo sorted it for me by sending correct piece out to me.
Eric