


jgs001
-
Posts
14,102 -
Joined
-
Last visited
-
Days Won
1
Content Type
Profiles
Forums
Gallery
Events
Blogs
Posts posted by jgs001
-
-
that is indeed an option, but you won't really have the detail doing that, if you're trying to get any surface detail... best I can offer, try it, and see what it looks like.
As for the illusion that the moon appears larger, that is true, and it's a deception, that if I recall correctly, your brain plays as putting the moon near the horizon allows you to get a sense of scale with the surroundings... I'm not aware of a method of being able to do what you're looking for any other way, I'd suggest trying to ensure you keep the same exposure settings, and do a gentle photoshoppery... If you really wanted a very detailed moon, you could grab a shot with the newt, and use that with the landscape... with some moon resizing.
-
 1
1
-
-
The 55-250 isn't going to get you that close... as you say, for close up use the newt. But, the 55-250 may allow you to capture a better framing of the moon with the scenario, and given the larger size on the sensor that the higher zoom will give you, will produce some detail.
-
1
-
-
That's a difficult one to answer... Typically, around the 50mm mark on a full frame (35mm on a crop sensor) is considered to be about the same as you're eye sees. I presume though you wanted to get closed than that. You could look at the EFS55-250, that would give you a closed view, and you would be able to get some detail on the moons surface.
-
1
-
-
It's actually easier at prime focus. You can use, an in camera clip filter, or a filter that screws into the EP adapter, be it, 1.25" or 2". With the images I posted above, I was using a 1.25" CLS filter.
-
the LP round here isn't too bad, but it does get noticeable in the images. I used an Astronomic CLS filter, on the ST80 to cut out the LP. It did a great job. I was also using a SemiAPO filter to cut out a lot of the CA that the ST80 suffers from, thus the images look less blue than you'd expect from an unmodified dSLR. My M45 image with this setup really didn't work very well because of that filter... it cut most of the reflection nebula.
-
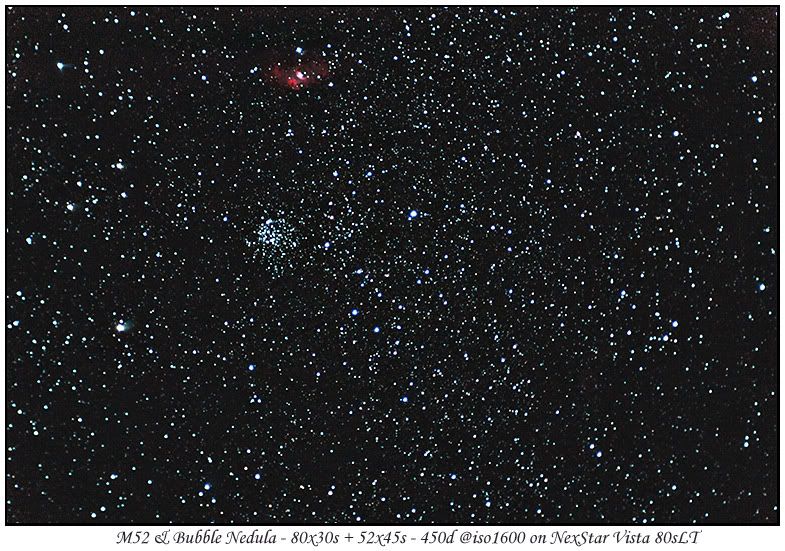
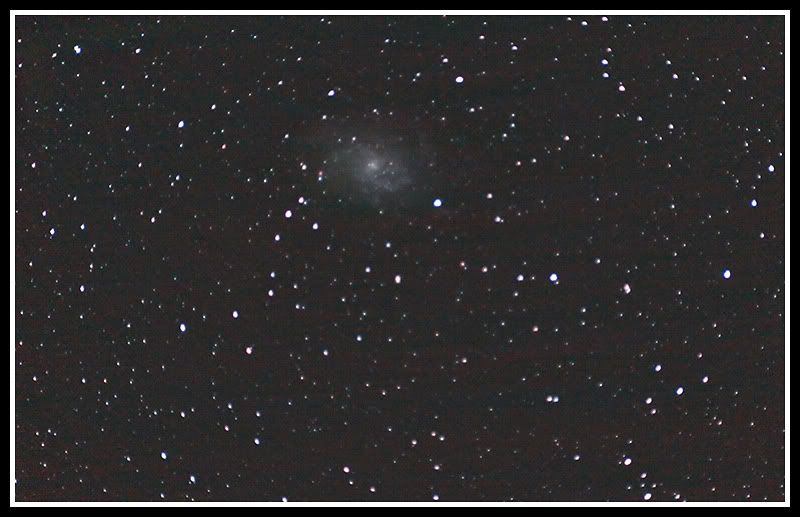
I'll play... these are all early, I've now gone HEQ5 or Astrotrac... but...
These were all shot using a NexStar SLT with an ST80 clone, and an unmodded Canon 450d. The mount and scope, in total cost £100. Shot settings are in the borders
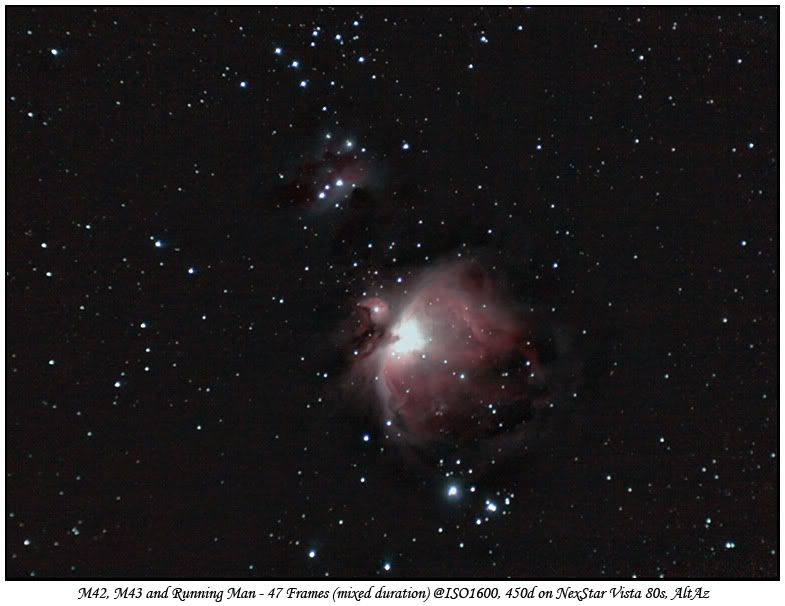

63x61 seconds ISO1600

-
19
-
 1
1
-
-
Interesting... flats at 100, the rest at lights ISO... I've only ever used the same ISO on all the calibration frames... dropping the ISO might sort out some oddities I get on flats using a laptop with camera lenses though

-
If you bookmark the page with your location on it, the URL contains that location. That way, when you go to the bookmark, the site takes you straight back to your correct location. It worked for me that way...
http://clearoutside.com/forecast/54.7/-2
This is using a couple of random long/lat values I entered rather than mine, but the principle is the same.
-
Looks great, Nice one Steve and team.
-
Bresser 10x50's
Celestron 12x50's
Celestron 15x70's
Revelation 20x80's
and my faves
Barr and Stroud 8x56 ED's
We also have a number of cheap (£6) 10x25's that were got at Lidl for the kids to use...
-
The issue with the 6"RC, it's quite slow for a DSLR at f/9, so you really want guiding working. If you can guide up to 10 minutes it works great. I was using 5min exposures with my ED80 at f/7.5 and going to f/9 means I needed to hit 7.5 minute exposures or thereabouts (from memory) to get the equivalent exposure. As my guiding test was 20 minutes at f/15 (1200mm), I found 10 minutes at f/9 (1340mm) a doddle.
-
Since then Leo, I have a more expensive lens, and it too focuses past infinity, but also has a distance scale, albeit, doesn't appear to be so easy to use. Glad the processing info was helpful.
-
Gary, I've the GSO variant and use it with a dSLR... weather permitting... which it's not been..
-
Not in the slightest... as John said, the ST80 works perfectly... As a very quick and basic approximation using sensor crop factors, the equivalent focal length compared to 35mm (st80 400mm, RC 1390mm), when using my qhy5v and 450d is approx... st80 3400mm and RC 2224mm, so I'm actually looking at a much smaller area of the sky with the st80 and guide cam than I am with the RC anyway.
I'm sure there's more to it than that, to do with pixel sizes etc... but I have to admit to not being fully au fait with that, and I'm used to comparing focal lengths to 35mm (full frame) to get an idea of approx FOV anyway.
-
Getting some good results from it John.. I got the GSO version from Teleskop Service in Germany... I had some fun fiddling with the collimation off the bat, as you say it took some getting used to just how fine the adjustments were, but I didn't have the other issues you've seen. I too use mine with an ST80 on an HEQ5. I don't have a reducer, so I'm running at f/9 with my SLR, and it seems to be working fine for me using 10 minute subs. I've also used it for lunar imaging, and that's worked nicely. Although I have to admit to not having looked through it.
-
1
-
-
Not really... to be honest Pete... ISO seems to be best at about 400 to 800 (800 I think was found to give the least read noise). So go with 800 (or push it to 1600 and see how you get on). Exposure time is going to be dependent on where you're aiming and whether you're tracking or not... On an untracked tripod, 8 to 10 seconds is your limit before trailling sets on. On the HEQ5, 5 minutes should be a doddle. From memory you want to stop down to f/4 as a minimum to deal with some of the problems... things you wouldn't notice under daylight conditions.
-
The nifty at f/1.8 is silly fast, but you get a lot of coma around the edges (egg shaped stars) you really need to stop it down to f/4 for best performance, but that let's in much less light.
-
Pete, with the Nifty, you're looking at about 8 to 10 seconds before trails set in... As for processing, I posted a few simple examples at the beginning, but that's based on the information MartinB posted (), take a look at that thread. It can take a while to understand exactly what you're looking to do and see , but with practice it becomes easier

-
Good news Pete. We'll look forward to the results
-
You could always leave the knob free of the saddle on the mount. I'm using standard roofing bolts on my tube rings, and they sit proud of the bottom of the dovetail, I just have to adjust the position to the bolt is not in the saddle and balance from there. It might be worth starting another thread, as the rq5 is able to track and this thread is really about using static tripods.
-
Peter, yes that'll work, habit I guess
-
I can't see your kit list at the mo, but if you got any standard skywatcher tube rings the piggy back bolt is a standard tripod thread. Get a dovetail from FLO and mount a ball head on the dovetail.
-
It's up to you really... 10s is a good value... Although, if you're going to be using a laptop and APT, why not mount the camera on the HEQ5 and capture some 5 minute exposures ?? (I found with 50mm and shorter, guiding is not required)
-
Pete, I use manual mode, in fact, I very rarely use any other mode even for normal photography
.I'm not sure on a raw viewer for windows 7, there are a number of plugins that worked for windows xp, and there are applications, Canon's zoom browser EX I use for my astro images, download and pulling into DSS (but then I'm running DSS in a VM on a Mac
)


AP Setup Help Please
in Getting Started Equipment Help and Advice
Posted
I'd suggest, rather than spending money now, as a start, get a dovetail, fit a camera quick release plate system to it, and mount your camera with lens directly onto the AltAz mount. The light weight will help relieve the pressure on the drives. Make sure that the balance is a little to the rear as it'll keep the drives fully engaged. Even in Alt Az you can achieve passable images, up to 2 minutes low in the east and west. Take a look at the posts in
It's not ideal, can be frustrating, but it's gear you have.