


Anne S
-
Posts
598 -
Joined
-
Last visited
Content Type
Profiles
Forums
Gallery
Events
Blogs
Posts posted by Anne S
-
-
10 hours ago, carastro said:
Any-one who hasn't booked will have a job to get in as it is always oversubscribed. Best to ring Kelling Heath and ask to make sure you can get in.
I shall be there as usual in a Caravan on T311. Lets hope we get some clear skies this year, last year was the first one in over 10 years where I didn't get a single night of imaging in 4 nights.
Carole
I managed to polaralign and then it was cloudy! it's bound to be cloudy this time as I've a new camera! Though I did get a week of trying it out at home last month. My first CMOS, an ASI533 for starparties.
-
 1
1
-
-
I'll be there in yellow field with a motorhome, awning and astronomy tent.
-
Like last night!
-
That's good to know. I don't like updating things when they work fine as they are. I'll update my observatory pc first though! I do fancy multi star guiding. That'll help with our wobbly seeing.
I'm on the same version of Sgpro as you.
-
I'm being asked to update my version of PHD to the 2.6.10 version every time I open PHD2, I'm on v 2.5 and have been for several years.
I'm running it through SGPro. Are there any problems I need to know about? I've got a trip to Kelling in just over a month and I my not have a chance to test it all out following the update, given the weather we normally have in Wales! I don't want to do it right now as I'm in the middle of an image using my new ASI533.
-
A couple of days ago I had my imaging laptop which runs Window 10 insist that Ioptron Commander, the Ascom driver for my CEM60 mount had to be quarantined as it allowed access to my computer. I've been using the programme for years! And that's what it's supposed to do.
it was the previous to the current one available now but as it works fine I don't intend to update it until I have to.
There have been several Windows updates over the summer.....
I sometimes think I don't own my computers, Microsoft do.
-
1
-
-
On 24/07/2021 at 09:54, drivera said:
I've got the Starwave 70EDT and I'm very happy with it. It's a lot cheaper than the WO ones and they're all made in China. Here's an image. I used a SX H694 with it to give over 2 degrees field of view.

-
1
-
-
I would start with Altaircapture, I think it's easier to get to grips with and it will make sure the camera is working. It will also live stack for fainter objects. Sharpcap is more versatile and has downloadable instructions. Such as focus measurement etc. I've not used that since 3.1 though as I've moved to Firecapture for my solar imaging. Not done planetary for a long time as I do deep sky imaging mostly.
-
Have you power going to the camera? You get black if you haven't.
-
I watched your video this morning and then reprocessed a close up of the centre of the Heart nebula. Imaged with an elderly Atik320e in April, so not much data even though it was over 3 nights. 900s subs with a L'enhance filter. I was never particularly happy with my original processing. The Hubble style version shows much more detail.
I'll be looking at some of your other videos. Thank you for putting in the time to do them.
-
2
-
-
On 17/02/2021 at 13:49, _steffastrostuff_ said:
I got it, just got delivered
Thank you!
Have you tried the camera yet? I want to replace my starparty camera so I can do wider field imaging. The other option is one of the 533 chip cameras. Incidentally I'm not far from you and a member of Swansea Astronomy club.
-
On 30/04/2021 at 22:15, Starslayer said:
Guys / gurls
I am overwhelmed by the immediate replies at this time. Wife is not well so cannot dwell now but I thank you for your replies and will go from here. I am thinking of going down a well tested route of Celestron SE for flexibility and convenience (weight /
portability) sake. Probably a 6 as I am concerned that the 8 is too big for standard mount and not too much more efficient for what I want to look at. Accessories needed to - powerbanks etc.
I had a 8SE for quite a few years. In my garden I have seen the veil nebula without using any filters. Just a faint smudge but enough to know I was pointing at the correct place. An O3 filtered showed it clearly. The 8 inch was fine on the mount as long as it was balanced. There is a limit to the weight of eyepiece usable with it. I could use a 22mm Nagler but not my husband's 13mm Ethos. It was lovely for Saturn and the other planets. I've seen Uranus and Neptune though it, small dots though with a little colour. Vibrations can be an issue on hard ground but I always used vibration suppression feet with it.
The 8 inch showed much more than our previous 105mm ETX but my husbands 10 inch LX90 showed even more but was too heavy for me. Aperture is everything for visual.
Latterly I moved the 8 inch to a Celestron Cg5 which was much more stable. Still with goto though. Only sold the setup because I wanted to switch to astrophotograpy with refractors.
-
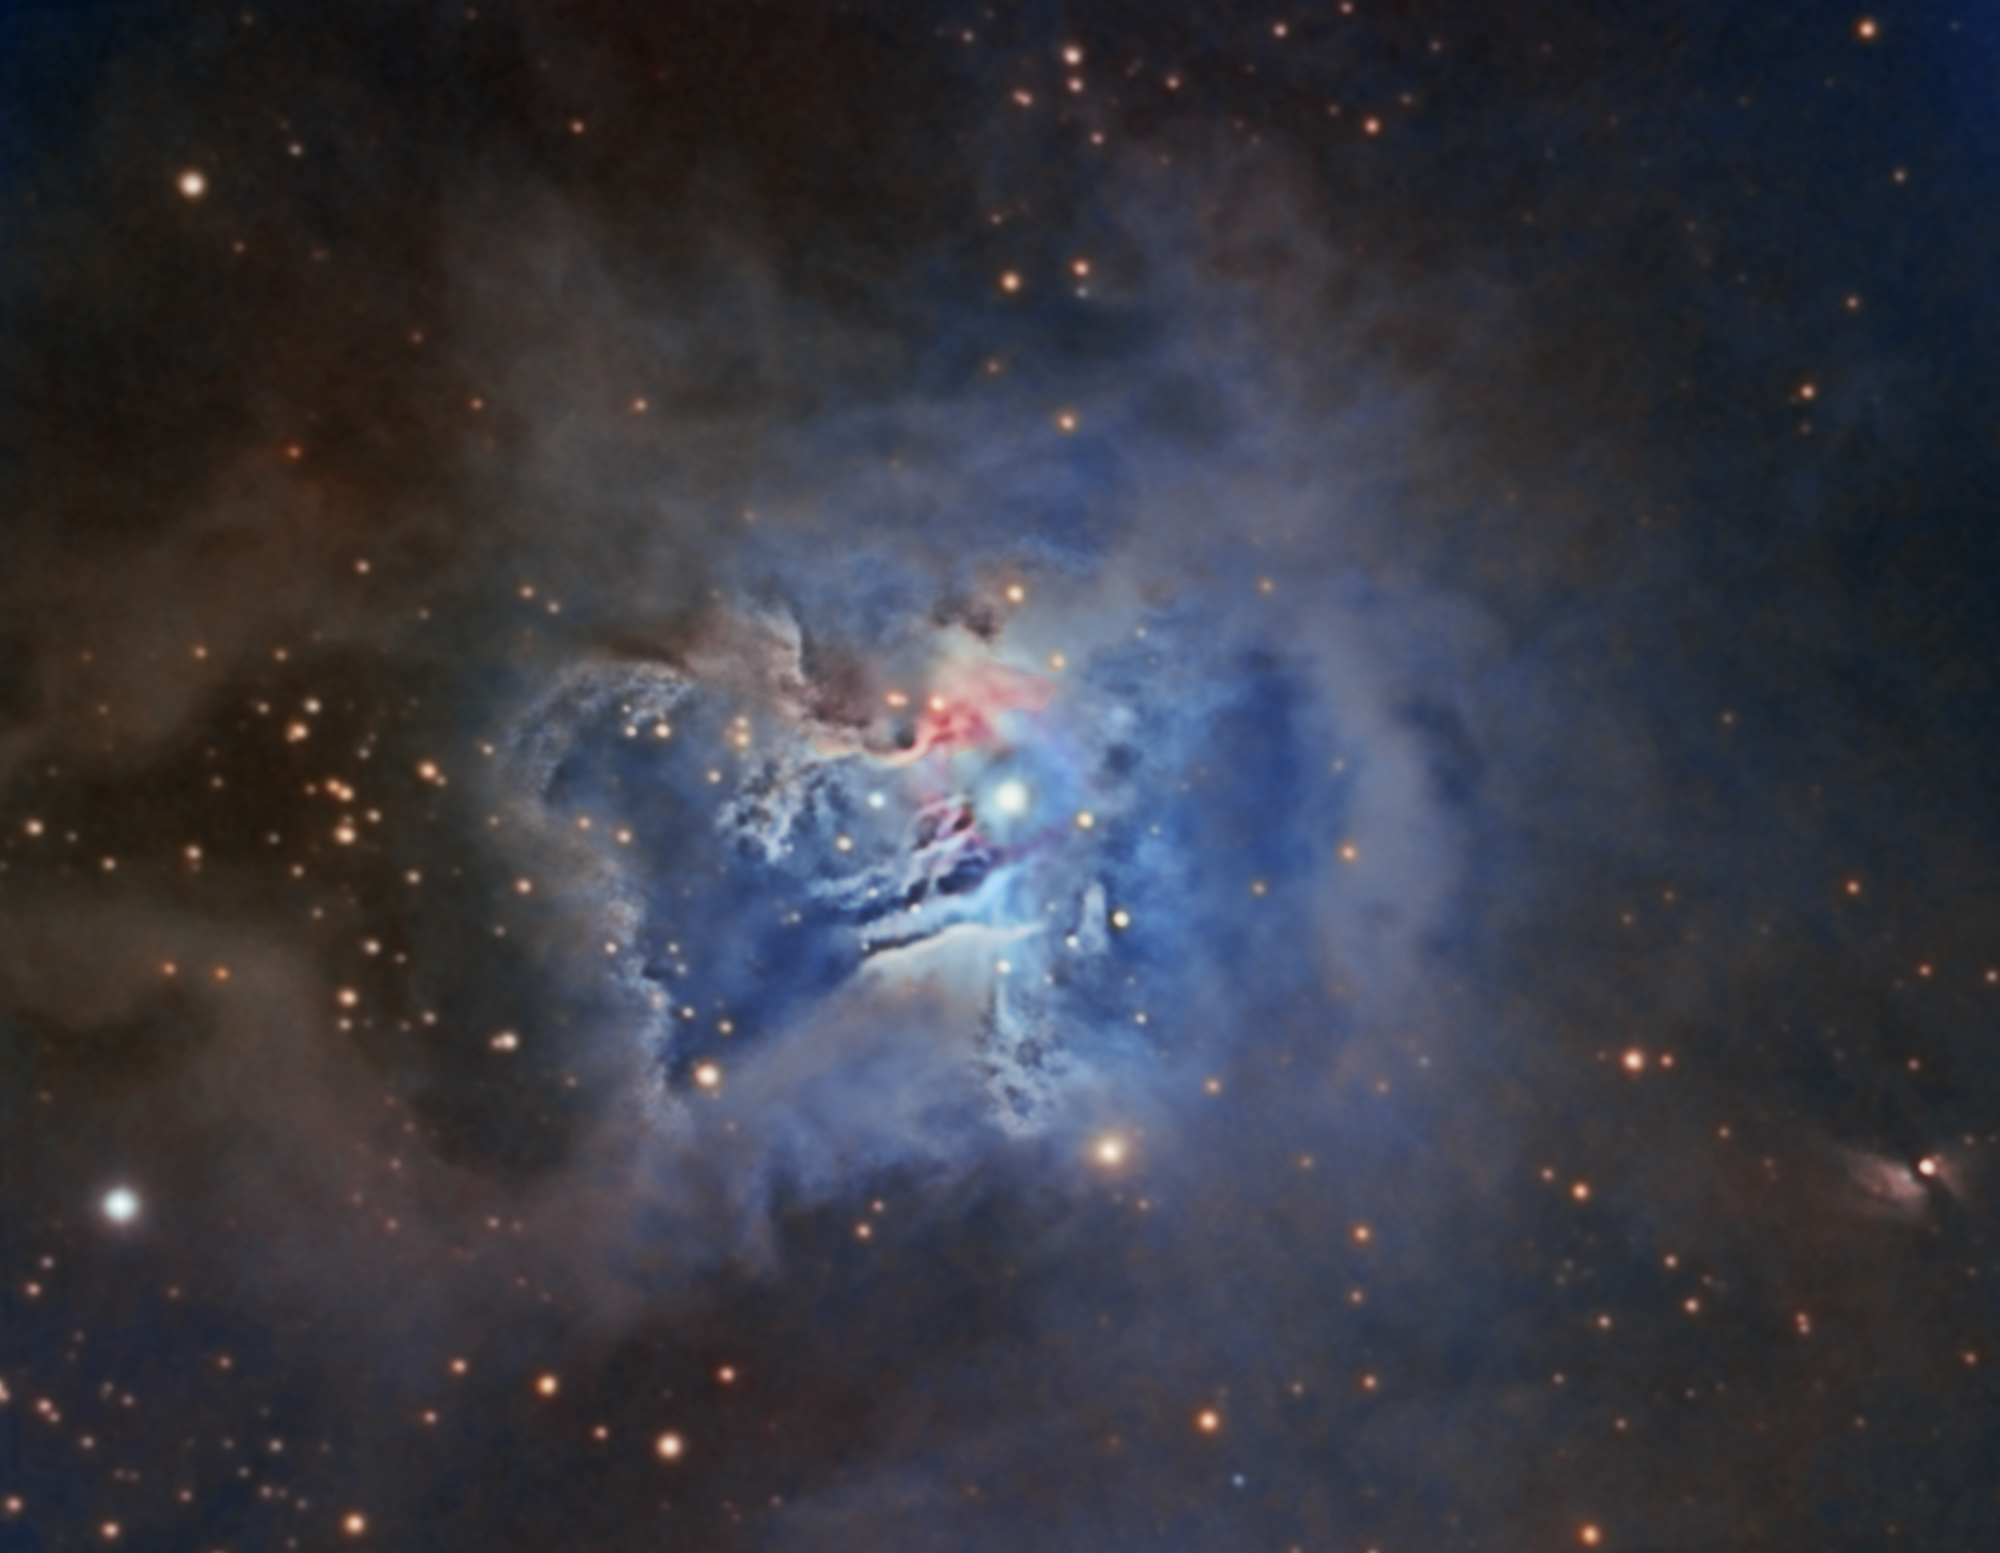
On 04/05/2021 at 16:59, ollypenrice said:
Tremendous contrast and colour variety in the dust. This is an all-time great bit of sky!
What we don't see here are the faint pinks which sometimes appear among the blues around the Iris. I haven't processed the IKI data this time but, on looking through some excellent processing jobs in the thread, I don't see them there either. (I though AnneS had the best hint of them.) I wonder what the IKI camera is and whether this could be a CMOS versus CCD issue. Sara has them bright and clear in this one: https://www.swagastro.com/uploads/2/3/3/7/23377322/iris.jpg
Olly
That explains why you reacted to my version! (My processing is still rather hit and miss)
-
On 19/04/2021 at 10:10, JemC said:
I don't have a reducer just yet but thanks for the tip 😁
I'm probably still going to have to play around with it a little more as i need to attach manual FW to it yet so i assume that is going to throw it off a little,My filterwheel is 22mm thick, 1 inch spacers are 25mm, just remove the relevant spacer. It'll work fine. That was why I switched the 2 inch for the 1 inch as I ran out of inward focus. The focuser has a long drawtube so remove more that you need. The focuser will just be further out.
-
1
-
-
11 hours ago, JemC said:
Thank you for this, found it very helpful.
So this is now how i have my Atik 314L+ mono attached according to this, 4b
Just going to have to wait to try it now as it is cloudy,
If you have a reducer you need to be a bit closer. If you run out of focus just remove one tube. That's why I ended up switching the 2 inch out.
-
1
-
-
Lovely. I take it you're doublestacked.
-
 1
1
-
-
8 hours ago, michael8554 said:
Good point Anne.
So Jem should measure from the rear of the OTA, and adjust spacers before and after the focuser, and the focuser itself, to get the 314L at the same distance as the DSLR.
I'm wondering now if the DSLR is at the RC's "sweet spot", or just some arbitrary point that focuses ?
Michael
I think he should have used the extension tubes with his dslr as per the chart. I certainly didn't have any problems getting focus with my 694. I recall having to switch from the 2 inch tube to the 1 inch when I tried it at night.
My RC6 came with 2 x 1 inch and 1 two inch spacers. It's an Altairastro one, but the same scope is sold by various vendors.
-
1
-
-
9 minutes ago, Anne S said:
Here's my version. All processed in Pixinsight.
RGB image produced from original colour stacks then DBE and Photometric colour calibration. Luminance image just DBE.
Both images permanently stretched then luminance had HDR at level 5 applied. RGB image colour saturated before combining with the luminance image. Light noise reduction using MMT.
Finally check sncr and background colour, gentle curves applied to bring out the dust and brighten slightly.
It hasn't posted my image!
-
1
-
-
1 minute ago, Anne S said:
Here's my version. All processed in Pixinsight.
RGB image produced from original colour stacks then DBE and Photometric colour calibration. Luminance image just DBE.
Both images permanently stretched then luminance had HDR at level 5 applied. RGB image colour saturated before combining with the luminance image. Light noise reduction using MMT.
Finally check sncr and background colour, gentle curves applied to bring out the dust and brighten slightly.
It hasn't posted my image!
-
1
-
-
Here's my version. All processed in Pixinsight.
RGB image produced from original colour stacks then DBE and Photometric colour calibration. Luminance image just DBE.
Both images permanently stretched then luminance had HDR at level 5 applied. RGB image colour saturated before combining with the luminance image. Light noise reduction using MMT.
Finally check sncr and background colour, gentle curves applied to bring out the dust and brighten slightly.
-
2
-
-
Here is is. Look on page 4.
-
1
-
-
57 minutes ago, michael8554 said:
In this image I assume the DSLR is in focus.
The white dot on the DSLR body is where it's sensor is.
But first I would focus on a landmark much further away than a couple of hundred feet, then measure the distance indicated by the red lines.
You need to place the 314L's sensor at that distance.
How you do that depends on what adapters and extension tubes you have, and the amount of focuser travel.
Then put the tin foil with a pin prick onto the front of the telescope, held with an elastic band.
Your current camera mountings are not very rigid for imaging - use threaded connections, not screw clamp fittings that can wobble and cause tilt.
Michael
Have you got any of the extension tubes in front of the focuser? I've used my SX694 with the same scope and I need at least one of them there, can't remember which one! The SX has 17.5mm back focus. I found an instruction manual for the Orion version that showed a diagramme as to which tube to use for various setups. I'll try to find it.
-
1
-
-
I run Pixinsight on an old laptop which has been upgraded to W10 pro. The main issue is that it won't run Starnet as it's missing something in its hardware. Also some of the larger process windows are too large to display properly but if parts of the various options are minimised they work fine. That's due to the screen resolution. As I use this laptop to capture the data I tend to start processing here. I find the various processes run fairly quickly even though it's a Core Duo with 4gb ram.
i don't have the same issues on my 1 year old i7 laptop with SSD.
-
1
-


IKO - SH2-155 Cave Nebula SHO - Processing Competition
in IKI Observatory
Posted · Edited by Anne S
Here's my rendition.
DBE on separate channels, then combined in the Hubble palatte. Convert to non-linear. Remove violet star by inverting image and using SNCR. invert again to obtain blue/gold colour scheme.
Starnet to create a starmask. Extract luminance and perform HDR on that. Saturate colour version then recombine with luminance.
Morphology on Starmask image, then saturate stars a little. Use Pixelmath to add star to starless image.
Slight MMT to reduce colour noise. Use star image as a mask to enable me to adjust the colours slight to strengthen the blue/gold effect. Remove mask. Crop to tidy up edges.
Lovely data, I wish I could do as well.