


michaelmorris
-
Posts
5,287 -
Joined
-
Last visited
-
Days Won
1
Content Type
Profiles
Forums
Gallery
Events
Blogs
Posts posted by michaelmorris
-
-
29 minutes ago, SkyBound said:
This company www.pegasusastro.com build and sell a focus motor controller that at the flick of a switch will control both a high res stepper and a DC focus motor, and its superb as I have one, but it also shows that it can be done, I was going to build the one you are talking about, but then came across this company, and so I got in touch, and they were and are so helpful and built one bespoke for my needs, I can't recommend them highly enough.....
")
but there off the shelf one will do exactly as you require if you decide not to build...
That Pegasus controller looks to be pretty much what I'm looking for. However, I do have two reservations.
1 - The Price. Whilst it is around £100 cheaper that most of the alternatives I've found so far, £270 is still MUCH more than what I guess an Arduino-based system would cost. (On that note, how much would an Arduino-based controller cost to put together?)
2 - The connections. I would have to build and additional converter to allow the 3 different focus motor types to connect to it.
-
 1
1
-
-
12 minutes ago, Dr_Ju_ju said:
The Arduino on its own cannot drive anyform of motor, that's why the 'Arduino' part is usually made up from an Arduino Nano plus a motor driver module e.g. DRV8825, and some other components e.g. power connector etc...
I mount mine in a custom 'black box' and can move it between various OTA's\Motors, so to answer your question, build the right one and you can re-deploy as required..
Thanks
-
My current imaging rig includes an 8" SCT + 66mm apo + an 80mm apo. Both refractors have Skywatcher 'Autofocuser' focus motors - this is serving me fine at the moment. The SCT has a Meade zero shift focuser on the back. This is basically a Crayford focuser with a built-in DC motor.
I am hopefully soon to upgrade from a DSLR to a CCD and I can see a day that approaching when I'm going to look to invoke computer-controlled automated focussing routines. From all the reading I've done this is really only practicable when using stepper motors rather than the DC motors I currently have.
My plan would be to slowly replace the current focus motors with Arduino-based stepper motors. As I can't afford to do this all in one go, I thought that my first step could be to get to grips with Arduino-based systems by replacing my present HitecAstro DC focuser controller with the myDCFocuser Arduino-based system.
https://sourceforge.net/projects/mydcfocuserrelativedcfocuser/
Once I've got the hang of this, I would then add a stepper motor controller to the Arduino and replace my two Skywatcher 'Autofocuser' focus motors with stepper motors.
This would mean using the same Ardiuno to run the DC motor on the Meade focuser and the stepper motors on the refractors (obviously not all at the same time). Is this possible, or would I need a separate Arduino for each focuser or each type of focuser?
Replacement of the Meade focuser on the SCT with a stepper motor-based system would come later.
-
After struggling with an over zealous Windows Defender I finally managed to download the ASCOM drivers for the Lodestar. After configuring the ASCOM drivers for the Lodestar, Sharpcap recognised my Lodestar 2.
Wow, this polar alignment tool is seriously neat. Following the on screen instructions (something I didn't do the first two times I used it
 ) it worked like a dream. I had my mount aligned really well within about 1/2 hour. Even with my Lodestar 2, I still had to use 7 second exposures, but it worked. The next time it gets used it should be a lot quicker.
Thanks for a great program Robin.
-
1
-
-
On 06/11/2016 at 21:48, rwg said:
I guess you are using the ASCOM driver for the Lodestar - sometimes that can lead to odd effects when the ASCOM driver does things in a way that SharpCap doesn't expect (like some ASCOM drivers claim that colour sensors are really mono, etc). ...
Robin
The Lodestar is becoming increasing popular for video astronomy using real time frame stacking software (such as Starlight live) and the Lodestar is in widespread use as the guide camera of choice. Surely Sharpcap's excellent real time frame integration functionality and the new polar alignment routine would both be enhanced greatly by having a specific (non-ASCOM) drivers available for the Lodestar. Is this possible?
-
On 24/10/2016 at 21:39, michaelmorris said:
I've got a couple of items for sale
SX Lodestar guide camera with original ST4 lead and original drivers disk in its original box (£225)
Skywatcher 21 cm Vixen-style dovetail (£5)
Add a Brightstar/Orion clone off axis guider to that list (£90)
-
I've got a couple of items for sale
SX Lodestar guide camera with original ST4 lead and original drivers disk in its original box (£225)
Skywatcher 21 cm Vixen-style dovetail (£5)
-
14 hours ago, Ruud said:
32 mm Plössls have a long eye relief and may take some time to get used to, especially when the exit pupil is close in size to the user's pupil.
Kidney beaning, however, should not happen with TeleVue or any other Plössls as they tend to have well behaved exit pupils. (Kidney beaning comes from spherical aberration of the exit pupil. Until the first generation Naglers this was a rare phenomenon.) Could it be blackouts that you're seeing?
I have a 32mm GSO Plössl. Had some blackouts at first, but got used to the eyepiece, and the blackouts disappeared. I think you too may get used to your 32mm Plössl.
Here is how blackouts occur.

With long eye relief, steady eye placement becomes difficult. The movements of the eye cause blackouts in which the image disappears from one side to the other. When the image is partially illuminated, it is as if a curtain is drawn over one side of the image
Here is how kidney beans occur

With kidney beaning a kidney shaped shadow forms between the centre and the edge of the field, while both centre and edge remain fully illuminated. Kidney beans arise from even subtle eye movements, especially with larger exit pupils. When the eye movements get larger, blackouts will also occur.
Below, a kidney bean occurs as one of the red rays can not enter the eye, yet the more extreme off-centre green ray still can. (The brain inverts what's on the retina, hence the shadow appears below the centre.)

Fortunately, spherical aberration of the exit pupil is, to a large extent, a thing of the past.
Where do these great graphics come from?
-
1
-
-
I'll second your recommendation. Jay does great work and the place is really interesting. Well worth a visit.
-
1
-
 1
1
-
-
Thanks for the link. Just taken off the front cell to measure the tube diameter - it's 99 mm.
-
I'm presently working out my options for upgrading the set up in my observatory. Part of this process involves working out how to mount the scopes.
I presently have two refractors, a Skywatcher 80ED and a Revelation 66mm ED. One of the possible configuration I want to research is mounting the Revelation 66mm ED on top of the Skywatcher 80ED. To achieve this I would need to mount the Skywatcher 80ED in a pair of squared off tube rings, similar to those offered by William Optics (example below).
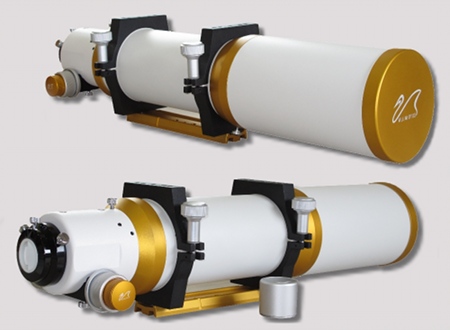
Does anyone know of any company that make a similar style of tube ring that will work with the Skywatcher 80ED?
Thanks
-
Sorry for the Brevity, but ... WOW!
-
Celestron 15 x 70s. The best £55 I have spent on astronomy.
-
I have one of the very early Xagyl wheels which appears to no longer work. I've been told by the manufacturer to try uploading the latest firmware from their website, but this just points to a text file with a long string of letters and numbers on it. I guess this is the firmware. It gives one no idea how to load it or what the risks are if you get it wrong.
The manufacturer said they would get back to me about my problem, but that was months ago and I've heard nothing since. My experience of their customer support is very poor to date and at the moment I would find it very difficult recommending these to anyone.
-
Another set of great resources, thanks.
-
Great guy. Bought a modified 1100D from him last year and I couldn't be happier with either the camera or the service.
-
Over the last 18 months I’ve been upgrading my deep sky imaging capability. At the beginning of the process I was imaging with an unmodified Canon 1000D through my Orion 80ED. Whilst I’ve been pleased with some of the pictures, I’ve always struggled with the noise inherent in the 1000D and gave up trying to image nebulae due to the poor Ha response on the unmodified 1000D. I’ve since added a Skywatcher focal reducer and a Hutech MFA in-camera IDAS filter, both of which have yielded noticeable improvements.
Last week I took the plunge and ordered an astro-modified Canon 1100D from Juan Fierros at Cheapastrophotography (Does exactly what is say on the tin!). http://cheapastrophotography.vpweb.co.uk/
Firstly, customer service – superb. Juan was very helpful with advice on the merits of various options. I looked at three different sources of pre-modified DSLRs and plumbed for Juan because his cameras are very competitively priced and he shims the imaging chip after removing the filter so the camera is still 100% compatible with focussing on infinity and using autofocus on all Canon lenses. He also tweaks the onboard default white balance so you don’t have to use a custom white balance option on the camera. The only downside is that he doesn’t honour the manufacture’s one year guarantee. However, at only £269 for an astro-modified factory-refurbished camera with just 900 activations one can’t complain.
The camera was delivered quickly and at every stage Juan kept me very well informed. The camera was well-packed in the original manufacturers packaging with all the normal retail bits (charger, strap, leads, disc written manual etc.) with a free SD card in thrown in.
As far as I can see, the shimmed chip is orthogonal with the lens mount and is free of dust. So far, I’m really pleased with the camera. It autofocuses fine on the four Canon lens I possess and I’m getting nice crisp images of star fields htough the 80ED. The only thing left to test is to image an Ha target (tonight hopefully).
-
1
-
-
A great loss to amateur astronomer. A very fine observer and populariser of astronomy and an inspiration to many (including me).
RIP.
-
1
-
-
Whilst APT is very good, Backyard EOS is not very far behind and has (I think) a more intuitive interface.
-
Thanks Rob, very useful. By the way, the observatory looks great.
-
Hi Peter
Thanks Peter, these are brilliant.
However, the link to the D-L maps seems to be broken.
Regards
-
My understanding is that a good rule of thumb is a minimum of the same diameter as the scope you're mounting on it. Obviously, if your sticking a very long focal length refractor on a heavy mount on top of the pier, you might want to add a few inches to the pier diameter. You really can't over-engineer a telescope pier.

 ) it worked like a dream. I had my mount aligned really well within about 1/2 hour. Even with my Lodestar 2, I still had to use 7 second exposures, but it worked. The next time it gets used it should be a lot quicker.


Arduino focus control for DC AND stepper motors?
in DIY Astronomer
Posted
I've decided I'm going to start off with a simple DC motor only system to get me acquainted with Arduino first . I've just ordered a bundle of bits on Ebay so that I can build a myDCfocuser system. https://sourceforge.net/projects/mydcfocuserrelativedcfocuser/ . This will then become part of a mini-hub system that includes 12v power distribution.
My plan is to get this up and running, then switch over to a stepper-motor based system when time and budget allows. I'll keep you posted with progress.