


.jpg.c15335a7bbfd14b74ff72a93d6a5e266.jpg)
JohnSadlerAstro
-
Posts
1,155 -
Joined
-
Last visited
Content Type
Profiles
Forums
Gallery
Events
Blogs
Posts posted by JohnSadlerAstro
-
-
Hi,
Last night was quite sub-optimal in terms of imaging weather, lots of moon and not very good transparency, so I decided to have a relaxing visual evening. My 130P-DS and NEQ6 pairing is hardly a typical visual setup, but I wouldn't swap them for anything!
 I plugged my ears into some Stellardrone and sat back to enjoy the sky. First up was the moon. At f/5, and with the 28 mm 2" eyepiece it felt rather like looking for flies on a searchlight, but once my eyes had adapted i was amazed. The small-scale "rippling" seeing was non-existent. The sharpness of the image was incredible, I was staring down on Copernicus, seeing for the first time the crater-lets on its half-illuminated floor. On the side nearest the terminator, dazzling terraces showed with almost cartoon-like clarity, and 3 or 4 central peaks with their tops picked out by the sun. Truly a breathtaking sight. I got a quick through-the-eyepiece snap with my phone, its nothing like the actual view though.

The low-magnification view began to get a little painful after a while, so i switched to my 6 mm wide-field eyepiece and moon filter. The pointy shadows on Copernicus' floor were shorter now, so I moved on south. Drifting down the terminator while looking for Fra Mauro, i was surprised by Straight Wall, which looked like a paper-cut in the moons surface.
I also had a look for the Hadley Rille, both it and Hadley were visible against the mountains. --Note: Theres a chance this wasnt hadley rille at all, but some other shadows from the low illumination angle.--
Once the moon began to get a bit low over the houses, i decided it was time for some deep-sky targets. First up was the Virgo Cluster, which was far too close to the moon--I could only see M49 as a pale blob against the glowing sky. Next I moved onto M81/82, they were visible, but not particularly clear. I could distinguish them, though as M81 appeared as a broader patch of light compared to the cigar's narrow shape. Next up was M106, my first time looking at this target. I was interested by its shape, it seemed irregular in one direction, but there was very little to see due to the moon and sky conditions. Finally M51, which looked quite clear, the double shape was apparently (just), and the main galaxy was slightly extended. Unfortunately some haze moved across the view after a while and it disappeared.

By this point Cygnus and Vega were beginning to rise, with the milky way. So many stars! I sat for ages just looking up at them...forgetting. Ive never felt nearer to the stars, despite the fact that this was a pretty mediocre night.
The Dumbell Nebula was just high enough, so I took a quick look. Hourglass shape was clear, but not much else, there was high cloud around again by this time, obscuring the lower targets.
Then I got cold and went in.
All round a very successful evening, I think. The seeing was incredible, very surprising with transparency as good as it was.
John
-
 6
6
-
-
On 11/05/2019 at 23:12, Uranium235 said:
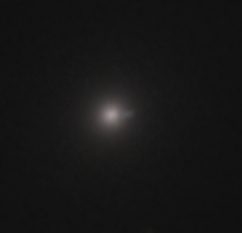
Have you checked if the jet correct? If it is - im impressed! Jets are something i've been trying to capture for years...lol. I dont think I have a close up of that galaxy in my archive, so I'll have to get some fresh data while i still can.
It might be worth me getting the 178 on that for some close-up action... and possibly enhance the jet slightly with some creative layer masking in Ps.
Hi,
It's something I definitely wasn't expecting! The jet is in the correct direction though, and is in the opposite direction to the coma. It's also strongly luminous in the blue.
I would suggest disregarding the standard method of taking short (<1min) subs, my ones were 120 and 200 sec, at iso800, I believe. It's quite possible to get the galaxy core + jet without too much clipping.
Good luck!
John
-
1
-
-
Hi,
Just a small offering for today, I have a Markarians Chain image in the works at the minute, its very poor quality though so looking at the above I might wait until page 105
") . I also want to work on identification of galaxies in it etc before releasing. Part of a 3h integration with my 1000d and NEQ6. 120 and 200 sec subs, iso 800.
. I also want to work on identification of galaxies in it etc before releasing. Part of a 3h integration with my 1000d and NEQ6. 120 and 200 sec subs, iso 800.
However, I can confirm that it the 130pds can indeed show the relativistic M87 jet, even when a newb with a potato for a camera is operating it, who is by no means a collimation expert! ? This is right at the bottom corner of the image, so theres quite nasty coma, which I think reduces the resolution of the jet somewhat. Overall, a very strong testament to the performance of the 130PDS.
John
-
4
-
-
23 hours ago, MoonNut said:
Hey Mate, don't forget, you can always sell a kidney
I would advise against this, I caught a nasty cold after selling three of mine to buy an neq6.
I wonder how small the fov would be on that 40in though?
John
")
-
1
-
-
Hi,
I cant truly say ive ever suffered from aperture fever, but I did suffer from the more rare but arguably more dangerous mount size fever a while ago. Thankfully budget restrictions stopped me at an NEQ6.
My message to anyone thinking of "going big" is really, really really think about weight and physical size. Its easy to say, "ill carry 25kg easy!", and no doubt most of us would be quite able to do so. However if you're getting out of bed on a cold night to do that, it really puts a fresh light (sorry
) on the entire situation. Also, if you aren't feeling well or are worn out, a weight-lifting session prior to observing is irritating. If you're a setup-each-time sufferer like myself, breaking up a setup and putting it back together again uses up valuable time! This will apply to dob users too, no doubt.
I can say quite honestly that my favourite setup of all time was an alt-az AT Voyager with a 90mm achro on. I could go out at any sign of clear skies, and literally carry the entire setup in one hand. Sometimes convenience truly is better than performance.
John
-
4
-
 1
1
-
-
Hi,
Thanks for the information, that will be really useful!
John
-
Hi,
I'm rather out of my depth here, I normally work on visible wavelengths but the recent bad weather has meant I haven't got out for proper imaging all year so far. Theres little hope of the weather changing and astro dark ends soon, so I have been looking around for a bit of an alternative as a day-to day, educational pastime to last until I go to uni, and hopefully past then. Radio astronomy looks really interesting, but there doesn't seem to be much information about achievable amateur projects or what options are out there etc.
I have a few questions, I'm afraid they are very newbish ones, perhaps someone could give me some advice though?
1. Is there anything interesting that amateurs can actually accomplish with radio astronomy, and what should my expectations be?
2. How much money will I need to throw into it before I get anything interesting back out?
3. How much radio and electrical knowledge will I need before beginning, i.e. is this a field for die-hard hams only?
4. Is there a good source of information about the field?
5. Is it fun?
Thanks for looking,
John
-
1
-
-
Hi,
Loving the fracs, but it's time for a newt ?!
The weather has been bad recently, but I did get out to collimate the polescope and troubleshoot the alignment issues I had last month. All round a successful evening, with everything resolved!
Cloud was on its way but I got to see a few galaxies before putting the setup away. ?
John
-
8
-
-
8 minutes ago, Uranium235 said:
proper calibration to make it decent:
Hi,
I'd say it looks pretty decent already!
Really nice photo, I'm a fan of mono fuzzies.
Sadly these galaxies are just a little to small to be a realistic target with big 1000d pixels, but in my opinion they look better than the trio.
John
-
1
-
-
1 minute ago, Astrokev said:
It would probably be a good idea for me to grease the southern bolt. I have a "modified" bolt which is supposed to be stronger than the SW original, but the thread has a very loose tolerance in the female thread of the mount. Grease would help this a little, would give slightly smoother turning, and would help resist corrosion. Not sure what metal it's made from but it certainly ain't rustproof!
No, the metal doesn't seem to be very rustproof at all, which is disappointing. They seem to rust quite nastily in exposed screw threads etc.
John
-
1
-
-
2 hours ago, Grumpy Martian said:
Can you use the coma corrector to improve the views for visual observing?
Or is it just for imaging.
Yes, its pretty essential if you're using the 28mm 2" eyepiece that comes with it. Spacing hardly matters, anywhere in the optic train improves the view!
John
-
1
-
-
I'd stick with my 5" f/5 130PDS.
With a coma corrector though. (which costs as much as the scope, so hopefully thats allowed)
John
-
2
-
-
Hi,
I can sympathise with many comments on here, my NEQ6's altitude is very messed up! The Synta Cheese-Steel southern bolt is so bent that the end of it describes an inch-diameter circle when rotated! ? Thankfully the mount can still be polar aligned with just the Northern bolt (which is under almost 0 stress, thank goodness), I think I need to do a rail mod at some point. The "tongue" in the base of the head looks a bit like a half-chewed digestive, I have no clue why they don't make it out of the same stuff as the az tongue on the tripod head. ?
I think that bolt may need cutting through before it can be removed, although it will instantly increase in strength when I try to file it through, no doubt!
I'm not entirely sure how the southern bolt got so bent, previous owner used it with a heavy setup in southern france though so it may be due to that. ?
John
-
We need one for nokia bricks.
John
-
1
-
-
Hi,
Thats a really nice photo @vernmid! ?
The small fuzzy is UGC 5302, roughly magnitude 15.
Here's its simbad page: UGC 5302
Ive found colour balance is very difficult on M81 and 82, you could try reducing the blue saturation in the background, though? I love the stars--what Coma Corrector are you using?
John
-
1
-
-
Hi,
I'm afraid I cant contribute to these amazing deep sky photos, there has been a bad lack of clear skies recently. However, on Thursday last week some haze came in, perfect for lunar photos! I took this photo of the Apollo 15 landing site, the illumination wasn't quite right, I needed to image about 12 hours earlier I think. The brightness range in this area is crazy, so some areas are a bit overexposed. The barlow is an absolute abomination but it seems to work reasonably well in mono mode, that way the CA doesn't show!
I probably ought to upgrade it!
130PDS on NEQ6
ASI120MC with default 2x SW Barlow
Around 10 min vid (15,000 frames) stacked with AS2
Processed in Registax, Star Tools and Gimp.
JPEG compression has slightly reduced the resolution, which is around 800 metres/pixel in the original TIF, I believe.

John
-
6
-
-
2 minutes ago, jjosefsen said:
Thank you John, very interrestign approach!
I plan on giving collimation a whirl tonight, will be interresting to see how it all goes.
I've been reading various sources of information, and Astro Baby's seem to be pretty well thought out so going by that tonight.
Thanks!
Yeah, those are well written and explained.
I wouldn't recommend trying my method for now, it needs some more work to 100% prove that it works and to sort out some miscalculations etc which cropped up!
John
-
1 hour ago, wimvb said:
That's a new approach to collimation. Just 2 questions:
1. How is your collimation now according to the Cheshire?
2. Can you post a pic taken down the drawtube, showing how the secondary is aligned to the focuser?
Hi,
1. The collimation was "correct" according to the Cheshire on all of the images, with the secondary centred and the primary dot lined up etc. However, it has been around 8 months since I collimated last, and I think things have drifted a little, theres a tad more coma than usual in some parts of my latest subs.
2. I'm planning to re-collimate next week in time for the new moon using this method so I will post up some shots once its properly done, but here's what it looks like atm.

John
-
1
-
1
-
-
On 28/12/2018 at 13:31, RolandKol said:
Hmm, can you please explain this part in detail? As I spent lots of time placing the secondary using Chesire and col.cap and I dont think I managed to place it perfectly
19 hours ago, jjosefsen said:Thanks!
Flats with ccdware ccdinspector?
Hi,
As far as I know it isn't a standard method of collimation, I had to develop it after my Cheshire showed the scope as collimated but my subs showed severe coma and distortion across the upper right hand third of the fov.
This drawing sort of explains the idea, sorry about the quality!

The main concept is that coma and *secondary* light-cone misalignment are related when primary misalignment is removed. Image coma and vignette are in the same places as each other, when the primary is collimated relative to the secondary. In other words, the method can only adjust the secondary and therefore requires use of a Cheshire to keep the primary constantly aligned with the secondary throughout the process.
To get a flat, I simply take a quick shot through the scope with my laptop screen open in Notepad, and then take the result into GIMP or StarTools to do a full desaturation and a savage clip/stretch. This was the result from the scope before any secondary adjustments, bear in mind that at this point it was "perfectly" collimated according to the Cheshire *and was rotated/centred almost perfectly, too*.
The dark gradients were indeed in the same place as the bad coma, and they fell in the position I had predicted.

As shown on the diagram, I then worked out which direction on the photo was which direction for the secondary, then started to adjust. Throughout the process the corrections were perfectly logical and followed my 'hypothesis'.
Note that the same stretch has not been applied to each flat, I altered the black point etc to optimise each one for the section I was trying to clean up. Shots 1-3 below show me getting the vertical (horizontal for the secondary) axis correct, then numbers 4-5 show me rotating the secondary into place.


After a bit of work I got this ^.
Most of the adjustment I had to make was rotation on the secondary, (up is to the right on the photos, so it was drooping a bit) and a little bit of centring with the vanes; I made sure that the primary was correctly adjusted after each movement of the secondary before I took the flat to estimate mis-collimation. I was then able to get almost entirely coma-free images.
Hope this helps
John
-
2
-
1
-
-
Hi,
That's looking really good. ?
Secondary collimation is a pain with the PDS, I used flats to get the rotation right in the end, and it worked quite well.
John
-
4 hours ago, Stu Wilson said:
Im gonna have a shot at that with my QHY8L on SW200P next clear night.
Love the colours ?
Thanks!
I'll keep a look out for that, I'm interested to see what it will look like with more resolution!
5 hours ago, Susaron said:A new objective for the big list.
Anyway I am waiting for the QHY 550M to shot small galaxies and faint planetaries with the SW130PDS, but this result is tempting me.
Eyy, its about time the galaxy gets some attention, searches suggest its not a common target! ?
A word of warning--you'll need long subs, as it does have a low surface brightness--mine were too short really and found that teasing out the arms was quite a challenge.
Thanks for the likes, kind words and encouragement!
John
-
Hi,
I hope you get on well with your choice!
One thing I will say about the EQ5-It looks waay better than any other EQ mount on the market!
John
-
33 minutes ago, serbiadarksky said:
I just saw this topic.
My first plan was to go for a 150PDS and EQ5 for imaging (with guiding etc)
Than I saw the 130PDS and wow I am in love with it!
Will it be totally ok to do imaging with the 130PDS instead of 150PDS on EQ5 Pro goto? The 150PDS is just under the limit, so I guess the 130PDS will work perfectly with that mount.
Hi,
Yes, for size and weight those two are very nicely matched. However, I would just warn you about using the EQ5 for guiding--I tried it and it was quite frustrating, I ended up upgrading to a used NEQ6. It might be worth considering an HEQ5, which is really designed for astrophotography--it is also a bit sturdier so it will be able to hold the 130 really steady.
Hope this helps,
John
-
Hi,
My first data this year! I cant believe its been so long, but finally I'm back to imaging again! ? The NEQ6 worked a dream, an average of around 1" total RMS over the night, for 4 hours! I was able to keep around 80% of the frames, too.
NGC2403, A difficult target that's probably a NASA copy-paste of M33. ????
130PDS on NEQ6, Guided with ASI120MC and 50mm finder
1000d, 200sec subs at ISO 800, 3hr 30mins
DSS, PHD2, GIMP Star Tools
It's a really exciting area of the sky, loads of galaxies and some beautiful colour contrasting binaries. The processing is pretty awful, but there was a really large gradient on each side of the image that was a big pain to remove and took most of the colour with it.

I put picture alongside some 100x100 crops to highlight all the little fuzzies.

And then compiled them into a table, because the weather was bad.
(Square brackets are my data, SIMBAD and the NED are disappointingly incomplete)

It's a testament to the miraculous abilities of the 130PDS that I could catch a magnitude 19.4 active galaxy with very newbish processing, a bad camera and a complete lack of experience over the 12 months.
Clear skies!
John
-
10
-


A Chill (y) Evening In Space
in Observing - Reports
Posted · Edited by JohnSadlerAstro
Hi Stu,
Thanks! The galaxies werent easy at all, i would agree than M82 is the better of the pair, visually.
Oops, my error! The optician says my eyes are ok but they would have to be very sharp to see Hadley Rille at 25x I think i put Hadley in the wrong section -- if i remember right I tried to spot it with the 28mm eyepiece, but realised it was far too low mag, so switched to the 6mm in order to spot it. (Which gives just over 108x). The crater was quite easy to spot, but the rille was only a hint of a shadow near to the mountains. There is a chance my eyes were making it up, or got confused with shadows from the mountains.
 ")
I'm pretty sure it is possible to spot with me setup though, this was with the same scope and my asi120 on a night with poor seeing and a bad lighting angle.
Thanks for pointing out that mistake.")
John