


RikM
-
Posts
8,440 -
Joined
-
Last visited
-
Days Won
2
Content Type
Profiles
Forums
Gallery
Events
Blogs
Posts posted by RikM
-
-
Oooh, I like the midday - midday layout

You've got the green boxes to line up with the nightime as well
 How did you manage that?
Thanks loads.

-
You can get 2" twist lock self centring adaptor that adds about 35mm extension and replaces the normal 2" thumbscrew extension. You still have the two thumbscrews on the focuser, but you only have to do them up once when you install the adaptor. I can't find a link at the moment though.
-
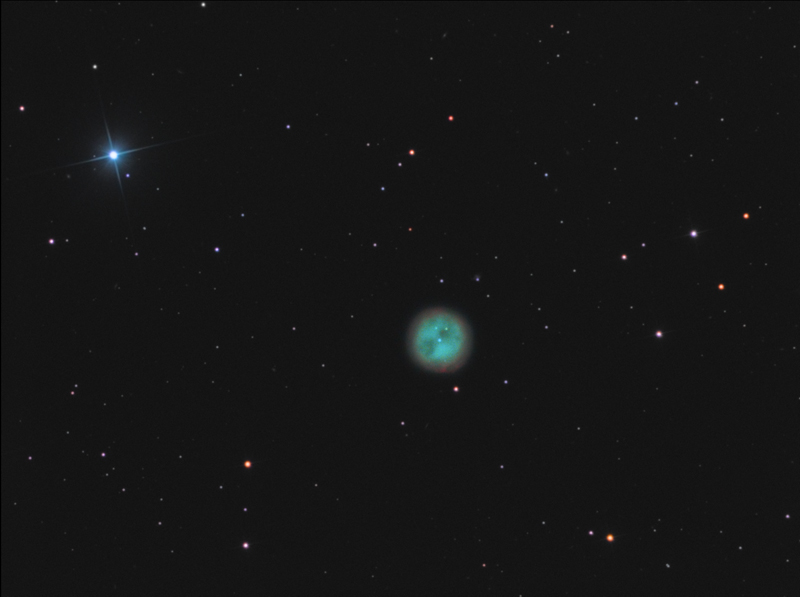
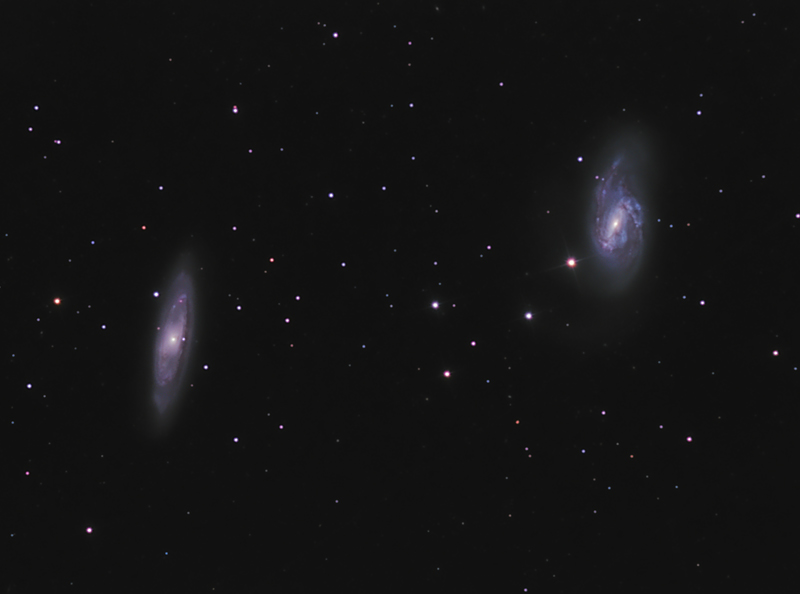
I have been hoping that people would start posting great images from the 130PDS since it was released. I think the slow uptake was that it was perceived to be 'too cheap to take seriously'. I think it is cracking telescope. If it had been available when I started, I would have had one for sure. As it is, I have the 150P and it's just the same but with a tiny bit more focal length. They are close enough that I don't intend to swap to the 130PDS but if something happened to my 150P I would get a 130PDS as a replacement.
Here is a couple from the 150P with an SXV-H9 and Baader filters on an NEQ6 with a QHY5 finderguider.

-
 18
18
-
-
She does have a mirror page with a more child friendly title https://www.facebook.com/ScienceIsSeriouslyAwesome I find some of the posts very interesting and it is nice to see 'Social Media' trying to spread knowledge. There may be a lot of dross posted on FB but they are your friends.
-
ive bought this one today Starguider Eyepiece Carry Bag / Eyepiece Carry Case
It does look nice but seems a bit steep to me for a soft case.
-
I am most certainly going to give that a go, thanks for posting
-
... the kit to connect my nikon is not bank busting, and should get some good results of the moon.
Yes absolutely
A t-ring and a nosepiece and you should be good to go. If you can lock the mirror up before taking the shot, you should get a sharper result
-
I really don't want to put a downer on such a wonderful gift but this is totally not the right telescope for astrophotography with a DSLR.
The Skymax has a very long native focal length and very slow focal ratio, this makes it ideal for planetary viewing and imaging but a Nikon DSLR is not the right camera for planetary imaging. The chip is too big really, planets are very small, and Nikon tends to be not well supported with software. For imaging planets, most good images come from specialised fast frame rate cameras or even modified webcams. Cameras that can take many hundreds of exposure, usually as a video clip, which is then post-processed with stacking software to produce the final image. You would want an EQ5 at minimum for this due to the focal length mainly.
DSLR cameras are much more suited to astrophotography of large faint deep sky objects, but for that you need a shorter focal length and much faster focal ratio optics than a Skymax. For DSLR you want to be around f/5 ideally. You will also be using very long exposures. These objects are very faint. Very long exposures means you need a hyper-accurate tracking mount. the generally recommended minimum is the larger HEQ5 mount, and you will probably want to add an autoguider at some stage.
If you want to stick with the Skymax 150 telescope, and your stated budget, I would be inclined to get an AZ4 mount and just use it visually. It is a wonderful visual scope, especially suited to viewing the moon and planets but with enough aperture to show you some of the smaller brighter deep sky objects as well
Forget about astrophotography for a while. Get yourself a copy of Making Every Photon Count by Steve Richards and do a bit of homework first
-
Update
For Christmas this year my wife got me a Pentax XW 5mm and a lens pen. This meant I also needed a swanky new case to put everything in

Merry Christmas everyone

-
3
-
-
Very good posts indeed Rob and the sketches are bang-on
Would be good to see some comparisons 4" to 10" if you have them -
1
-
-
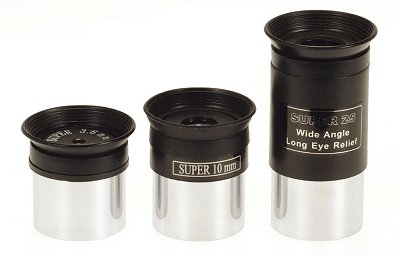
Skywatcher often bundle non-standard eyepieces with OTA packages. The Evostar ED Pro telescopes come with a 2" 28mm LES, whatever that is. The closest thing on the OVL (Skywatcher importers) web site are the LER eyepices, but they only list 15, 20, & 25mm. No 28mm option in sight.
-
The MA's have plain metal bodies and look like this:
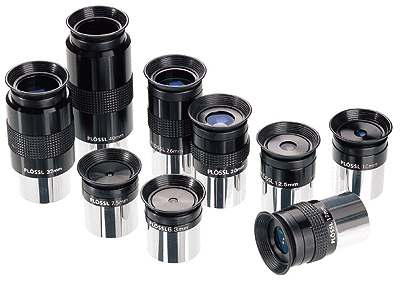
and the Plossls look like this, the longer FL have a rubberised grip:
-
I have always had an interest in space. The first film I can remember seeing at the pictures is Star Wars. I don't know if that was released in '77 or '78 in the UK but I would have been 5 or 6 anyway. Shortly after for either Christmas or Birthday I can't remember my Grandparents bought me a 60mm Prinz Astral 400 (I guess it was from Dixons). It got set up and pointed at the moon or Saturn once a year for the next 30 years but that was as deep as my practical 'astronomy' went.
Some time 2009 I took my kids to @Bristol. We went in the planetarium and they were both fascinated. All they way home to Glos. It was 'you've got a telescope Dad, show us all that stuff. We want to see the seven sisters, we want to see the ring nebula'. Well of course a 30 year old 60mm refractor on a wobbly wooden tripod isn't much good so I bought a pair of binoculars (Patrick Moore said that was how get started). It turned out that I don't get on with bins for longer than about 3 min. I come over all queezy, but not when using a telescope so I set out to see what such a thing cost and was pleasantly surprised to find that I could afford something worth having. In the course of searching I found my way to a wonderful forum full of people willing to pass on some of their vast knowledge
I was all set to purchase an 8" Dobsonian, when both my wife and my best friend said 'as soon as you look through it you're going to want to stick a camera on it and share it with people'. I didn't believe them, but I trusted them, and a quick phone call with Steve at FLO confirmed that an 8" Dob wasn't the right choice for me but my budget would cover a 150P on a driven EQ3-2 which would get me started at least.
'Hooked' isn't word. I would say committed, my wife would say I probably should be
Since getting that scope I have spent almost every spare minute either stargazing or mooching around on SGL. Both my Sons have telescopes, my two brothers in law have scopes, I have four (including the 60mm Prinz in its box in the attic), I look after two others for my astro-society, and I am a very much happier, healthier, more contented (if poorer) man than I was. Long may it continue -
2
-
-
Looks very similar to my late 1970's Prinz Astral 400. I still have it and it gives good views of the moon and you can make out the bands on Jupiter and clearly see that Saturn has rings. Actually, with a proper Baader film filter in front of the main lens, it makes a very fine white-light solar scope.
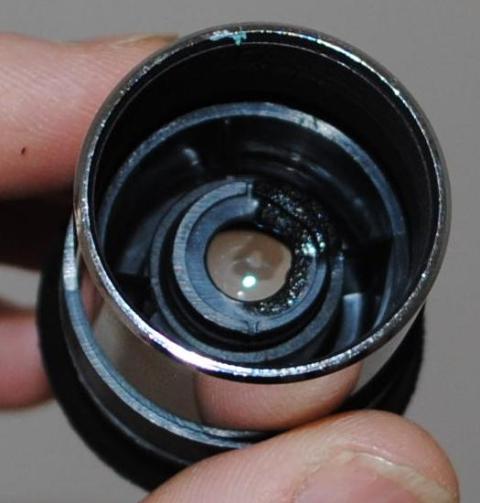
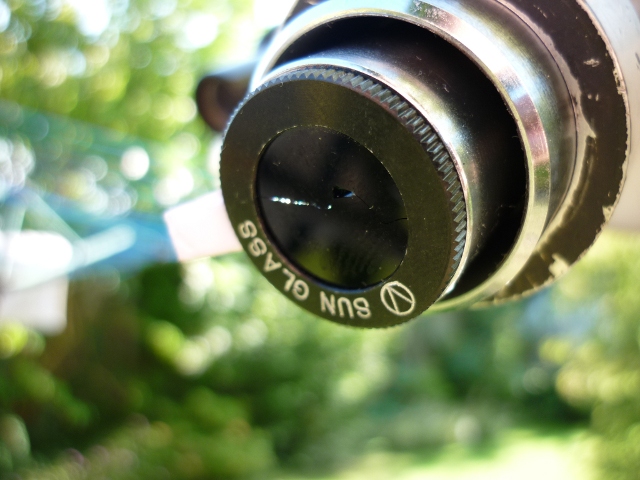
If you do have the little screw-in eyepiece 'sun' filter, please take a hammer to it. They are not safe at all.
-
I placed an order for an Explore Scientific 68° series 28mm eyepiece on the evening of Sunday 24th. I received a confirmation email on Monday and the eyepiece was delivered via UPS safe and sound on Thursday 28th. Prompt and efficient service, thanks very much

They even used brown paper and foam to protect the EP during shipping rather than the clouds some suppliers use, so I was able to give it a test drive on the first night
-
I have a question regarding the difference between the EQ5 with dual axis motors and the EQ5 with synscan kit added.
As a 200p/EQ5 user weight is always an issue, i'm really hoping to improve my tracking by using a finderscope guider - as my synscan box has the 'autoguider' input i'm a little confused as to how my set-up will connect to a finder/guider.
Also what i'd need to do, and/or buy, in order to make a guidescope from the 9x50mm finder and a webcam, and whether I can use something like Ascom to increase things like tracking and polaralign accuracy?
Basically, I have the goto and want to try guiding with lightweight/inexpensive finderguider - can anyone help?
Regards
Aenima
If you have a 9x50 straight through finder you just need a guide camera with an ST4 output, an adaptor to connect the camera to the finder, ST4 and USB cables. ST4 to go between camera and mount and USB between camera and laptop, then something like PHD running on the laptop. This controls the guide cam and sends the guide corrections to the mount.
-
He certainly inspired me to begin looking upwards. End of an era indeed.
-
I made one earlier this year, cant post pic but theres a page on it here
http://www.astro-bab...ase Project.htm
Scroll down to tha last bit of the page and there are some pics of the finished item.
That is a real work of art
-
I don't know BackyardEOS, but APT is a super program. Very easy to use and has great features.
-
The 30mm XW is bigger than I expected.
-
Agreed. About 20 years ago i can remember my nephew having a telescope for christmas one year claiming to be able to see rings of saturn and the usual stuff only for it to look like a spec.
As for astro-imaging (and ill probably be hated for saying this), im still sitting on the fence where that is concerned as, and this could be me being naive as well due to my lack of experience, but from the little i have read on the subject one takes a video clip of an object, then runs it through a bunch of computer software to stack the frames, adjust colours, magnify etc. which is basically manipulating the image so the final product, as awesome as it looks, is nothing like what was actually captured to begin with.
Going back to the original subject tho, they should have some sort of message on the packaging saying the views are not taken from the actual scope, with maybe some pictures on the box of what one can actually expect to see through the purchased scope.
I also image, so get the best of both sides of the hobby. It is true that you do take many images and stack them, then run them through software, but this processing is to correct for flaws in the image like thermal noise, or light pollution and building up the exposure time to compensate for the object being so dim and faint. You don't add anything that wasn't captured in the first place, just subtract the defects to leave what should be a realistic image of the object 'as captured by the camera rather than as seen by eye!'
-
As well as pointing people towards the sketching section, I think this link gives the closest comparison to my views: http://www.backyardvoyager.com/eyepieceviews.html
Having owned a small 60mm refractor since the late 1970's, I had a fair expectation of what I would be able to see when I bought my first real scope. There are plenty of other 'comparison' sites, but again these all use long exposure CCD images, so other than perhaps getting a sense of scale, don't bare any relation to what you will actually see with your own eyes.
A problem for equipment manufacturers is how would telescope sales be affected by 100% realistic images?..."buy this £2,500 telescope with a built in database of 40,000 objects, spend 2 hours setting it up and aligning it to be able to see...this smudge...if you squint at it with averted vision and use a bit of imagination!"
For me, the thrill is far more about what the object is and the fact that I can see it at all, with relatively humble equipment from a back garden in Gloucester, rather than what it looks likes in the eyepiece.
-
1
-
-
Some examples of what can go wrong.
DO NOT leave a telescope that is pointed at the sun unattended.
DO NOT use a truss tube telescope for observing the sun without first fitting a secure shroud to cover the open part of the tube.

(click the image for the full thread by squeaky)
DO NOT use eyepieces with plastic parts or cemented lenses for solar projection.
(click the image for the full thread by broony)
ALWAYS check and double-check that your solar filter is in good condition and firmly fitted to your telescope BEFORE connecting a camera or eyepiece.
(click the image for the full thread by Bizibilder)
DO NOT use the eyepiece solar filters that are often sold bundled with budget telescope packages.
(click the image for the full thread by tetenterre)
Finderscopes should also be covered with a solar filter. If they are not going to be used, they should be securely capped or removed from the main scope.
For details on how to make a DIY solar safety film filter holder click here: http://www.baader-planetarium.com/sofifolie/bauanleitung_e.htm
For details on how to make a solar projection screen click here: http://www.skyatnightmagazine.com/feature/how-guide/how-to%E2%80%A6-make-solar-projection-screen
-
Some examples of what can go wrong.
DO NOT leave a telescope that is pointed at the sun unattended.
DO NOT use a truss tube telescope for observing the sun without first fitting a secure shroud to cover the open part of the tube.
(click the image for the full thread by squeaky)
DO NOT use eyepieces with plastic parts or cemented lenses for solar projection.
(click the image for the full thread by broony)
ALWAYS check and double-check that your solar filter is in good condition and firmly fitted to your telescope BEFORE connecting a camera or eyepiece.
(click the image for the full thread by Bizibilder)
DO NOT use the eyepiece solar filters that are often sold bundled with budget telescope packages.
(click the image for the full thread by tetenterre)
Finderscopes should also be covered with a solar filter. If they are not going to be used, they should be securely capped or removed from the main scope.
For details on how to make a DIY solar safety film filter holder click here: http://www.baader-planetarium.com/sofifolie/bauanleitung_e.htm
For details on how to make a solar projection screen click here: http://www.skyatnightmagazine.com/feature/how-guide/how-to%E2%80%A6-make-solar-projection-screen
-
3
-


365 Astronomy
in Supplier Reviews
Posted
I ordered a couple of small items at 2pm on Thursday. Goods were delivered 10:30am on Friday. Well packaged and correct. Good service and quick delivery. I would definitely buy from 365Astronomy again