


andy fearn
-
Posts
163 -
Joined
-
Last visited
Content Type
Profiles
Forums
Gallery
Events
Blogs
Posts posted by andy fearn
-
-
9 hours ago, bosun21 said:
It means that the motor controller boards aren't responding. Check that you have the correct power supply of 12v and 2.5A as low power input can cause this error. Also check all your connections and cables are tight and secure. This can be a costly error and is fairly common with AVX mounts.
Thanks bosun21, at the moment i run power via ASI AIR UNIT .i will try a direct power supply to the mount. Thanks for your help.
-
Has anyone had problems with celestron AVX mount/handcontrol. Hand control puts up a message saying "not responding 17" anyone know what this means please.
-
So so sad. have spent many hours watching his youtube vids, such an inspiration.
RIP ALYN.
-
 1
1
-
-
Hi RJC and welcome. have you got skysafari or stellarium, they will be a great help in deciding and finding objects. Orion is a good area to start and easy to find.
-
1
-
-
Hi Patrick, it's region of interest.
-
11 hours ago, ArmyAirForce said:
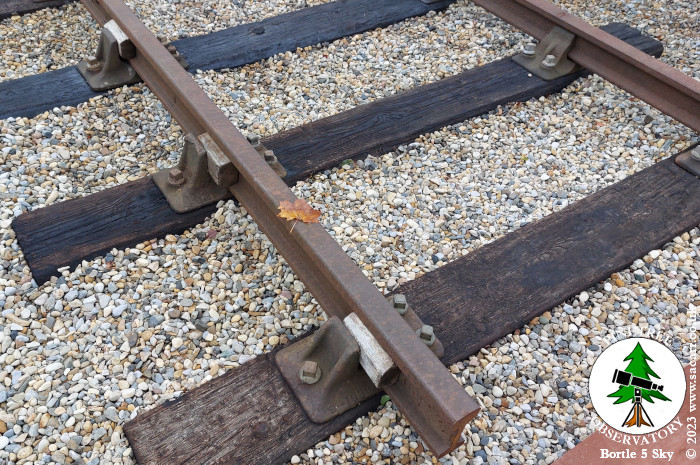
Tragedy struck the Carr household on Sunday the 12th. It was bound to happen sooner or later.....
Leaf on the line!! 😁
I'm working on a replacement bus service!!

😂🤣 like it.
-
17 hours ago, ArmyAirForce said:
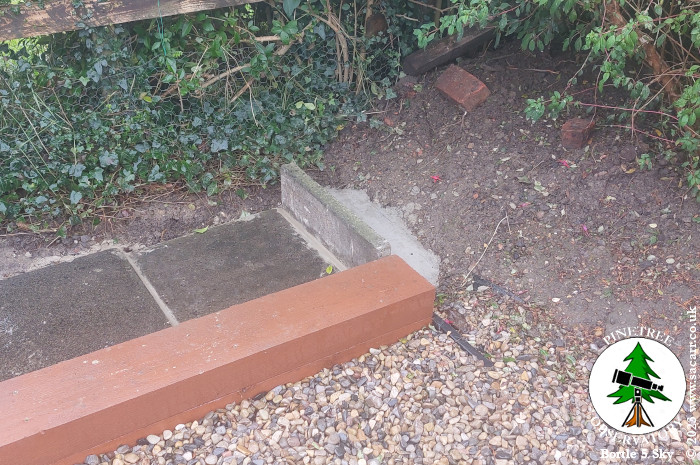
October 23rd
The final paving stone was cut and laid on the 23rd of October, along with a 10 inch tall slab cut and fitted vertically to end the path and hold back the earth and gravel behind.
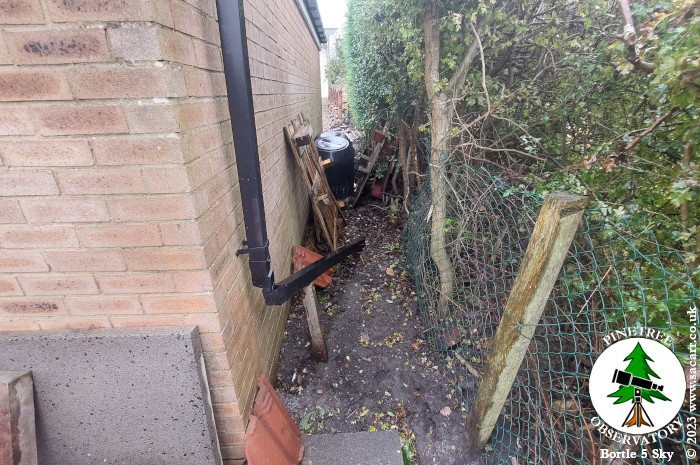
Poor weather is delaying further work right now, but the next stage will be to clear out the rubbish behind the garage. When that's done, I can rake out all the dead plant matter, prior to starting to dig out in preparation for the garage path foundations.
I probably won't post again until this path is complete. That will complete the garden landscaping part of the project. The thread will then probably go dormant until the Spring, when I get to plant the flowers in the railway embankment. That will be the final act to complete the whole project.
I'm looking forwards to seeing some colour in the embankment, but for now, I'm really happy to get so much of the path done this year. Fingers crossed for a few more dry days to complete it.
All your hard work is now coming together and what a great job you have done. I have watched this project with great interest and admiration. now the longer nights are here hopefully the weather will be kind and you can enjoy the obsy. Clear skies.
-
 1
1
-
-
On 02/10/2023 at 23:08, Lurcher said:
Hi,
I've been so focused on seeing deep sky objects I haven't viewed the moon in quite a while.
I noticed it was clear on Sunday, and although the moon was bright I headed out with my scope into the back garden with the intention of concentrating on double stars.
After a while I thought I'd take a look at the moon, as it was at a phase, (one day after full moon, which I don't normally catch. I noticed a nice line of craters on the edge of the terminator and thought I'd have a go at sketching them. It's probably been a couple of years since trying to sketch anything on the moon, and I felt really rusty to begin with. But I had forgotten how absorbing and enjoyable it is to focus so much on a few craters! - I think next time I'll pick just one or two craters and try to get the detail of a limited area correctly.
nice to see you still sketching. Brilliant piece of work.
-
1
-
-
On 21/08/2023 at 21:52, ArmyAirForce said:
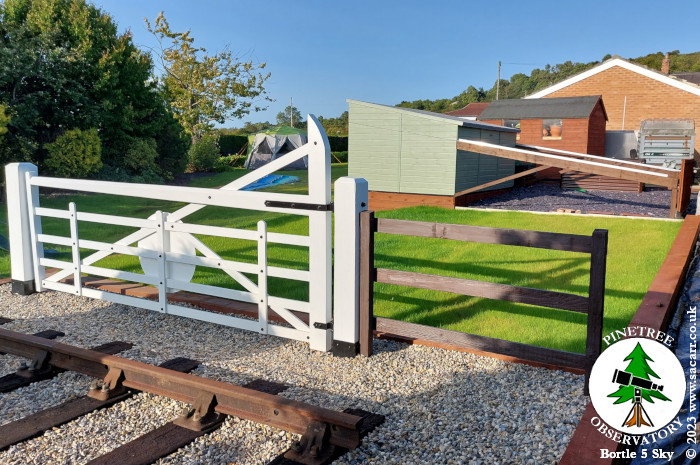
The new lawn is taking hold quite well, though I did overseed some thin areas after getting back from France. While we were away, I think the heavy rain washed the seed off some areas. Looking back towards the observatory, it's looking quite good. For the next part of the job, I need to order another fourteen sleepers for the final top layer of the sleeper wall and thirty six 900 x 600 paving slabs, for along the hawthorn hedge.
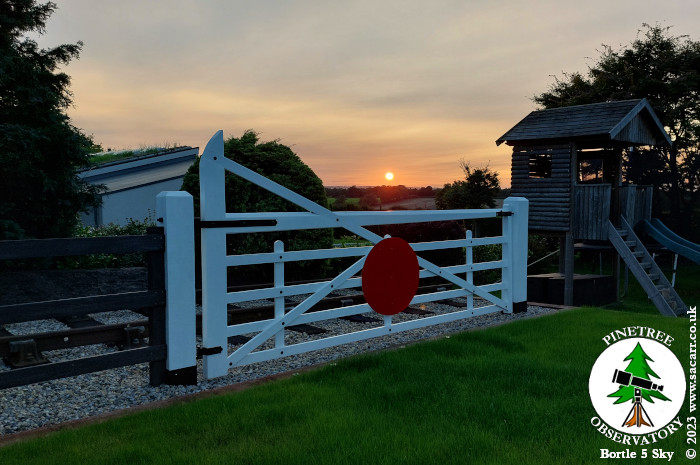
The day ended with a fireball sun setting on the West North West horizon, so I grabbed a few phone pictures over the gate. The last time I did this, there was no ballast or lawn.
An amazing transformation, for all the hard work, time and effort that you have put in to it,( not to mention the cost ) you must be very pleased with the end result. I know you haven't finished yet but have really taken an interest watching this huge project of yours. p.s i think your truck deserves a well earned rest as well as yourselves.
-
1
-
-
Both very nice. 👍
-
1
-
-
wow, and congratulations on a fantastic project. your hard work and enthusiasm is really paying off now. your attention to detail is amazing.
-
1
-
-
stunning image's. very well done.
-
Are you trying to image from inside your home, there appears to be a reflection to the right as if behind extra glass. you would do better outside.
-
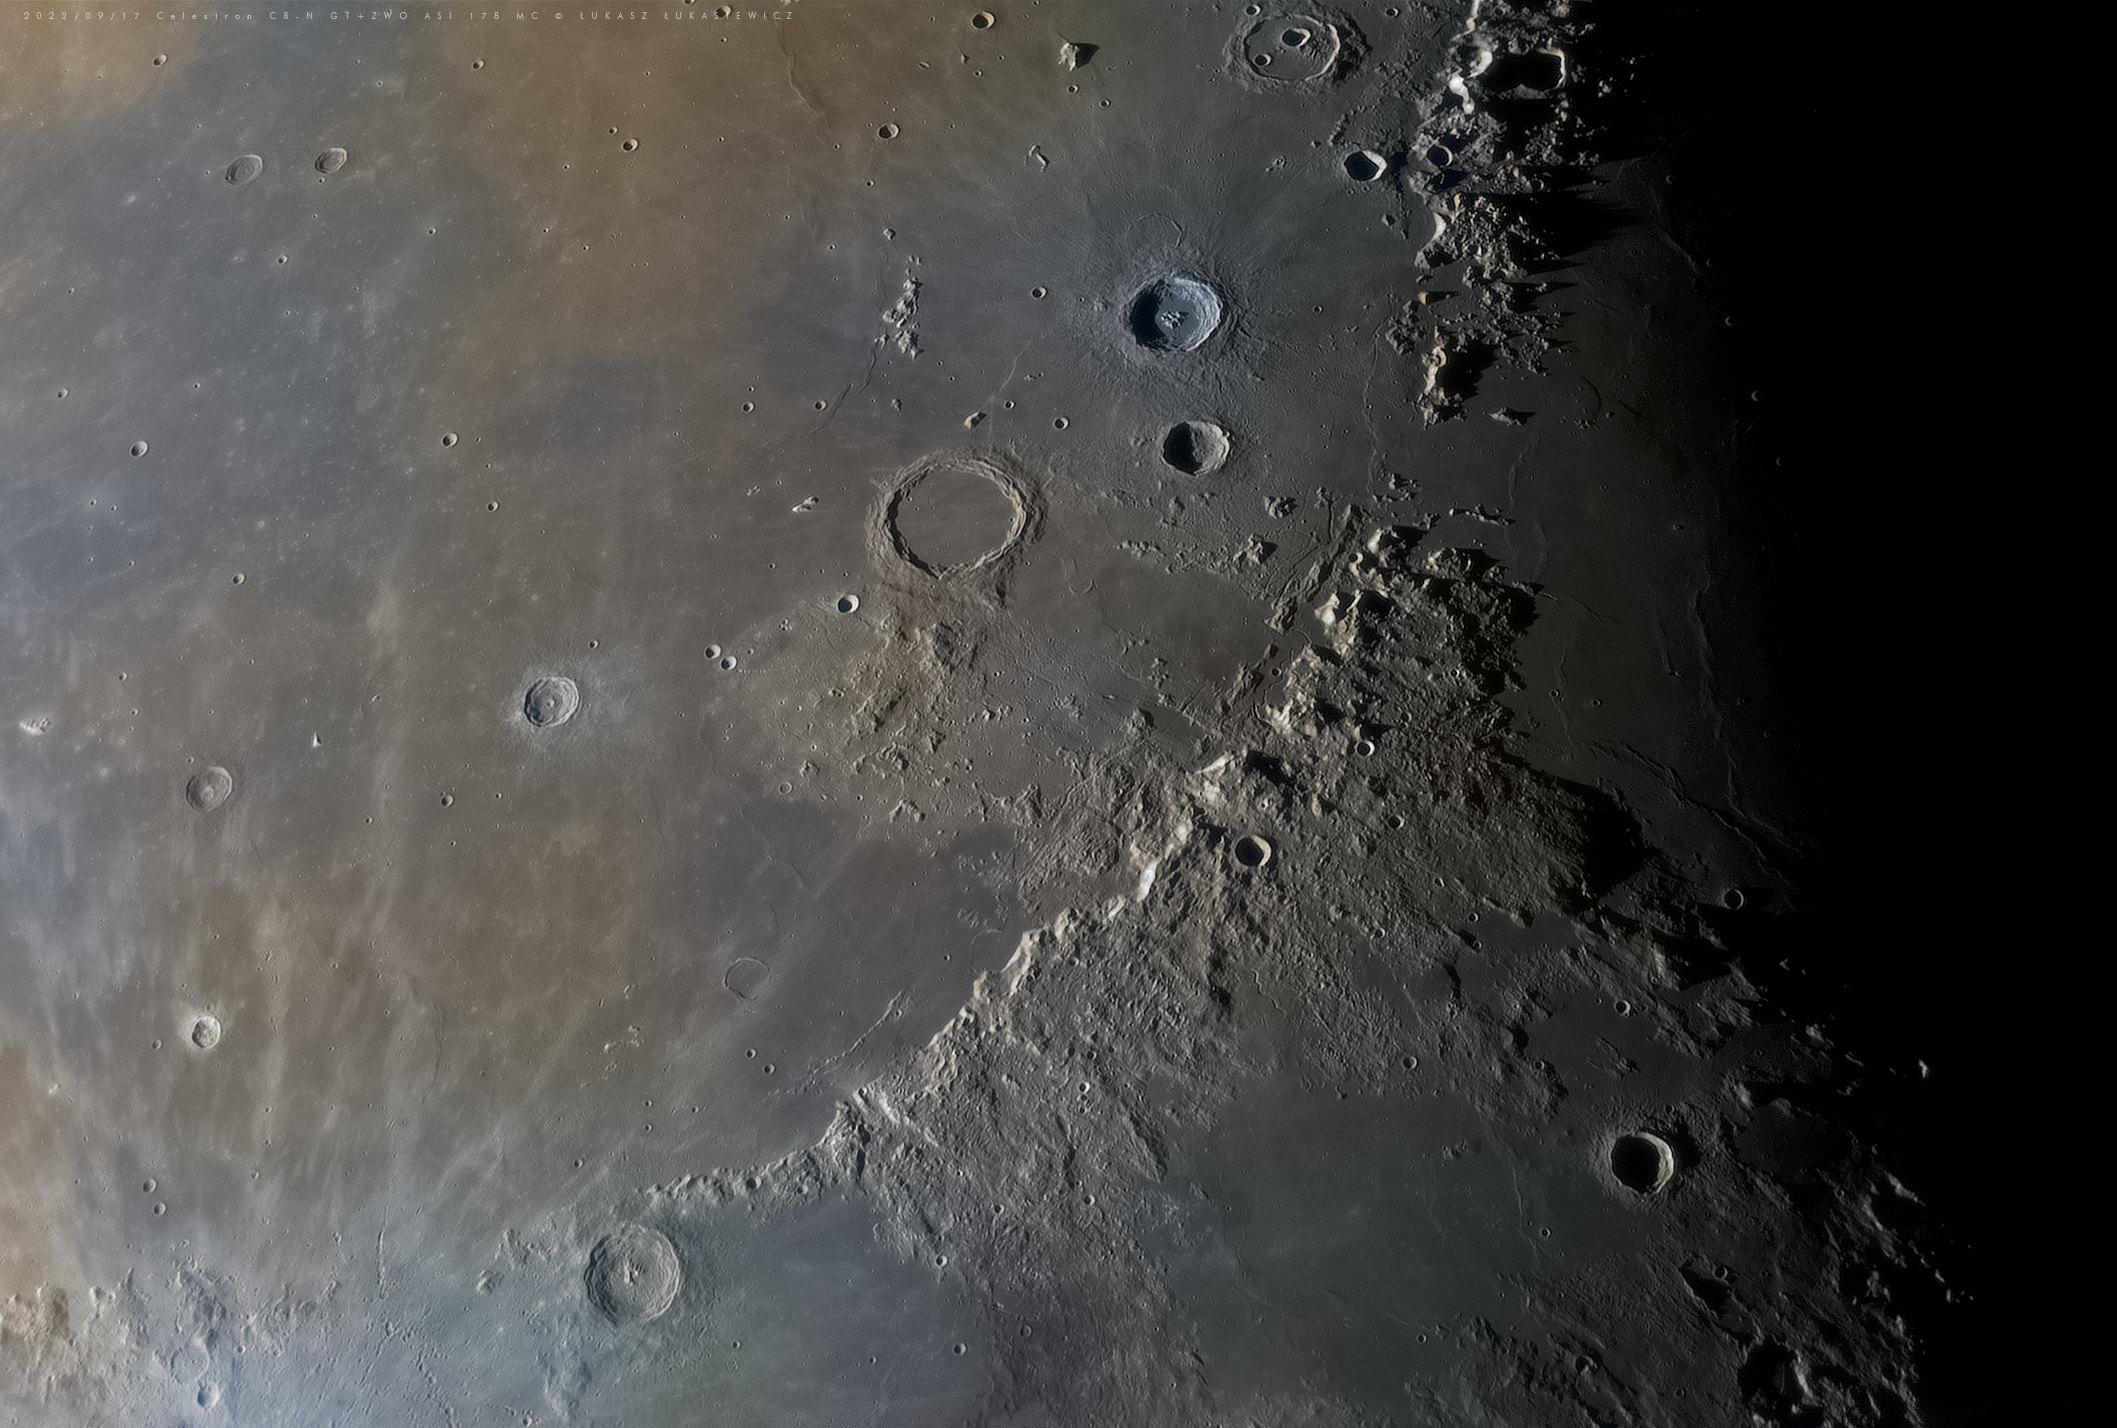
12 minutes ago, astrolulu said:
It must be said with appreciation that everyone did a really good job posing for this photo. Everyone brought out as much color as they could. And the blue Aristillus crater made the most effort. Only INA - a mysterious area distinguished by a blue tint, because of which it is sometimes called "Blue Lake", does not want to be blue... As usual.
So so good, can't get enough of these. Thank you.
-
1
-
-
19 minutes ago, Xiga said:
Thanks! I never actually produced a finished image first time around, i was that unhappy with it. But i did find the version below, which seems to be the most recent one i had before i gave up on it.
Pretty bad, i know! 😅 🙈
Wow, what an improvement. very nice.
-
2
-
-
lovely images. hopefully the nights will be clearer and you can gather more data. Good luck.👍
-
1
-
-
Hi Westmoorland,
you will need an actual polar scope which screws into the hole you are looking through to get a precise alignment.
Regards.
-
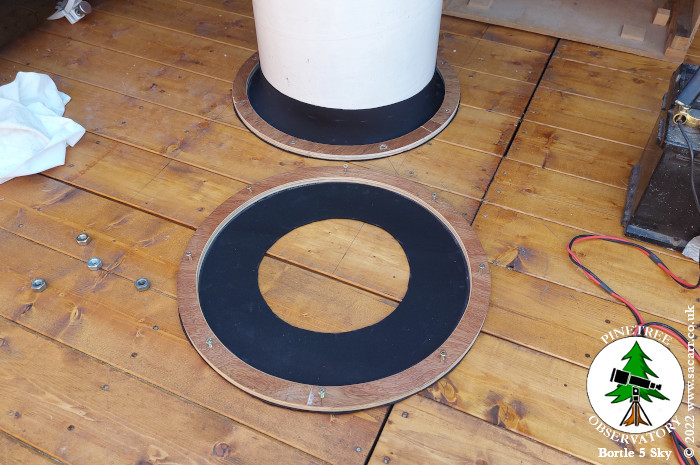
1 minute ago, ArmyAirForce said:
The neoprene was then glued to the plywood rings and weighted down to dry again. A little while later, both rings were screwed down to the floor of the observatory.
With the first in place, the second mount was able to be bolted to pier two and the original mount was removed to allow fitting of the other ring. That was then refitted and the observatory closed up. The rest of the day was spent indoors processing my solar images as it was too hot to be outside.
I like the neoprene idea, very neat.
-
1
-
-
On 05/08/2022 at 13:12, Steve143 said:
Thanks. I'm not buying a new iPad with 4GB just to run the app.
Can anyone recommend a good Android tablet for the ASIAIR app?
Thanks.
I use my late mothers samsung galaxy.
-
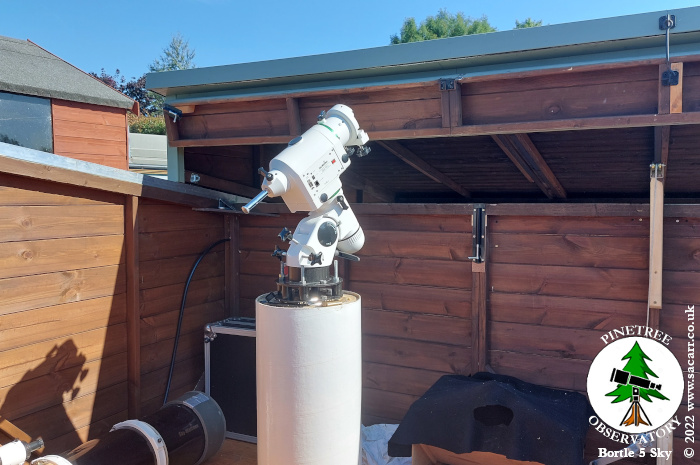
9 hours ago, ArmyAirForce said:
I managed a quick Lunar close up with the ASI178MM and 742nm IR Pass filter before it clouded over. Still a daylight image. It was due to clear again, so I switched off, closed the roof and waited.
The "Moon Duck" crater formation.
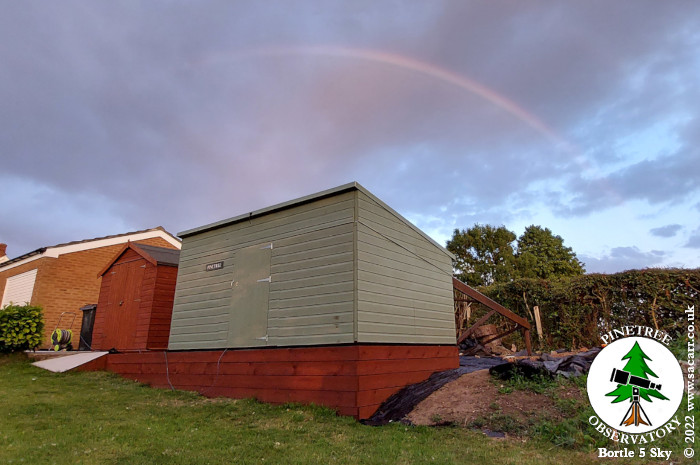
Good job I closed the roof, because it rained for a short time. I was rewarded with a rainbow over the observatory which must be a good sign!
As it got darker, I took my daughter out to look at the Moon for a while and we got a brief view of Saturn rising, before it went behind those tall trees you can see below. I think it's about to come back out the other side, so I'm about to head back out.
congratulations on a fantastic build, and end result. That looks a bit of a climb to get into the obsy ?? hoping you and your family enjoy clear skies.
-
6 hours ago, peter shah said:
Thats a lot of stars!.....M11 The Wild Duck Cluster and Barnards 110 dark Nebula. A two panel Mosaic imaged remotely from Spain with the Takahashi Epsilon 180ED and ZWO 2400MC pro full frame camera, Total exposure time was 5hours. Worth taking a look at the full res.
Thanks
Peter
Amazing image. very thought provoking.
-
8 minutes ago, ArmyAirForce said:
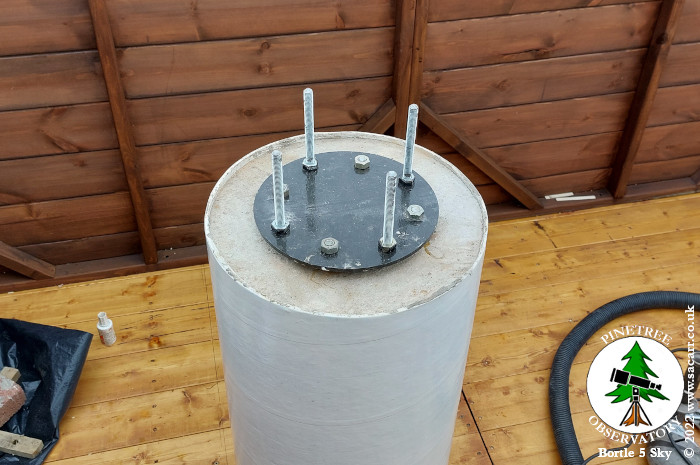
July 28th - I knew today wasn't going to be so productive, having burned myself out yesterday. I began with the vacuum cleaner, sucking up all the dust and shavings inside and outside the observatory. With a clean work area again, I proceeded to make more mess! The second concrete pier was drilled for the new adapter and the lower plate was fixed in place via studding glued into the concrete.
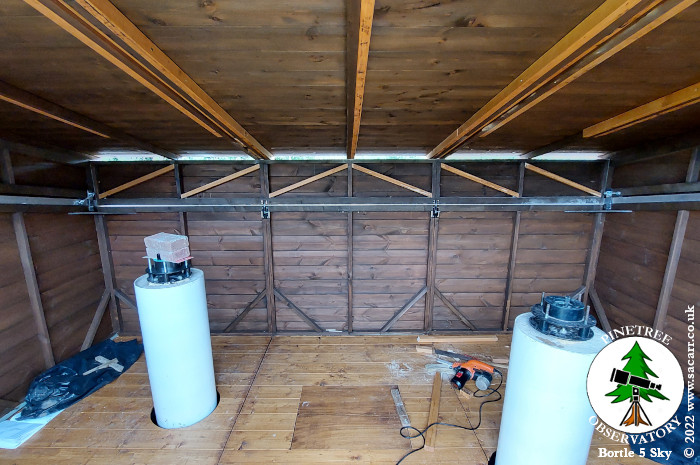
While that was curing, I turned my attention to the slightly sagging roof. I suspected it would sag to some degree with the weight of the roof panels and as a result, the back edge of the upper wall was now rubbing on the lower wall. if the roof was opened, it dropped a fraction below the lower wall, preventing easy shutting. I needed to fix the sag and restore the gap.
I made a plywood wedge which was hammered into the now closed up gap, to lift the wall and roof back up to where it should have been. Then one by one, I cut some diagonal braces to fit into the rear roof panel to stop the sag. Each was individually cut to fit and slightly on the large size. The ends of the timber were tapered slightly to help them fit, with some persuasion from a big hammer. The tight fitting pieces worked perfectly, lifting the sagging rear wall until the temporary wedge fell out of its own accord. The gap was restored.
I have some small brass rollers that have been kicking around the workshop for years. I think I'm going to add two to the rear wall, so that during the long periods of the roof being shut, the wall is supported. It took quite a while to fit them all and was heading towards 1pm by the time I finished - lunch time!
This is so impressive.
-
1
-
-
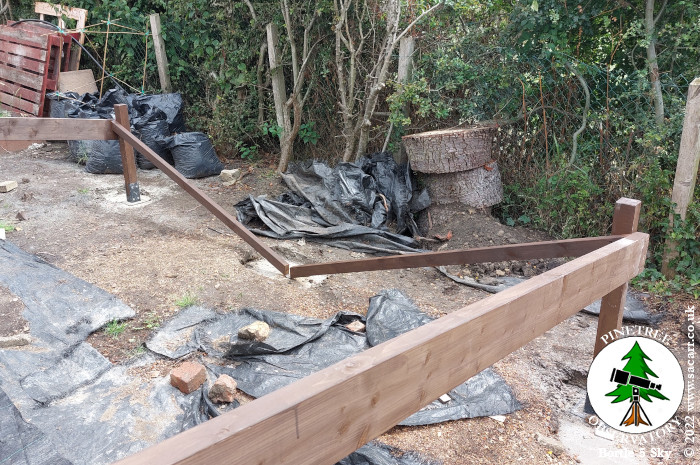
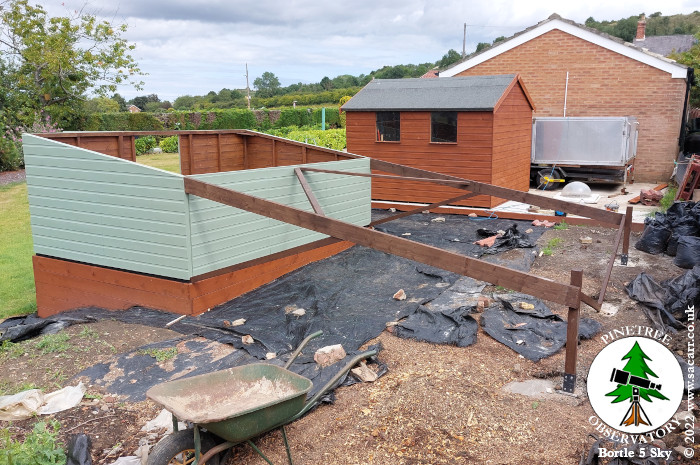
1 minute ago, ArmyAirForce said:
The remaining two pieces of timber were cut for the rear braces. These help to keep the vertical supports upright, especially when they have the load of the open roof on them. A steel strap joins the two timbers in the centre and is then bolted into the centre concrete foundation. The over-long runner timbers and the vertical posts were also cut down to remove the excess. The cut ends were treated with shed paint followed by several coats of waterproof PVA glue.
So that was all the roof support timbers fitted and painted and I still had time left in the day.
This build is so impressive. How are you going to open and shut the roof, Manually, or electronic.?
-
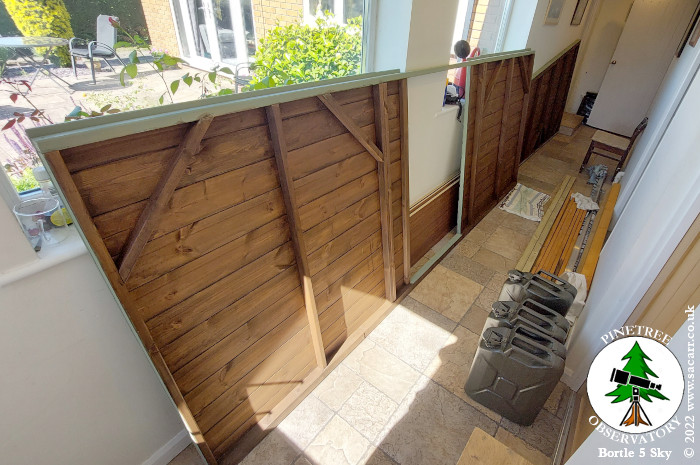
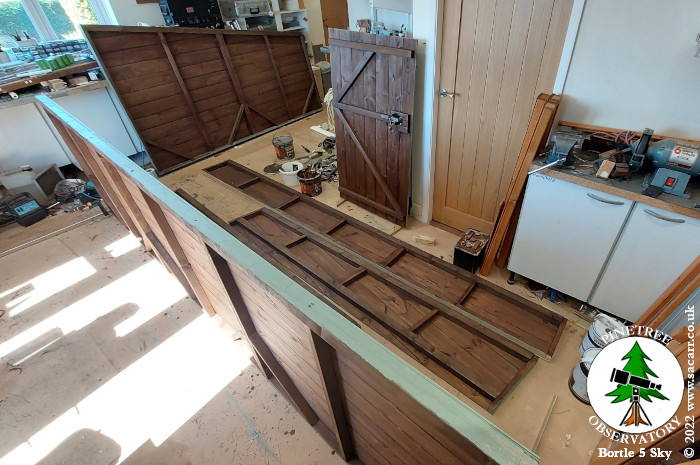
3 minutes ago, ArmyAirForce said:
July 7th - Today was all about painting. I started with non-observatory stuff; finishing painting three jerrycans for my Dodge truck. I'm away for the weekend with the truck and wanted to take the cans for accessories to the display, so the painting was finished first thing and left in the sun to bake dry.
Last night, my daughter helped me to move around some of the panels, so I could get access to the rear of the front panel. That allowed me to paint all the panels today. In the corridor, the front panel and the right hand end.
In the workshop was the rear panel, left end, door and the roof ends and rear walls. With all the panels accessible, the inside of the front wall was given its first coat of paint. I then moved on to all the other panels for their second coats. By the time I'd done all of those, the front wall was dry enough to give it a second coat.
I'll get home from my military weekend on Sunday evening. On Monday morning, I need to check over all the panels, plus the base and be sure I'm ready for the main wall assembly. That's because wifey is free to help on Monday evening, but probably not for the rest of the week. So if everything looks ok, the plan is to get the four walls and the door assembled on the base on Monday evening.
Enjoy the weekend, and good luck with the build on monday.🤞
-
1
-


celestron AVX mount and hand control
in Discussions - Mounts
Posted
Thanks cosmic geoff, i did wonder if it needed updating although i have done so not long ago. i have changed powering each unit individually which at the moment seems to help.