


StuartJPP
-
Posts
2,416 -
Joined
-
Last visited
-
Days Won
9
Content Type
Profiles
Forums
Gallery
Events
Blogs
Posts posted by StuartJPP
-
-
Good job Adam.
I have got a Canon 1000D camera and a spare 1000D sensor but haven't gotten around to attempting this mod...not sure if I will or not.
What plastic polish did you use?
-
1 hour ago, gnomus said:
Love the second photo. So now we know what happens to all those Taks that get returned.
Naah, they wouldn't use mere Taks, these are proper OTAs with nano coatings
")
-
45 minutes ago, Uranium235 said:
Youre probably looking at a camera lens then.... but thats going to be pricey.
Take up bird photography as a hobby, buy either a Canon/Nikon 500mm f/4, a 400mm f/2.8 or a 600mm f/4 lens and then you effectively only paid half for your OTA due to it's dual purpose use
Well that is what I told the OH anyway...plus it looks cool in camo...

After all, if it is good enough for these guys...

-
 2
2
-
-
4 minutes ago, Roy Challen said:
Friday night was clear for me, but seeing wasn't as good as it could be.
Yep, seeing wasn't great but better than I have had for a long time...
6 minutes ago, Roy Challen said:Blimey! You can read by that light! But you can also see the Milky Way, so it's not that bad

As long as the light doesn't reflect off the top of the lens hood it is okay (i.e. facing away form the light). This image was a ~30 second exposure at ISO3200 at f/4 so it is way exaggerated as to what the eyeball sees...enough light to not trip over things but definitely too dark to read anything.
-
From the night of Friday the 26th August 2016...I was imaging in a t-shirt...look at all that LP!

-
6
-
-
Another one...look at all that LP from a nearby street light (though this is a 30 second exposure and the light isn't even enough to read from)...this is from my so-called "dark" site...
Notice M31 just above the lens...

-
9
-
-
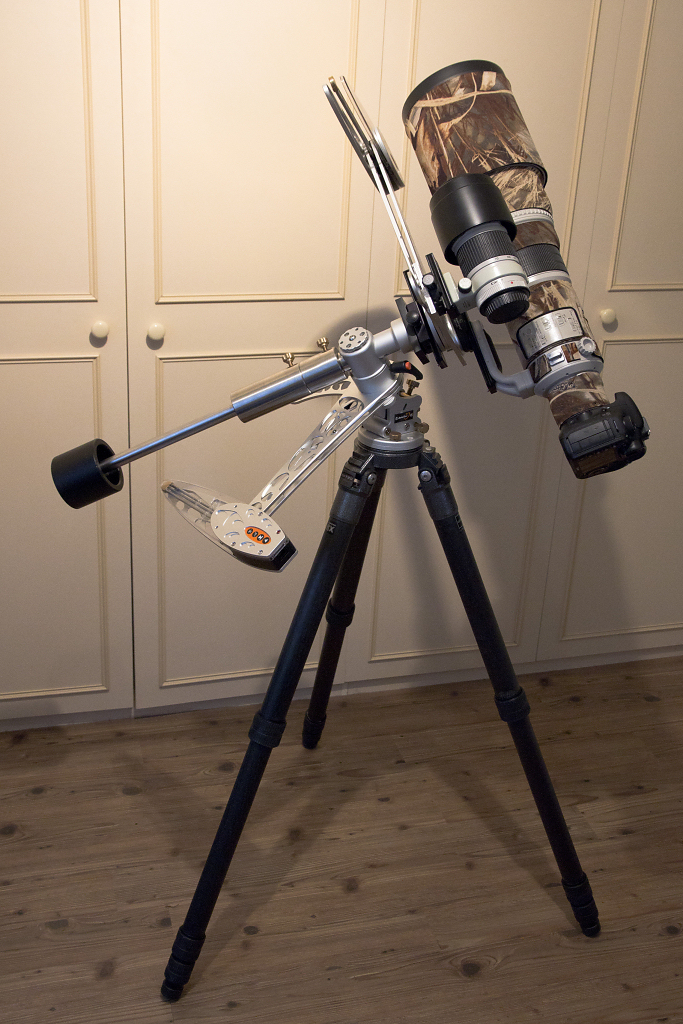
My AstroTrac kit on holiday in Fuerteventura...

-
44
-
 1
1
-
-
Hydrogen Alpha (~656nm) is the wavelength of the photon generated when the electron of a hydrogen atom falls from the 3rd energy level to the 2nd...Hydrogen Beta (~486nm) is when the electron falls from the 4th to the 2nd energy level.
A Hydrogen Alpha narrowband filter will only allow a narrow portion around Hα through (a couple of nm to a few tens of nm either side) and a Hydrogen Beta will only allow a narrow portion around Hβ wavelengths to be passed through. Both will give a representation of how much hydrogen there is in a specific part of the sky and as far as I can remember there is roughly 50% more Hα as there is Hβ for that same area...I am not sure what effect causes either to be produced (natural decay?).
I always thought that a Hydrogen Beta filter was mostly used for visual since your eyes are more sensitive to green light which is closer to the Hβ line. So even though there is less Hβ, the sensitivity of your eyes to that wavelength compensates...but honestly I do not know the real difference...hopefully someone can elaborate? They may also be more useful for non-modified DSLRs that would traditionally chop off the Hα line severely (although NB is not really recommended for DSLRs).
Quite interesting is that for radio astronomers the "Hydrogen Line" (21cm) is the wavelength generated when the "spin" of the electron changes from being parallel to being anti-parallel.
Please note that the above is only my own "noddy" interpretation and shouldn't be classed as being "scientific"
")
-
I would say that you should aim to get it as accurate as possible... then if it is causing problems you can tweak things by backing off a bit.
I use a PoleMaster (equivalent) and it makes polar alignment quick and easy and to a degree where I don't have to worry about it.
SharpCap now supports a polar alignment routine similar to PhotoPolarAlign and I will try that at some point.
My biggest issue was flexure...which is hopefully now sorted...
-
Over the Xmas holidays I was in fairly frequent contact with Bern from Modern Astronomy, both by email and by phone. He is a really helpful guy and goes out of his way to make things happen.
First thing I wanted was a QHY5L-II-M "CS" adapter (mine was an early one and was supplied with a 'C' type), no problem and he even set up a special order just for it, placed late on the same day, delivered first thing next morning. About a week later I contacted Bern again regarding the QHY miniGuideScope. Although it wasn't in stock as it was pending release he did promise to put me on the "early adopter" list. When it came in stock he contacted me and I placed the order, no quibbles (even got a good deal on it as well).
Thanks Bern!
-
Here's an interesting write-up, though that really pushes it to the limits:
http://www.wilmslowastro.com/tips/autoguiding.htmI found that the biggest factor when I first started guiding was differential flexure...I now use a 130mm focal length guide scope with 3.75um pixel size (6.24 arcseconds per pixel) and image with a 500mm focal length and pixel size of 6.25um (2.71 arcseconds per pixel) so a ratio of ~4/10 well within spec.
-
1
-
-
I also like this thread, it is good to see what can be achieved with very modest equipment and an inspiration to people who have already got kit or are on a tight budget. Some people are extremely happy with the results they get and stick with it and to be honest they probably have more enjoyment capturing them than a lot of people who take it further...they also save a lot of money as well.
But the most appropriate mount for astrophotography is a mount that counteracts the rotation of the earth...i.e. an EQ mount...be that a GEM, a Barn Door Tracker, a single arm fork on a wedge or whatever it is called. A pure Alt/Azi mount keeps the target central but obviously rotates around that target. When a field de-rotator is used with that alt/azi mount it is effectively mimicking an EQ mount.
Does that mean that you can't use an alt/azi mount? Well of course you can use one, this thread proves it and that fact should not detract from what this thread is. if I had started off with an Alt/Azi mount I would have taken much inspiration from it (I was purely interested in imaging and not visual and went for a glorified barn door tracker).
Keep up the good work and with sensitive enough cameras and fast enough optics, I am sure that alt/azi imaging, perhaps with a short stroke de-rotator between images (you read that here first), will become a lot more prevalent in the future.
-
5
-
-
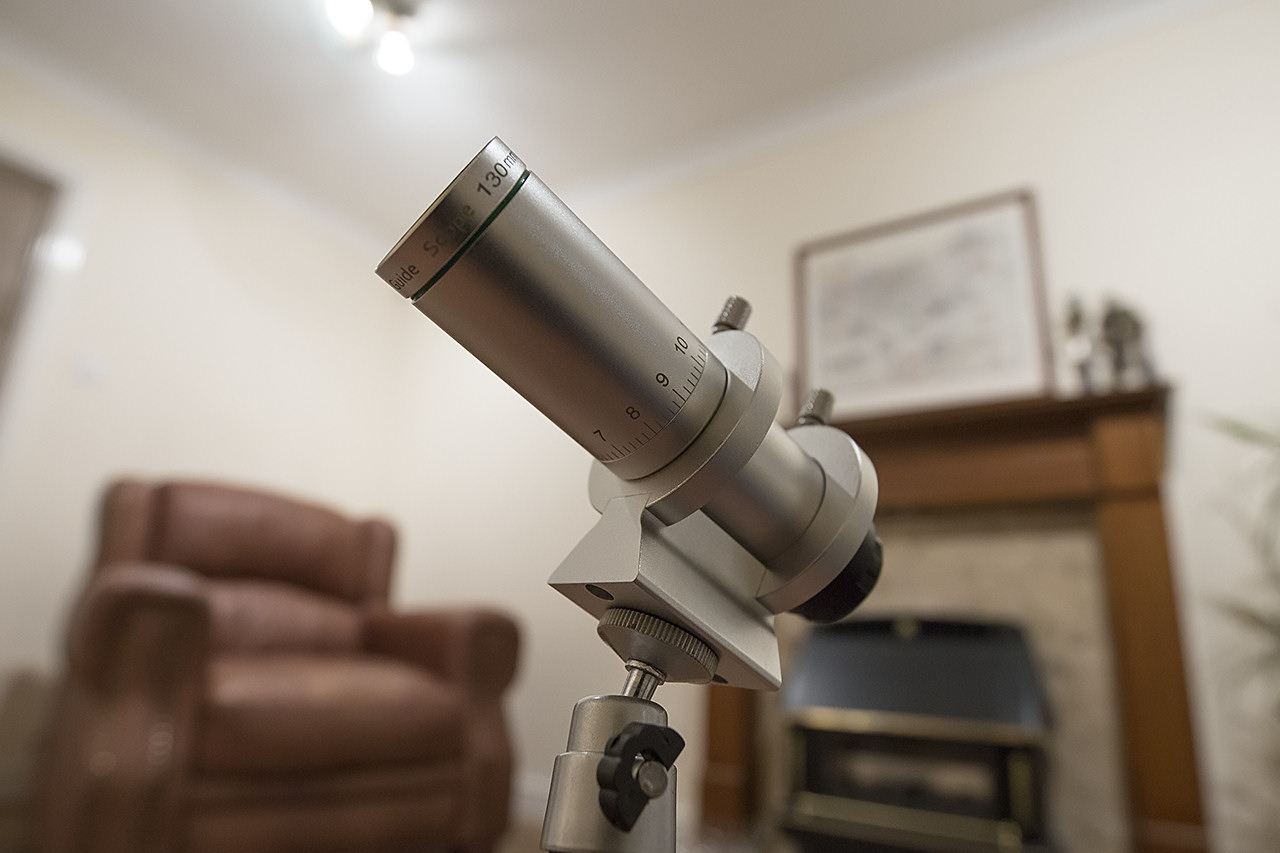
It is the new QHY miniGuideScope...a 130mm FL guide scope...or mini 'frac.
-
2
-
-
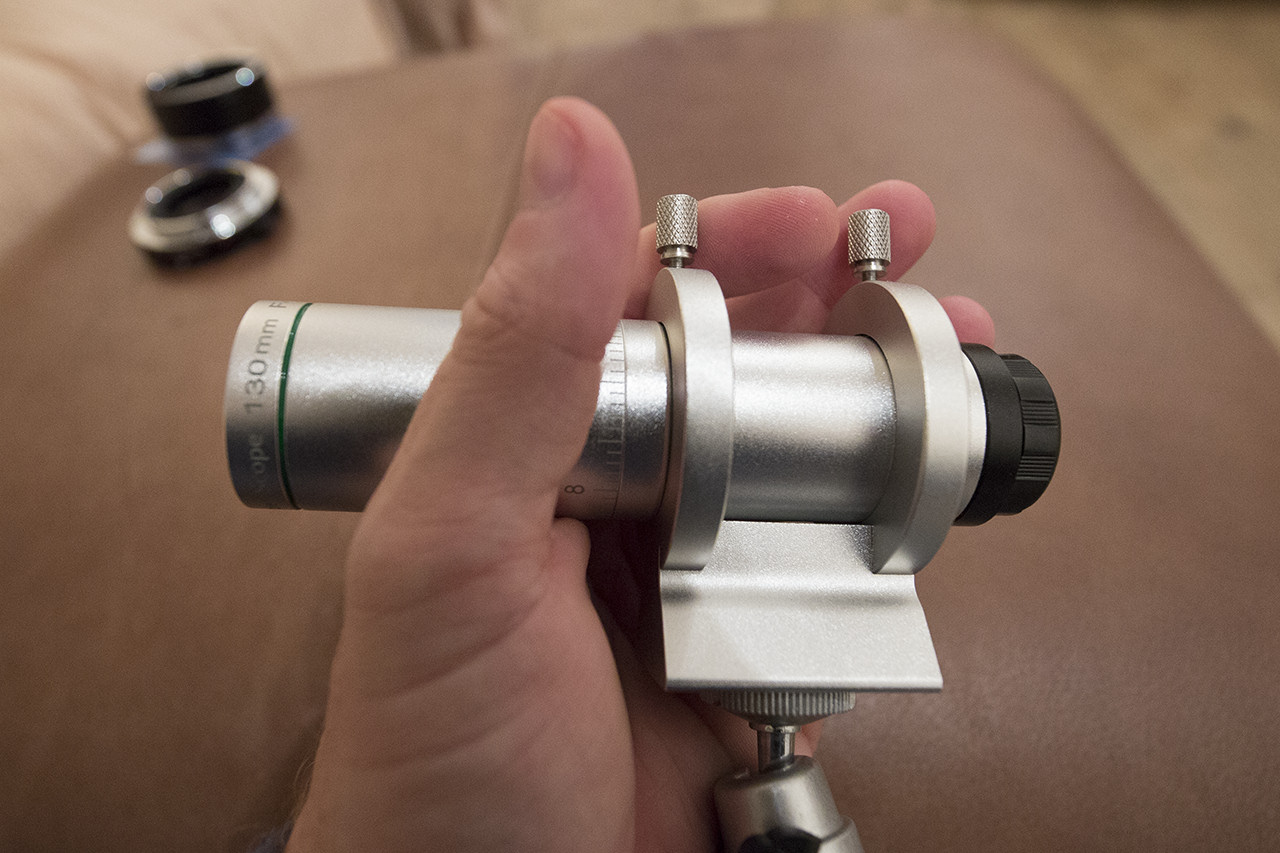
I have now actually got a "proper" 'frac instead of my usual selection of lenses ...a 130mm beast...
And up close...BTW I have massive hands
-
5
-
-
This is an example of a non-working camera that I wouldn't risk as the problem is said to be "The camera turns on but the pictures come out black" which is quite likely to a sensor problem.
I take it this would put you off as well Gina

-
2
-
-
Nice - my kind of frac's and tripod

 Two astrotracs?
Peter...
Ok Stuart, I'm baffled... whats with the two AT's?
It was an experiment I was running to try to guide two AT's, one in DEC and one in RA...although the set-up was quite fiddly I managed to get 10 minute subs at 500mm of decent quality...except if there was even the slightest breeze...then game over.
-
1
-
-
Here's my usual "frac"...
-
10
-
-
Not too shabby Tom & Olly

-
What I am really trying to do is work out if a Skywatcher guide mount introduces flex or not. What I have found is that if the "guidescope" is bolted into an M3 vixen clamp and the PA is 0 in altitude then I get about 12 arc seconds drift in RA & Dec over 10 hours Due to other errors my main imaging scope camera was not running so I am still trying to characterise my mount.
Andy
I think MetaGuide can calculate flexure between the imaging scope and the guide scope, not sure what configurations of imaging cameras are allowed though...with FlexRX it can allegedly compensate for it (to some degree)...but I haven't tried it.
-
Using a live-view overlay would be kind of neat as long as I don't end up having to support all kinds of video formats and devices.
Not all kinds of video formats and devices...only the ones I need

I have downloaded the Canon EDSDK, but of course I am a Windows guy so it won't be cross platform...if I get around to it I might have a go.
-
Andy, thinking about it a bit more, I could find out which direction is the local horizontal if I know the location and the time and then adjust the instructions. Something to think about...
Even with a DSLR and no inverting of the image (refractor) I still find it a bit tricky when it says "Left xx.x", "Down xx.x". "Left xx.x" means that you need to move the FOV (or NCP) left, which actually means moving the mount right...it comes down to the azimuth bolts that are inverted i.e. using the left bolt moves things right...and vice versa...I can only imagine it getting trickier with a refractor and a CCD...
What I do (since I am using Windows XP), is pop live-view on and adjust the bolts by observing a star, then there is no mistaking it. Usually you can hit it within a couple of iterations.
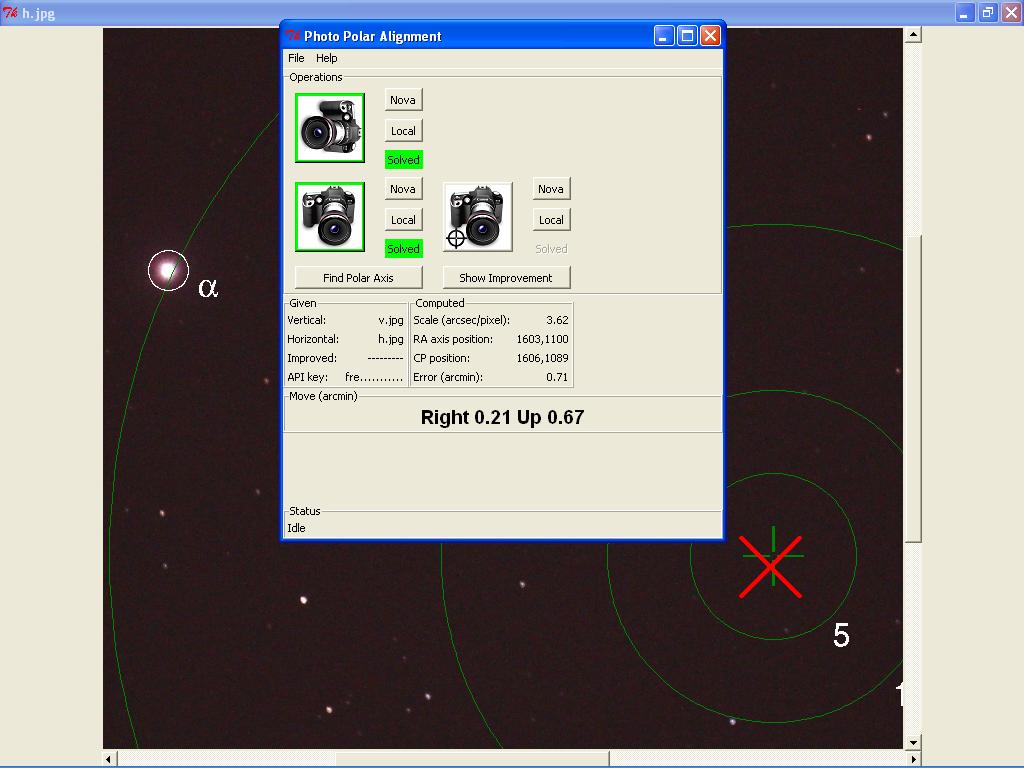
I have managed to do a complete polar alignment by being doing it blind, i.e. plonking the mount and scope on the ground roughly pointing north and using PhotoPolarAlign, however I'd recommend using a polar scope at the very least to get it as close as possible to start with.
-
One thing I am not sure of is does the quantum efficiency decrease with temperature drop or does it increase?
I know that the noise decreases with a decrease in temperature, but does the QE also decrease or any other criteria related to wanted signal? Removing as much unwanted noise is good, removing signal is not good...I accept that we are wanting to improve the S/N ratio which we are doing by decreasing the noise, but sometimes that is not the whole picture.
I have seen dark images of 60 minute exposures where there is very little noise...now please point that camera to the stars and show us some results, preferably alongside a stock camera that hasn't been cooled. I am sure that the cooled camera will win hands down, but by how much?
-
Another tester here...works quite well I find. What I like about it is that there is no DEC slewing like AlignMaster so any potential backlash does not skew results. With some automation this could be made very fast indeed.
-
Hello,
if you would like to volunteer to try out a new Polar Alignment method, please let me know. The requirements are:
- You can see the Polaris/NCP region from where you usually set up. (South hemisphere? get in touch!)
- You can attach a camera to the mount and bring the JPEG image files to your computer.
- You can freely rotate the RA axis (this excludes AstroTrac mounts and similar, I think).
- You have Internet connectivity.
- You can run Python on your computer (e.g. Anaconda for Windows, Linux, MacOS X)
You might be able to verify your Polar Alignment within 2-3 minutes. The software will be in the public domain.
Regards
Themos Tsikas
Not if you have got the AstroTrac head (or similar). It has RA and DEC "controls"...I would be interested in people in the southern hemisphere trying this out...preferably before March next year


Debayering a DSLR's Bayer matrix.
in DIY Astronomer
Posted
Thanks for the info Adam.
Regarding the sensors, I am not 100% sure if the "spare" one works as it came with a faulty camera, I think the person plugged in the wrong power supply and fried the camera main board. The other camera is working fine, it has had the filters removed. I was/am going to have a go as a Winter project, but am still undecided if the effort is going to be worth it. I want to try but then again I am not sure I will use it if I do get it done...will let you know.
With regards to shooting in mono, I 'd definitely say no. Shoot in RAW and then use DCRAW with the parameters elsewhere in this thread to extract the image without demosaicing.
I would suspect that where the microlenses have been removed you will see a quite a reduction in sensitivity (from what I have read about microlenses), but then a gain since the CFA/Bayer matrix has been removed.