


JAS
-
Posts
260 -
Joined
-
Last visited
Content Type
Profiles
Forums
Gallery
Events
Blogs
Posts posted by JAS
-
-
I usually use sheet aluminium for this sort of thing, you can have it punched or laser cut to any size you like if you are considering having it professionally made.
I am a sheet metal fabricator/ Programmer, if you send me a DXF file of what you want I can get you a price. We only punch we do not have a laser.
Alternatively I have also used a local engraving company. They have coloured plastic that reveals another colour underneath when engraved. They have also cut the shape out and all of the cut outs too.
Jason.
-
 1
1
-
-
8 hours ago, adyj1 said:
This is what I find the hardest part of doing the stepper motor focus control - how am I going to mount it? (on an Altair Astro ED-66R)
Ady
Yes the bracket can be a pain.
There is quite a good choice of standard metal L brackets available from B&Q, Screwfix , eBay. I have used different ones in the past and cut and drilled them to suit. I have also used two L brackets bolted together.
The real challenge is working out how to fix it. Google is your friend, search for your scope and things like diy focuser and more often than not you will find several approaches that people have come up with.
Jason
-
 1
1
-
-
26 minutes ago, upahill said:
Nice bracket @JAS Is it homemade? My mounting for the PG was too large and bulky and pushed the motor out too far causing some balancing difficulties.
Something like this could make me reconsider keeping MFP2 instead of getting the ZWO EAF (and save £200)
Thanks Upahill.
I am a sheet metal fabricator, I made the bracket from stainless steel at work.
-
2 hours ago, RolandKol said:
Hmmm, how do you balance your frac with such a motor placing?
PG27 is quite heavy, something around 400g as I recall... Plus I do see your guider/finder scope shoe on the same side...
(I am with Newt at the moment, just thinking about future options and etc.)
I have not had any balance issues with this setup, the motor is reasonably central. When you consider all of the other kit bolted on 400grams is not a huge deal, especially when you consider that the scope is 4kg.
I don't keep the finder on the scope, I was using it last night for alignment.
-
1
-
-
I am using the Nema 17 PG27 on a myFocuserPro2 that I built, there are speed options in the setup ( slow, medium or fast) that allow you to speed up the motor. Once connected go to settings, Motor speed, and select the speed you require. I was quite supprised at how fast it can go! I have always prefered the overkill option, but I dont think this motor/gearbox combination is too bulky.
Jason.

-
1
-
-
I have mounted the same sensor onto a small pole inside my obsy at a small angle to allow the rain drops to run across the sensor surface, it is only exposed to the weather when the roof is open.
It quickly activates my roof when it starts raining, but the roof started closing when there was no rain! After several false alarms I realised that dew was forming on the sensor and activating it. From what I remember the inboard due heater only activates once rain has been detected to dry it off, obviously this is not of any use as far as dew is concerned !
I have not done anything about it yet, but I thought is was worth mentioning.
Jason .
-
1
-
-
I built my own filter wheel and drove it with a stepper motor. I used a switch for the home position and used a step count for each filter position. I have used it for about a year and have not had any issues. See my thread here: http://stargazerslounge.com/index.php?/topic/186095-DIY-remote-filter-wheel
My arduino code is there too, feal free to use it. Its probably not the most elegant of code but it has worked for me, no Ascom driver though!
Jason.
-
1
-
-
Looks like you have made a nice tidy job of that.
I did a similar thing for my 1100D, it was well worth the effort.
Jason.
Sent from my Nexus 10 using Tapatalk 2
-
Also liking that pier. Do you have a thread on here or a link to any details of how you built it?
Here you go Ian: http://www.astronomyshed.co.uk/forum/viewtopic.php?f=35&t=7704
It is very solid, I went this way because I was not keen on going to all the trouble of making it a solid as possible only to support the top plate on 4 long threaded bars! I have seen lots of debate about this point, but in my view 4 long bolts are going to flex alot more than 4 bolts less than 10mm long! But saying that lots of people have done it the other way without issues, this is just my opinion.
I never did fill it with sand, I have not had any need to.
Jason.
Jason.
-
1
-
-
Very nice neat job

Those are nice neat little connectors you got from RS
I've aready bought all my connectors - I had a good search for small latching connectors but didn't find those and went for XLR connectors. I've got replacements for my NEQ6 but having replaced the original cable with my own and new right angle connector to fit the SW socket I have had no problems at all. So it's a case of "if it ain't broke, don't fix it" 
I have rebuilt my power and data hub to incorperate the Arduino dew heater, while I was there I swaped all of the sockets for theses: http://www.ebay.co.u...984.m1497.l2649, they are about the same size as XLR's but have a nice locking action and are a good price
 They do these in 2,3 and 5 pin versions.
Jason.
-
I see what you mean. I keep meaning to have a good look around your site, just havnt got round to it yet. I should have, it would have made it easyer to see where someone else drilled a hole.
Good point about the mobile setup, better to loose power than tip the mount.
Jason.
Sent from my LT15i using Tapatalk 2
-
1
-
-
Hope it goes to plan for you.
I spent a lot of time looking for any info for this mod but found nothing, looks like there will be plenty of info about for others now.
I have not seen the new skywatcher connector, I would be interested to see yours when it's finished.
Jason.
Sent from my LT15i using Tapatalk 2
-
Thanks, it was worth the effort/ risk!
I was unsure about drilling a hole in my mount at first, but then I thought worst case, I have a hole that I could put a grommet in if things didnt go to plan
Jason.
-
After reading a post here: http://www.astronomy...t=the power mod
about replacing the power socket on a HEQ6 for a locking type connector, it got me thinking about doing it on my HEQ5 pro, I have knocked it out several times in the past and I also had the power LED flashing when the mount slews. I spent hours searching Google but could not find any info?
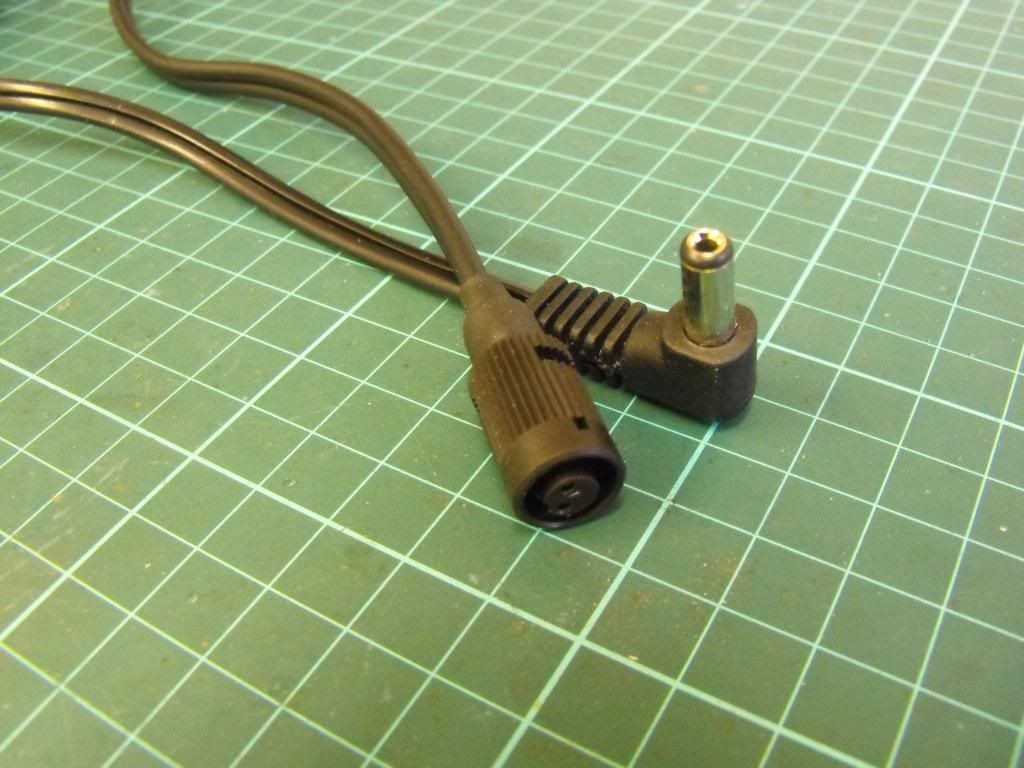
So I set about finding a plug and socket that would fit into the small space that was available, and eventually came across this,
SOCKET.
http://uk.rs-online....7633D4E4F4E4526
PLUG.
http://uk.rs-online....7633D4E4F4E4526
I got the cable recommended in the first link here: http://uk.farnell.co...003&sku=4327100
and using Astro Baby's guide to dismantle the mount here: http://www.astro-bab...ild/heq5-m1.htm
I made a start.
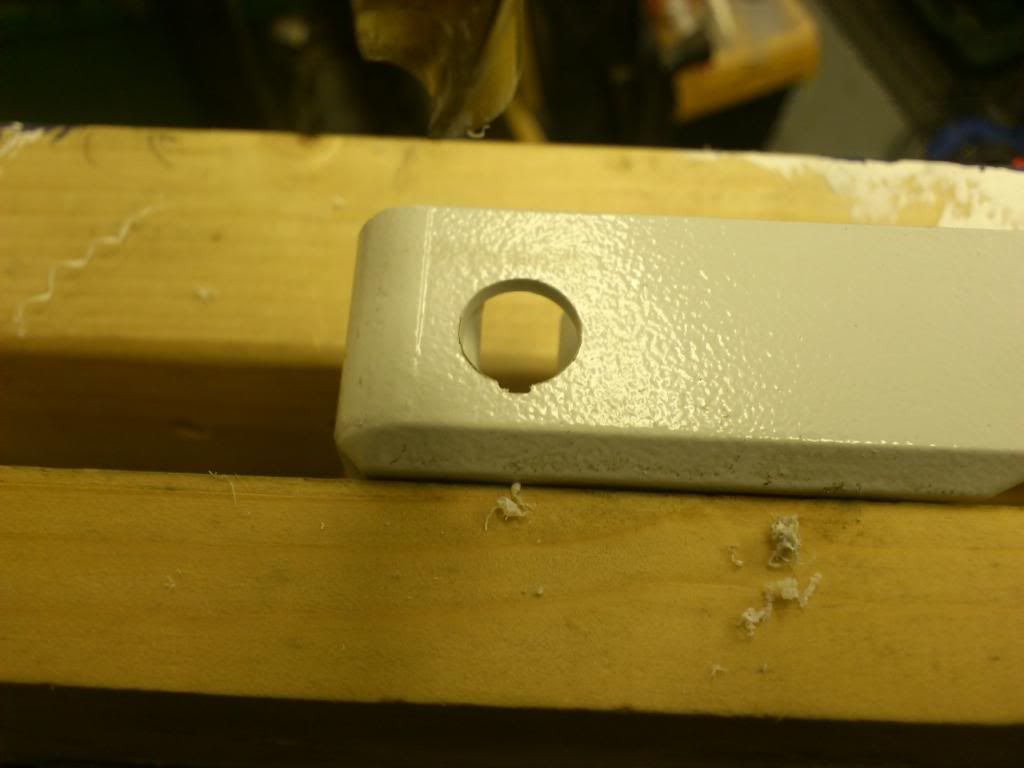
Drilling hole in panel.
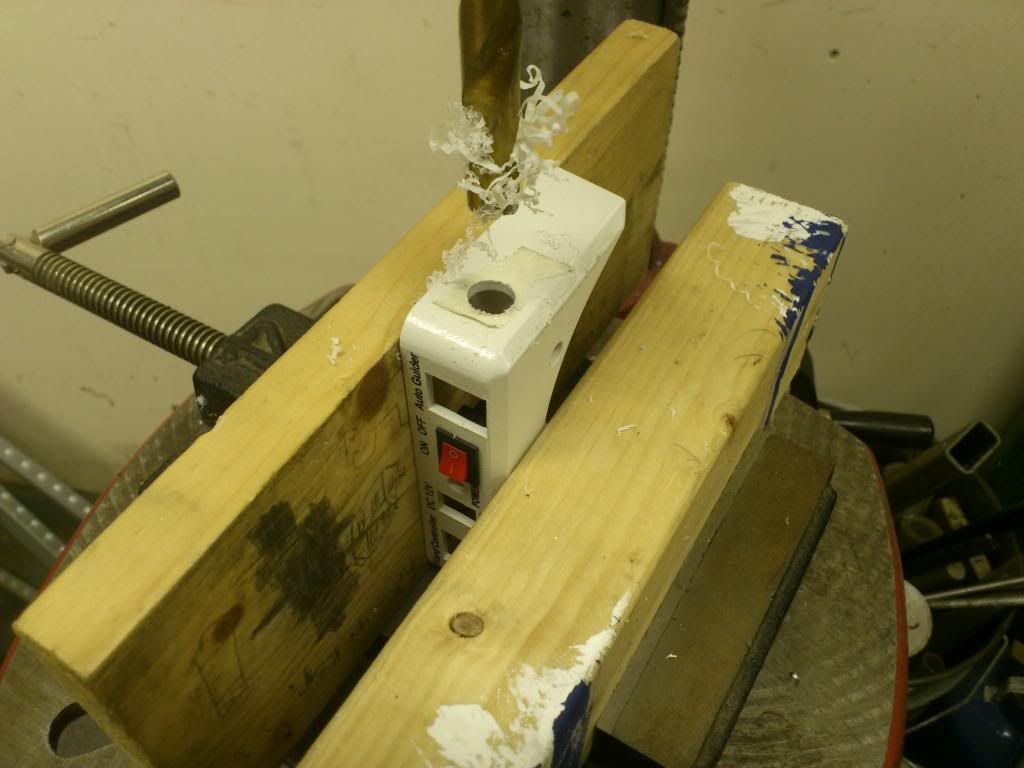
I had to file the key way in with a needle file.
It was a tight fit but it went in, if anyone tries this ensure the nut sits below the pillar for the circuit board, note the pencil line. You could remove the internal rib to give more room, but the nut just about drops in behind the pillar.

I routed the wires under the switch wires and kinked them over to miss the guide socket.
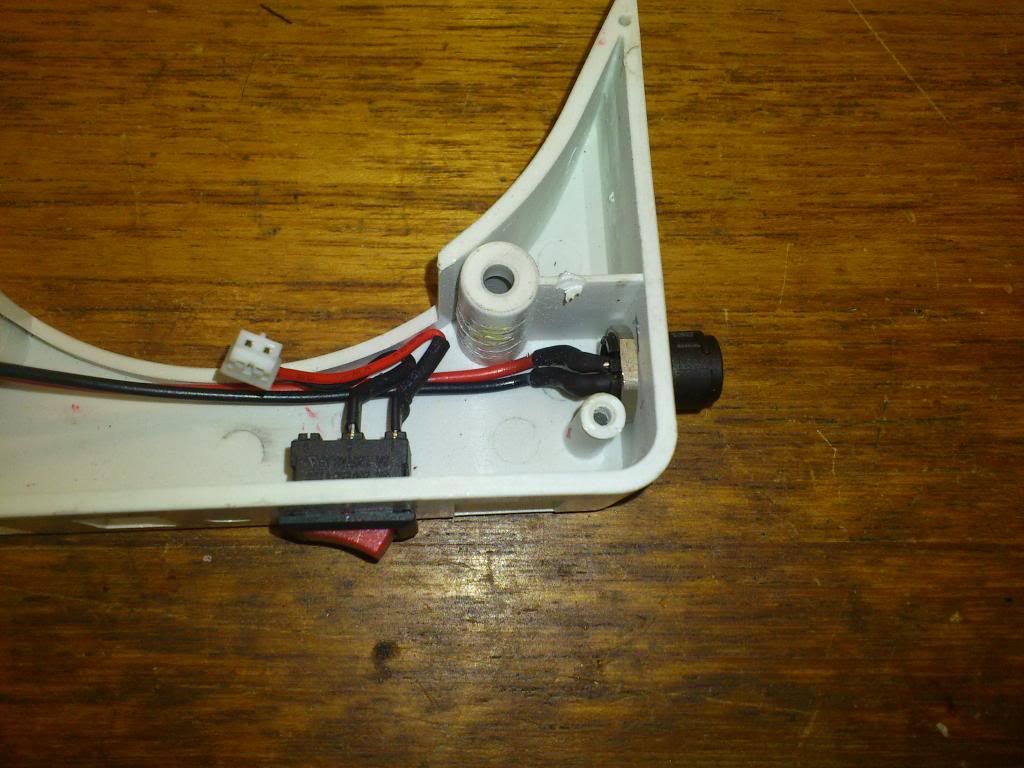
Then refitted the board and soldered the wires to the back of the original power socket.
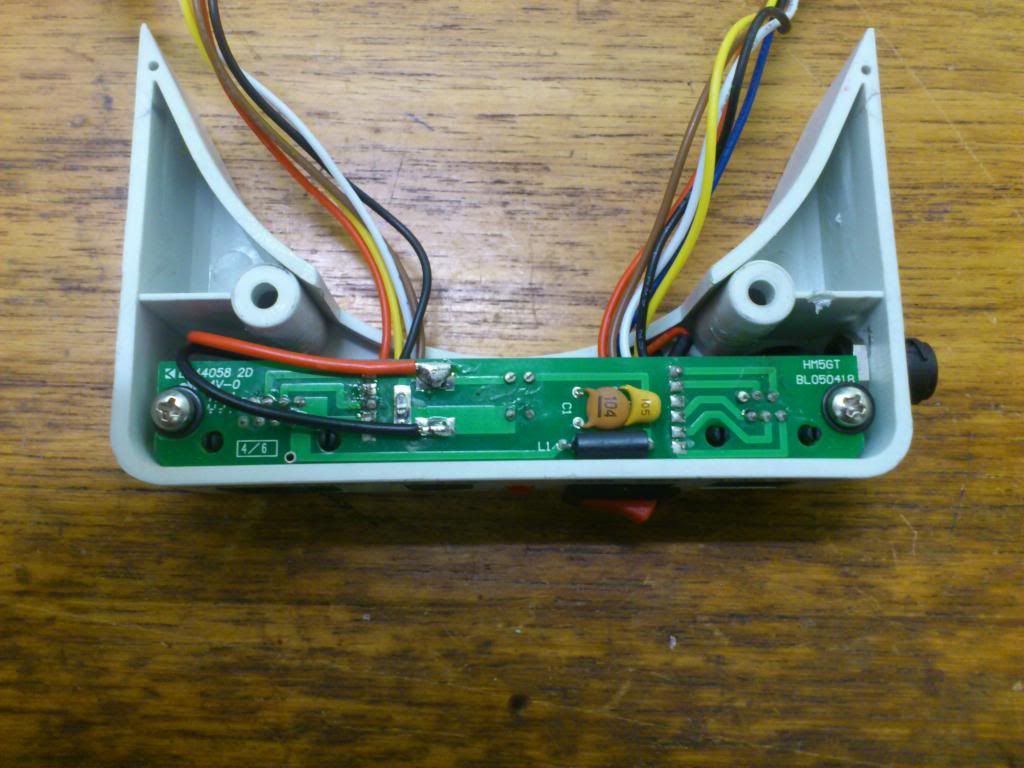
I then covered the soldered ends with hot glue to insulate them and refitted the panel to the mount.
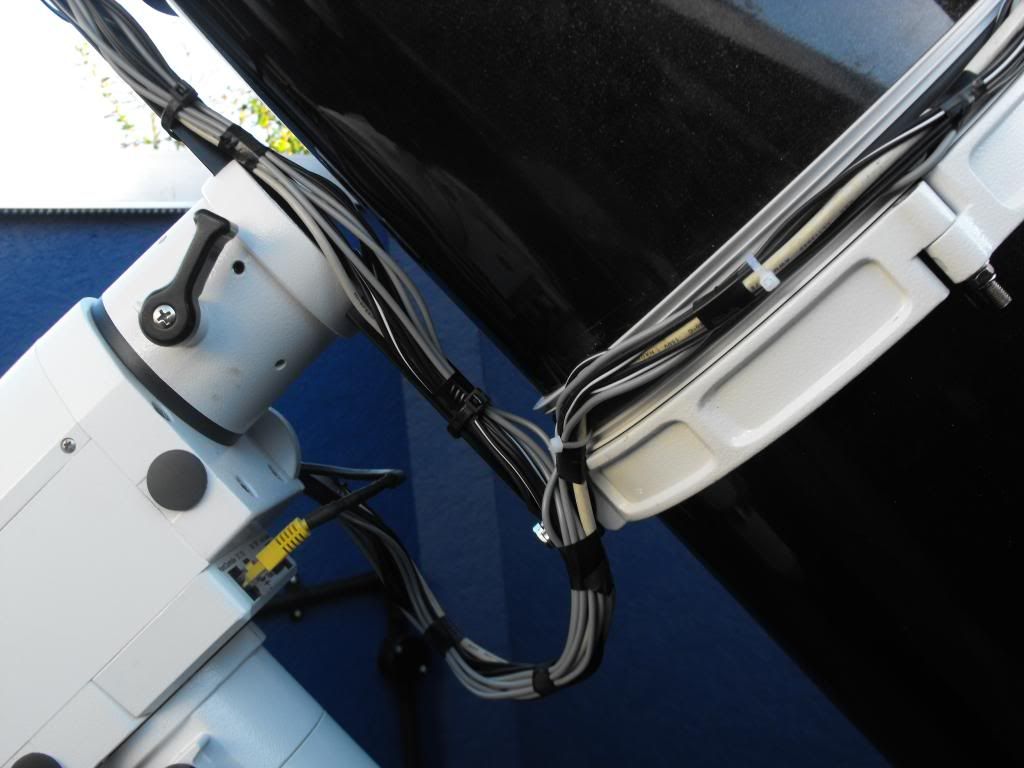
This is the plug and cable ready for fitting shown with the original skywatcher cable, the wire is double insulated so quite thick it was a tight fit but it went in with some persuasion.
A couple of pics of it in place.
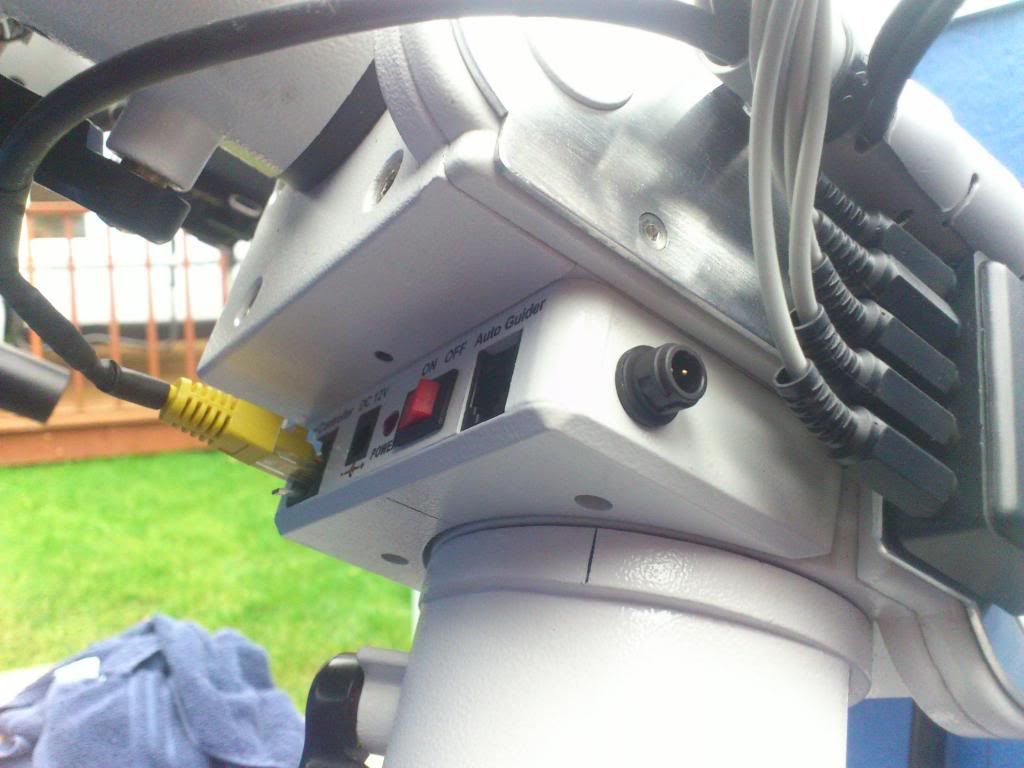
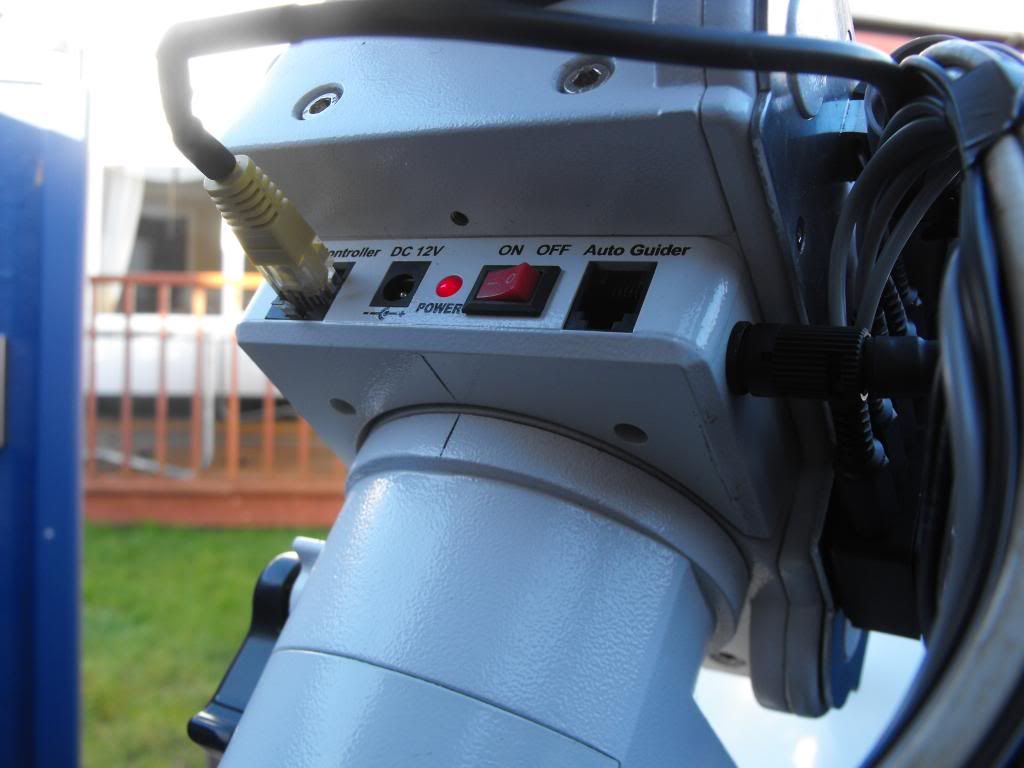
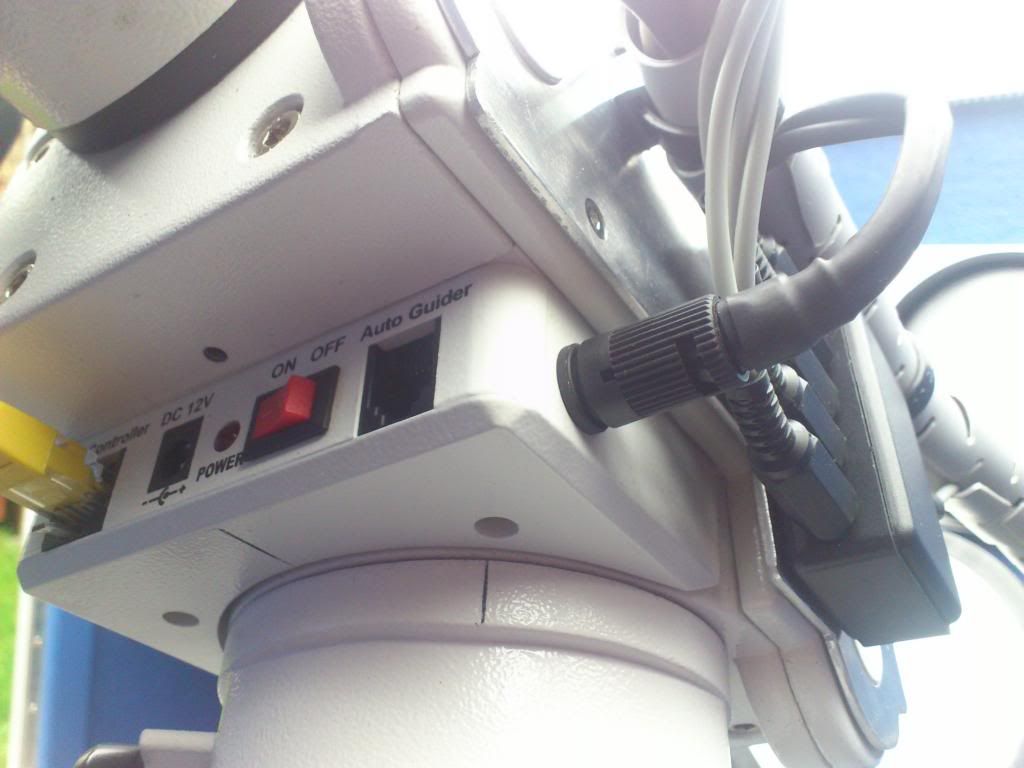
I then spent some time tidying up all the wiring.
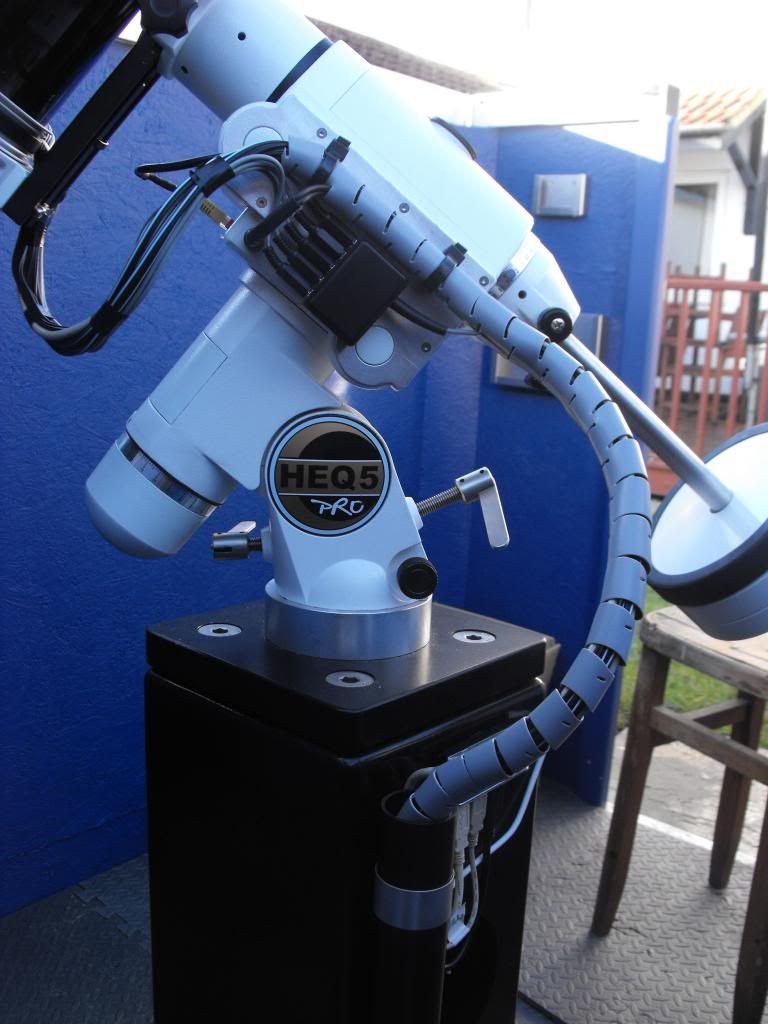
The black box is for the temperature sensors for my automated dew heaters that I have just put together, but that is in another thread.
I have only had the one opportunity to use it in anger and everything worked a treat, and no more flashing LED

The connector and socket are both small but have a nice positive locking action and there is no way they can be knocked out, the cable is also very supple and of good quality, the only down side is the £20 min order +VAT from Farnell, when the cable is only £7.21 + VAT. I spent a fair amount of time on Farnells site trying to find suitable connectors to make up the order but I could not find anything!
Anyway hopefully this will be of use to someone.
Jason.
-
6
-
-
I have a lx modded spc900 using a HEF4066b as show here,
I am having a nightmare with windows 7 and the serial to usb, would this part be compatible? I amd using a FTDI cable as you have shown for EQmod and this is ok with windows 7.
This could solve my problem.
Thanks
Jason.


Advice on choosing the right mounting plate for a distribution box
in DIY Astronomer
Posted
You could 3D print two spacers that are the same width as your rings, both with a flat top to mount your box to and with a radius profile on the bottom to match the outside of the rings. Then just bolt through the box through the spacers into the top of the rings.
Jason.