Ali Alhawas
-
Posts
19 -
Joined
-
Last visited
Content Type
Profiles
Forums
Gallery
Events
Blogs
Posts posted by Ali Alhawas
-
-
On 29/04/2022 at 19:11, Steve143 said:
Hi,
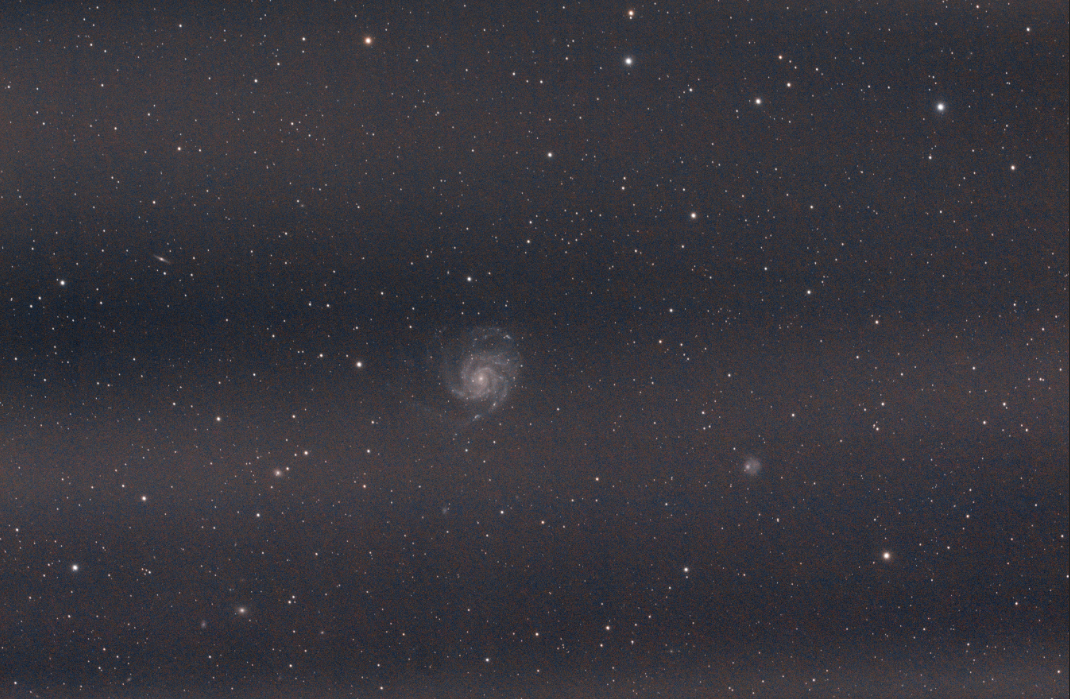
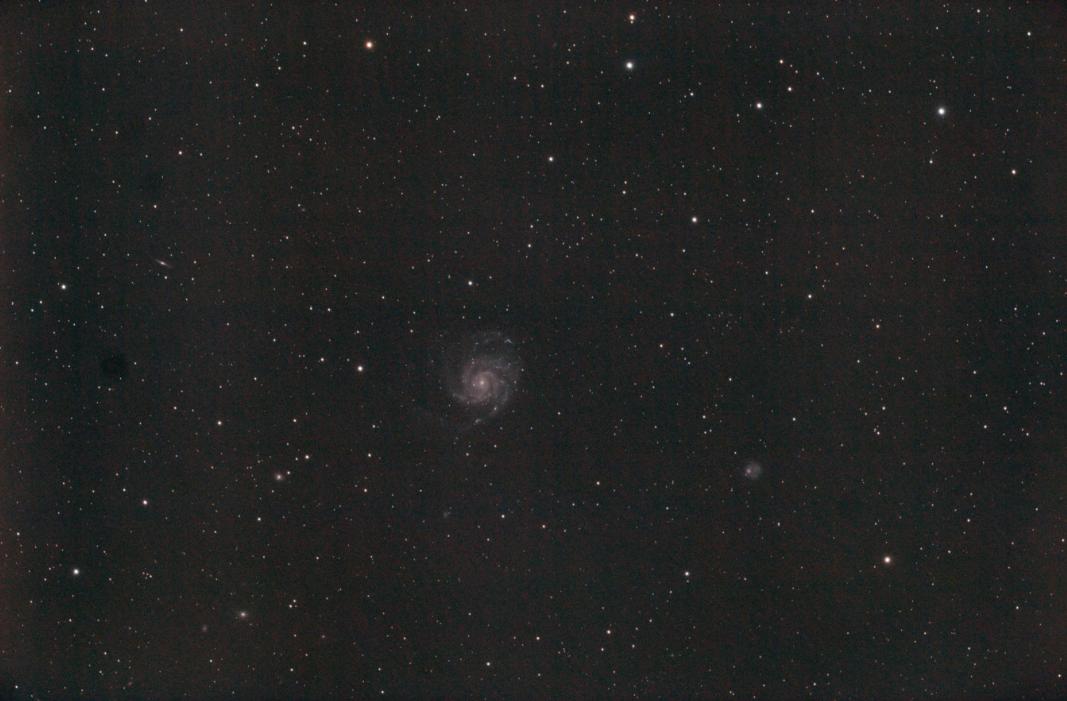
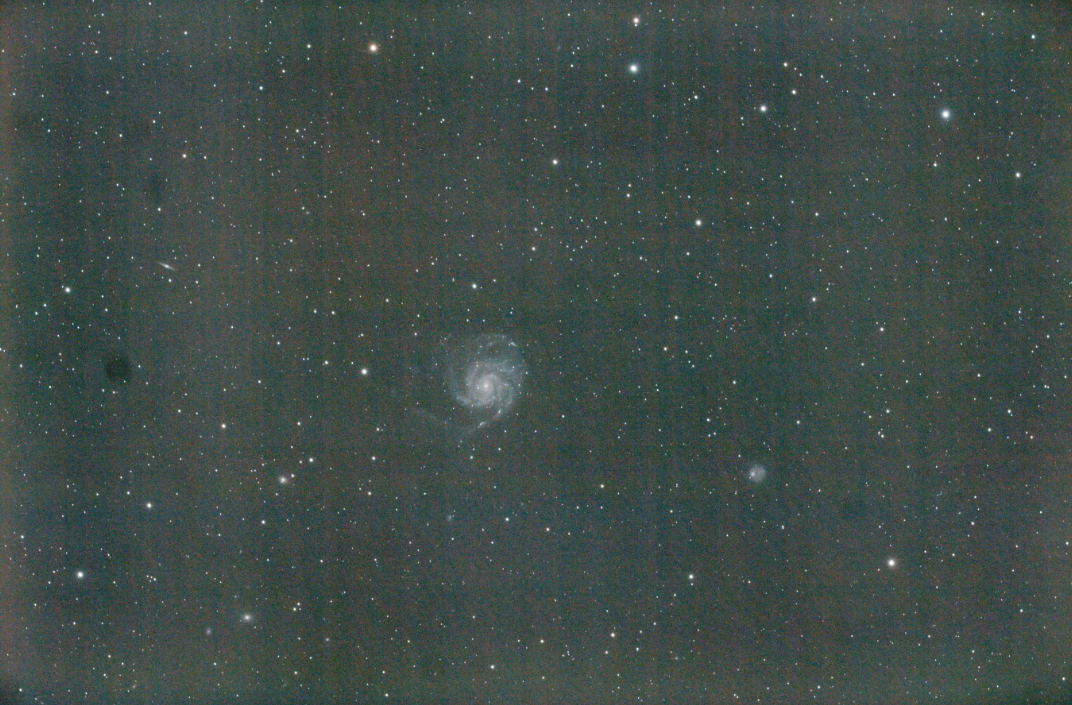
Can anyone help with the images below? They have been created using 120x 60 sec exposures and stacked using flats and biases together (see 1), biases only (2) and no calibrations frames at all (3). They were all taken with a Canon EOS 70D at ISO800 using a 80ED-R fitted with an Optolong-Pro filter (unguided and no dithering). The stacked images were then processed using the same simple workflow in Siril.
Each image has a cross-hatch pattern, especially in red and green, which is less noticeable in the stack with both flats and biases but this stack then has horizontal bands of light and dark - how can I get rid of this?
In DSS I used the Intersection mode to stack and selected the detect and clean both remaining hot and cold pixels under the post calibration cosmetic settings.
Is this caused by my camera or is it a stacking issue - or do I just need more integration time to reduce the noise? This is 2 hours of integration time.
Thanks for any suggestions or advice.
1. Flats and bias used.
2. Bias only.
3. No calibration files used.
Hello ,
Is it a cooled camera ?
What was the ambient temperature ?
-
Hi,
Finally .. I could get the idea of these 3 grub screws (as I tested)
They affected the Dec. rotation to go smoother when the clutch is disengaged ..
At least this is what I found after many trials ..
You start with untighten the 3 screws and move the Dec. head while the clutch is disengaged:
1-If you feel its smooth and you happy with it.. just tight the 3 screws a little .. not too much ( tow fingers tight is enough )
2- If you feel stiffness .. stop the rotation in a position that you feel the highest stiffness is occurred and try to tight ONE screw only and check. If its smoother just tighten the others two.
If stiffness still untightens the screw and try other one till you find the affected one.
Now this is what works with my mount and may not works with others. I am just sharing in case someone struggled to solve this bad stiffness.
BR,
Ali
-
On 15/02/2022 at 00:38, Starflyer said:
Your welcome Ali, let us know how you get on with the rebuild.
Hello,
Long time due to parts delay..
Anyway.. rebuild is finished but not yet tested under sky..
Dec. stiffness gone..
I filed about 0.1mm from the case to get total shim required about 0.2mm.
rebuilding was smooth and straightforward.
Just waiting for guiding graph certificate

Thanks all for your great support.
BR,
Ali
-
 1
1
-
-
Hi,
I am changing all bearings of the atlas eq-g mount now, just I noticed something weird :
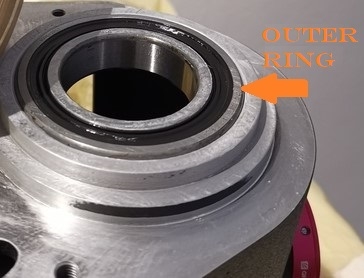
The outer ring of the bearing is moving slowly when I tested while it inside the casing, see picture.
I get back to the old one.. Its the same..
Also I did some web search .. Conflict opinions .. some say leave it its normal, It will fixed by loading other parts.. some say It is not normal and you have to solve it ,they suggested the followings :
1- Make some small notches in the casing so fraction is made and the bearing well not move , or
2- Add some Loctite glue to make it fit.
What do you suggest ?
Any reply well be appreciated.
Thanks
Ali
-
16 hours ago, Starflyer said:
Is that bearing all the way in, it looks high in the casting to me? Maybe a tiny piece of swarf or other muck underneath it.
They're designed to need some shim, I've stripped and rebuilt a few and I've never seen or heard of one not needing a shim. If it were me I'd pull that bearing out, check underneath it for crud / damage in the journal, if all looks good measure the bearing thickness against the old one.
Thank you for your recommendations.
The bearings is surely all the way in.. maybe I have to measure the old and the new thickness.
All area under/around the bearings is clean and clear, I will recheck again anyway.
"They're designed to need some shim, I've stripped and rebuilt a few and I've never seen or heard of one not needing a shim" --> this made me happy and waiting for any one to confirm, and you did !

Mount parts are on the table now cleaned and greased and 12 New bearings are ready to installed .. . I am just waiting for the shims to receive in about 4-5 days.
Many thanks for your time and support.
BR,
Ali
-
 1
1
-
-
20 hours ago, Same old newbie alert said:
All it means is the worm and the ring gear won't be perfectly aligned
In that link you sent me the figure was in a negative figure, but still put a 0.1 shim in there
I think I have some teflon sheet somewhere, if I find it are you in the UK?
Oh, thanks for your kindness ..
I am in Saudi Arabia and have the same shims as you..
Actually the measurements gave 0.1mm shim So, I will put the smallest shim I have which is 0.25mm and see how it goes.
BR,
Ali
-
17 minutes ago, Same old newbie alert said:
What thickness washer/shim was in there originally, bet it was way bigger than 0.10 and made of plastic
Yep.. It was 0.5mm 🤪 and made things harder..
Hope the 0.1mm shim will work perfectly.
-
17 hours ago, Dr_Ju_ju said:
Look for a "shim washer" stainless steel, teflon, nylon etc. (I personally use stainless) measuring the inside diameter and outside diameter... standard ones can be found as thin as 0.1 mm ...
Thanks..
So, you agreed that I have to put a shim in there.. even with "no shims required" as calculations results ?!
-
17 hours ago, Same old newbie alert said:
Use the thinnest teflon washer you can find
What's the calculation, not familiar with astrobabys recommendations
I will .. but afraid of worm gears not align perfectly !
Regarding astro-baby .. Here you can find it..
in the " Shim setting/calculations" section you can find how to get your correct size of the shim.
-
Hi,
I am working now on replacing all the mount bearings and lubricate parts.
When I calculate the shims requirements as Astro-Baby recommended, I ended up with:
No shims required in the Dec. axis,, My question is:
Is it normal to place the worm gear on its place without any thing between? See the pictures please.
In addition, when doing this and rotate the worm gear by hand it produces a sound like metal friction.
I think the worm gear edge is contact with the casing itself.
So, what do you do if you face this issue?Mount: Orion Atlas eq-g the same as EQ-6
Bearings: SKF 6008 2RSH in this case.
Thanks
Ali -
On 27/01/2022 at 15:24, discardedastro said:
Assuming this is similar to the EQ6-R...
The grub screw under that cover shouldn't need to be anything more than nipped up - if memory serves it's pressing against the top Dec bearing to make sure that it's under tension/load.
If you undo the top three bolts holding the saddle on you'll be able to see the other side relative to the top Teflon washer and bearing.
If you've got friction in Dec, then I would start at the other end of the axis. It could be the end nut is too tightly tightened or the bearing lubrication isn't in good condition. If it's the end nut, that's a really easy fix and very simple to adjust by releasing the grub screws and backing it off a smidge, then nipping up and securing the grub screws.
Thank you for your nice hints..
Last update :
I followed your recommendation about those 3 grub screws and I only finger tight all in regular basis , then I removed the Dec. tapered bearing and test it by hand , feel a little friction ( small clicks ) despite the lubricant is excellent as I greased it 3 months ago, but I think its damaged by unknown cause , maybe aging (7 years).
Wonder why I didn't test the bearings when I rebuild the mount

Also I removed the Ra. tapered bearing and feel a little friction but less than the Dec. bearing. All other bearings are good.
So , I ordered a new set of bearings for all bearings in the mount, total 12.
Hope this well end the stiffness issue.
BR,,
-
Nice reference and useful details..
Could you take a look at this topic of mine..
Maybe you can help.
I am really stuck !
Thanks
-
So,,
I think these hidden grub screws will remain a secret for ever ..☠️
-
Hello,
I did a good Belt modification to my mount Orion Atlas eq-g as I have a reasonable mechanic background .
Every thing is perfect now.. except a little stiffness in Dec. axis.
I tried every thing like the down tapped bearing tightness, top ring bolt which is under the Dec. head.. still some stiffness ,,
Then I decide to adjust the hidden grub screws under the slotted head screw.
But I cant find the concept behind them or a regular rule to deal with them
One thing I noticed, that they affect the Dec. axis stiffness.. But in what way I can adjust I don't know
I tried to tighten the in sequence by a tiny turns ( Clockwise and Anticlockwise ).. same result.
Any Ideas ?
Thanks
Ali
-
Congrats ! Happy for you 🎉
By the way .. What is your mount model ? age ? 🙃
-
Update..
Solved !

I found the worm gear wheel was touching the mount case , It made a mark on it all around due to friction ..
I file almost 2mm from the case to make more room for the wheel.. put every thing back together and BANG! It works straight and easy..
That friction didn't make any sound nor feeling stiffness to be observed. Also It was very hard to see it by eyes . My only evidence of the friction is to wipe and clean the wheel and see the friction marks on it .
Hope this help others who struggled like me

CS!
-
Maybe a sticky grease ..
Does the Dec. axis move freely when you move it by hand ? Is there any stiffness in a specific part along around 360 degrees?
Did this symptom in Dec. backlash appeared recently ?
How was your balance ?
-
Hello,
I already did a successful Rowan belt modification myself and it works well, smoother sound and way better autoguiding in PH2.
It worked for almost 5 months without any issue.
Last imaging session the Ra stop moving while slewing to a target, and gives a grounding sound, I stopped every thing and power reset the Mount and the PC , start again and slewing via EQMOD , The Dec. is working well
bur the Ra is giving the same issue.
Back to home and I stripping the Ra axis to check..
I found no issue.. every thing is in place and tight.. So I doubt that the belt or the worm engagement have to readjust again and it seems easy to me as I already done that before.
My only problem is when I calculate the shim to determine what thickness do I need it gives 0.35mm and I assumed this is NO SHIM IS NEEDED, but then I couldn't perform the worm engagement correctly I tried thousands times and It was painful.
I ignored the calculations and add only one 0.5mm shim.. same result..
I decided to add 2 shims 0.5mm each.. then I tried to do the worm engagement! It works !!
Notes :
1- I used ASTRO BABY tutorial for mounts maintenance.
2- Calculations were repeated many times .. no math errors.
THE QUESTION IS : better to ignore calculations and stick with what works with you.. BUT I am afraid it fails again after a while
Any recommendations or hints are highly appreciated .
Thanks
Ali.


Is this a problem with my camera or DSS?
in Imaging - Image Processing, Help and Techniques
Posted
How did you decide the sensor temperature? It is not the same as the ambient temperature ! Its getting hotter ..
If the sensor is not cooled you will see a totally bad images.
Did you dither ? it can help a little but not as affected as cooling.
Post one sub. 60sec here to see what a single image looks like..
What happen is, in the beginning of the session the images are acceptable but sensor is getting hotter after some long exposures and the images getting more heat noise ..
cooling must have unless the ambient temperature is around Zero or so.
I hope this helps.
Geoduck !