Jump to content

NLCbanner2024.jpg.2478be509670e60c2d6efd04834b8b47.jpg

conehead

New Members
  • Posts

    2
  • Joined

  • Last visited

Posts posted by conehead

  1. Hi,


    i´d like to share my experience. i did many tests with different canon dslr sensors and it seems that every sensor is a little different with scratching. i didn´t get a real good result. either the sensor was death or had sratches, but no one was useful. so i start to give the polish method a try. What can i say? every sensor i debayered was a fully success. so here is my howto list:

    - remove the sensor and the top glass (heat helps a lot to do this)

    - use "uhu endfest 300" for the bonding wires to protect

    - use some leather rods, meguiars plastx and ethanol (to thin down the plastix) to remove the microlenses and the cfa (takes 30 minutes for rough pollish)

    - q-tip, plastx and ethanol for fine polish the hole sensor

    - ar-coated glass from edmund for top cover

    - ar coated glass with heating wire instead of the shutter cleaning piezo and low pass filter


    Here some pictures (sorry for the bad "screenshots"):


    Picture of a streched flat before i fine polish the sensor extensively:

    4swf-174-d13c.jpg


    Here after 10 minutes fine polish, both picture are streched to max in fitswork:

    4swf-175-49cf.jpg


    Heres the first test, 5 x 600 seconds with 12nm h-alpha filter (without cooling):

    4swf-173-2cc8.jpg


    So after this successfull test i start to build the active cooling with a high quality 2 stage peltier from quick-cool. these peltiers are much more efficient than the cheaper chinese ones. many parts are made out of carbon fiber. there is also an arduino controller for the little display i added inside the flash-head. here´s a picture of the nearly finished camera:

    4swf-178-f8aa.jpg


    and here the display in detail, it shows the sensor temperature, the surrounding temperature, air pressure and the current through the peltier. i get a delta of nearly 30°celsius:


    D=Digital

    a= astronomy

    c= cooled

    m= mono-debayered:


    4swf-17a-5b00.jpg


    markus
    • Like 7
  2. Hi,

    i read the hole thread before i started to debayer a sensor from my 40d. i bough one for a few buck to start with it. i also wan to share my experience with you:

    first i removed the front glas, i heat it up with a heatgun and a small extension to 60°celsius. then i lift up the glas with a scalpel starting at the Corner:

    4swf-x2-a824.jpg

    then a start to scratch of the lenses and the Matrix with a wooden tool:

    4swf-x4-16e6.jpg

    finished removing the Matrix:

    4swf-x5-884d.jpg

    to protect the bonding wires with epoxy i used the 2 component uhu endfest . i take a small drop and let it fallen down to the pit. it is not perfect, but the protection is superb:

    4swf-x6-38ca.jpg

    starting to pollish the ar coating away:

    4swf-x7-abea.jpg

    and here a streched flat without a lens and some paper in front of:

    4swf-x9-00e2.jpg

    and now the Tools i used for it:

    meguiars PlastiX for polish:

    http://www.meguiarsdirect.com/product/4596

    a pice of Wood grindet to a sharp top from a cleaning rod like this:

    http://www.leder-lauber.de/index.php?id=1

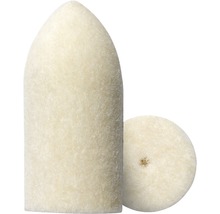
    a dremel felt tip, but i polished without the dremel only by Hand!!!:

    http://www.hornbach.de/data/shop/D04/001/780/493/579/55/DV_220x214_7947100_01_4c_DE_20131204174638.jpg

    markus

    • Like 4
×
×
  • Create New...

Important Information

We have placed cookies on your device to help make this website better. You can adjust your cookie settings, otherwise we'll assume you're okay to continue. By using this site, you agree to our Terms of Use.